blog

Styling your kitchen worktops

Hi there!

Hope you are all enjoying the frosty cold weather?…it puts me into full on faffing mode and the latest place in Rose Cottage to get hit is the kitchen worktops! When I share my kitchen over on Instagram I always get lots of compliments on the styling of it so thought I would share a few tips over here on how I put it all together. The tips are nothing too complicated but they sure are effective…

1. Separate your kitchen into sections

Think about your worktops in smaller more manageable areas, rather than as a whole. Concentrate on one area at a time, make sure your really happy with how you’ve dressed it before moving onto the next.

Think about whether the area will be for practical use or simply decorative; or it could be a mix of both! It’s useful to have certain appliances close to particular cupboards eg mugs near the kettle (especially handy on busy mornings!!). Keep this in mind when choosing what appliances you will need in each worktop section. Also most appliances will need plug sockets so give this consideration too!

2. Start with a blank canvas

I always clear the space I am working on before deciding where anything will go. It helps see the full size of the space and will make it easier to experiment with different accessories.
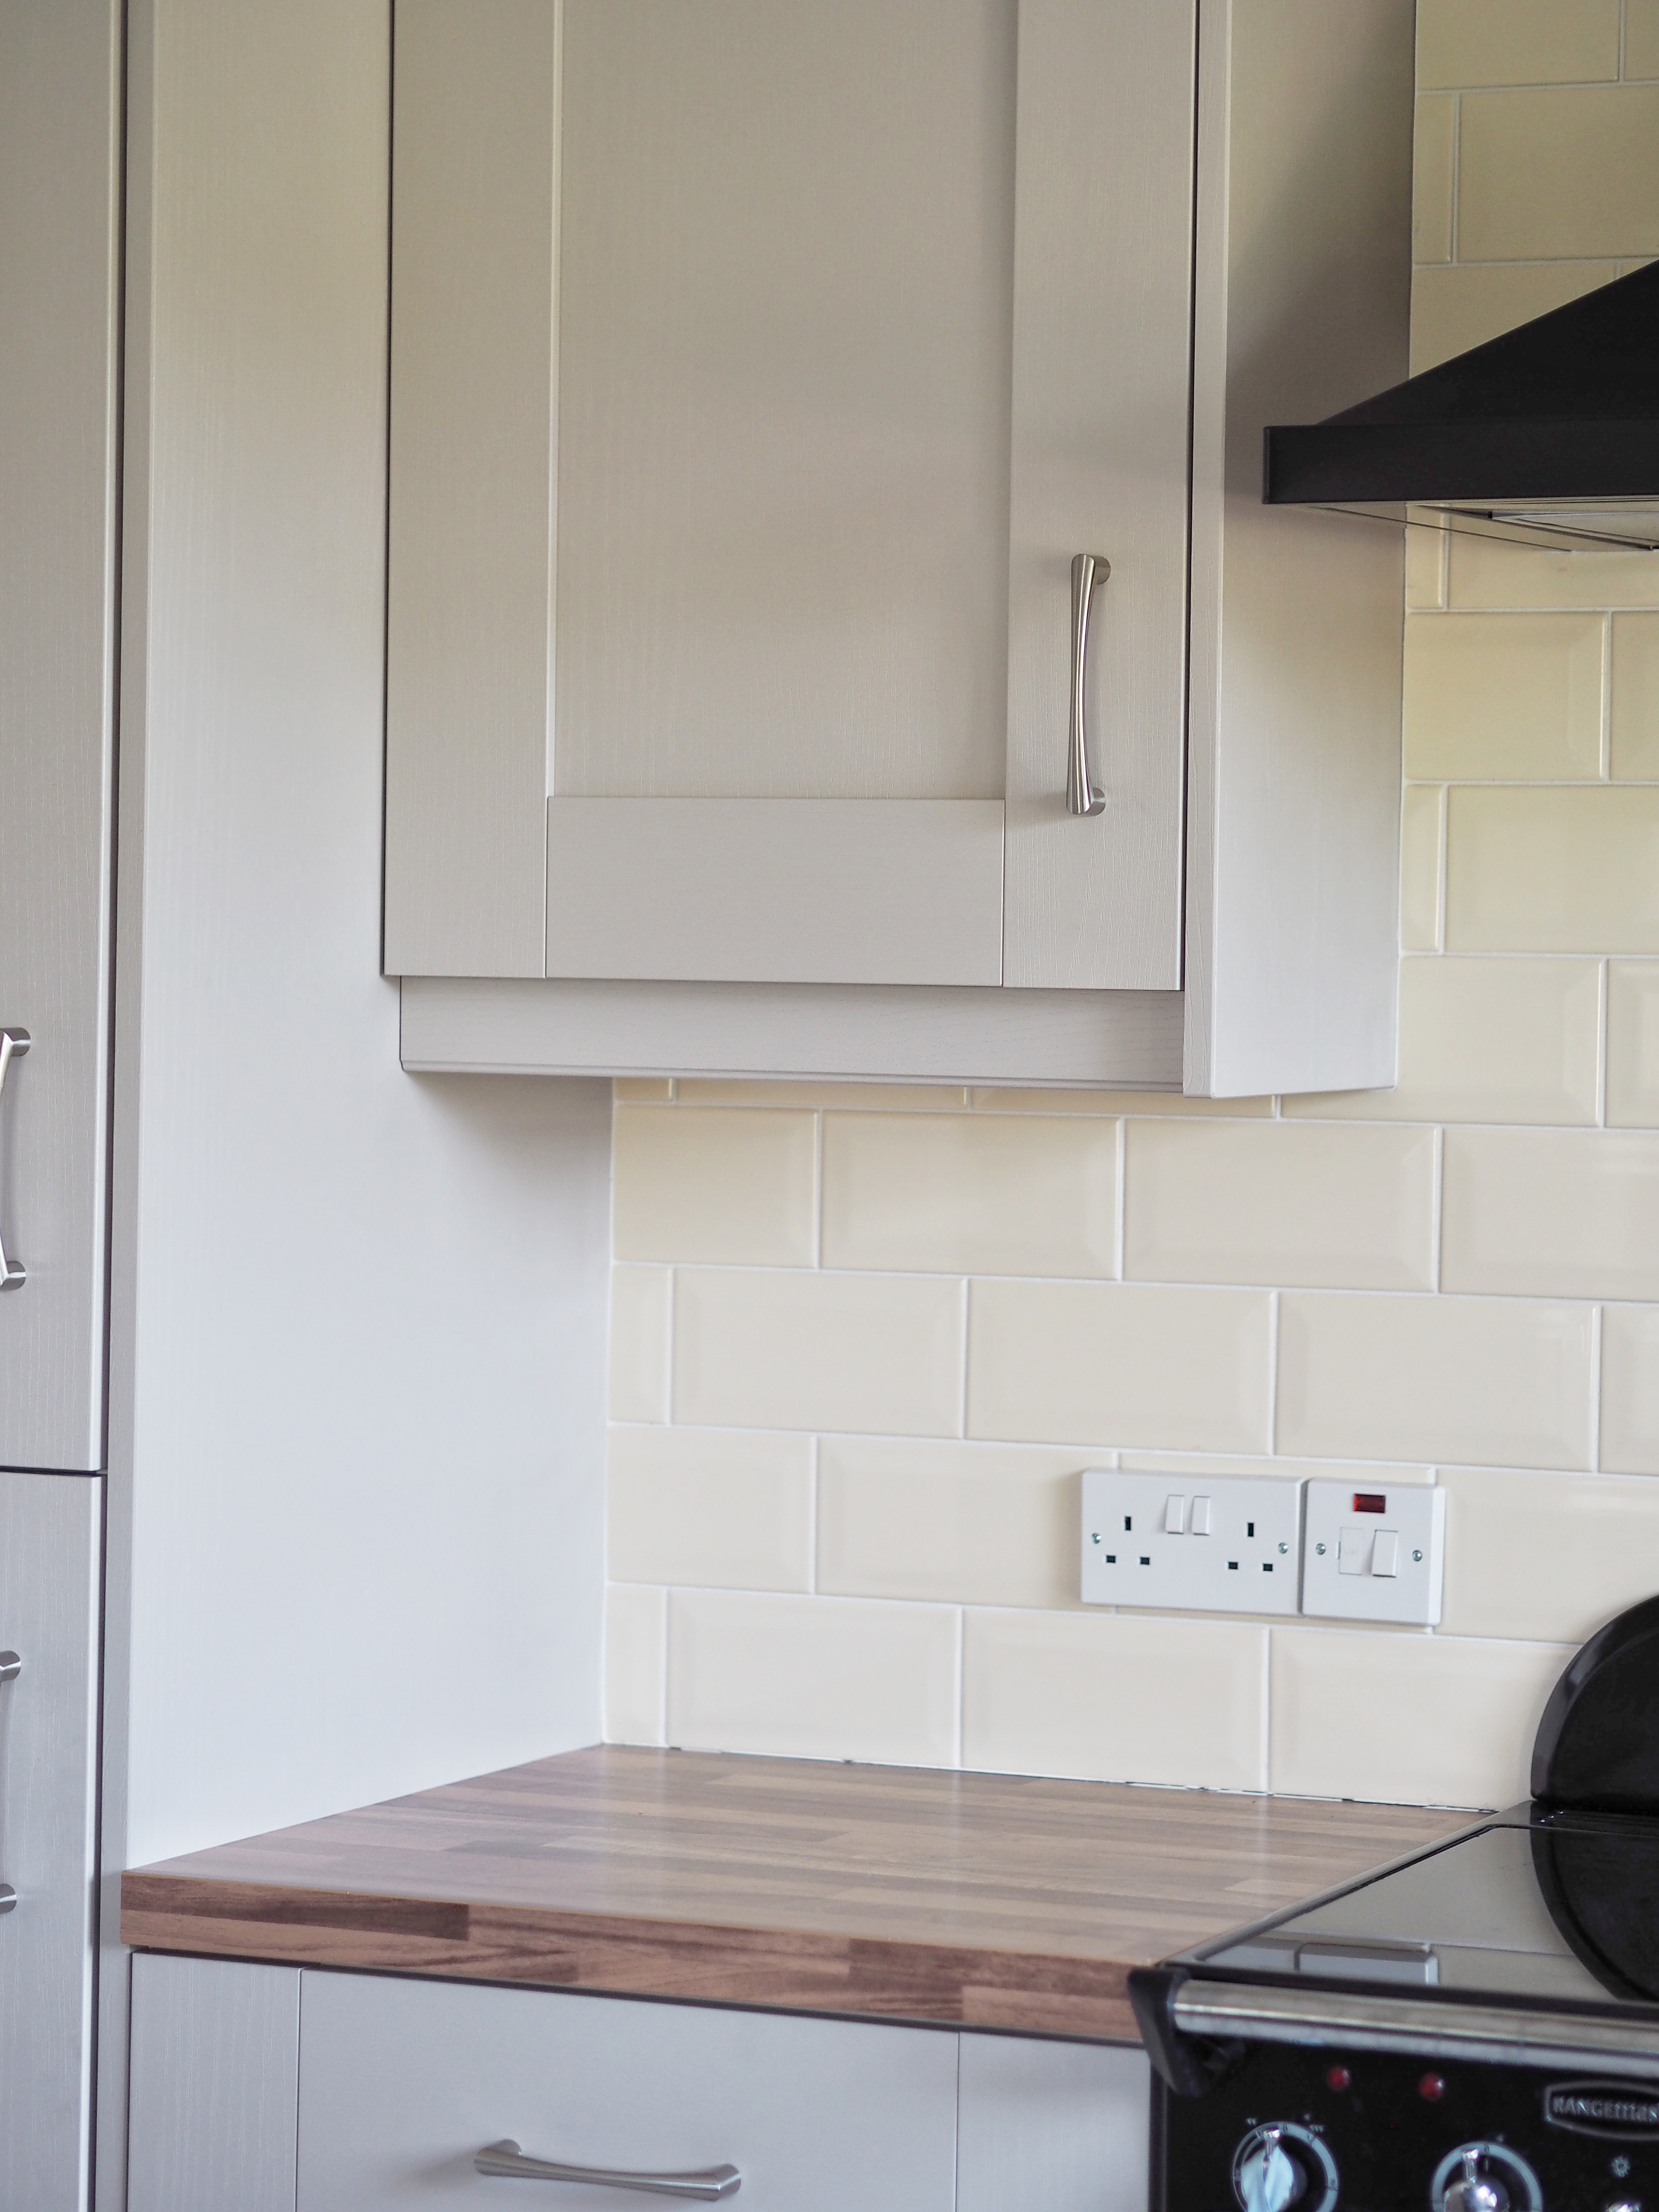
3. Give the area a good clean

Use the opportunity to give the area a good scrub; clean the worktop itself, the wall/ tiles behind and any appliances or accessories you will be using.
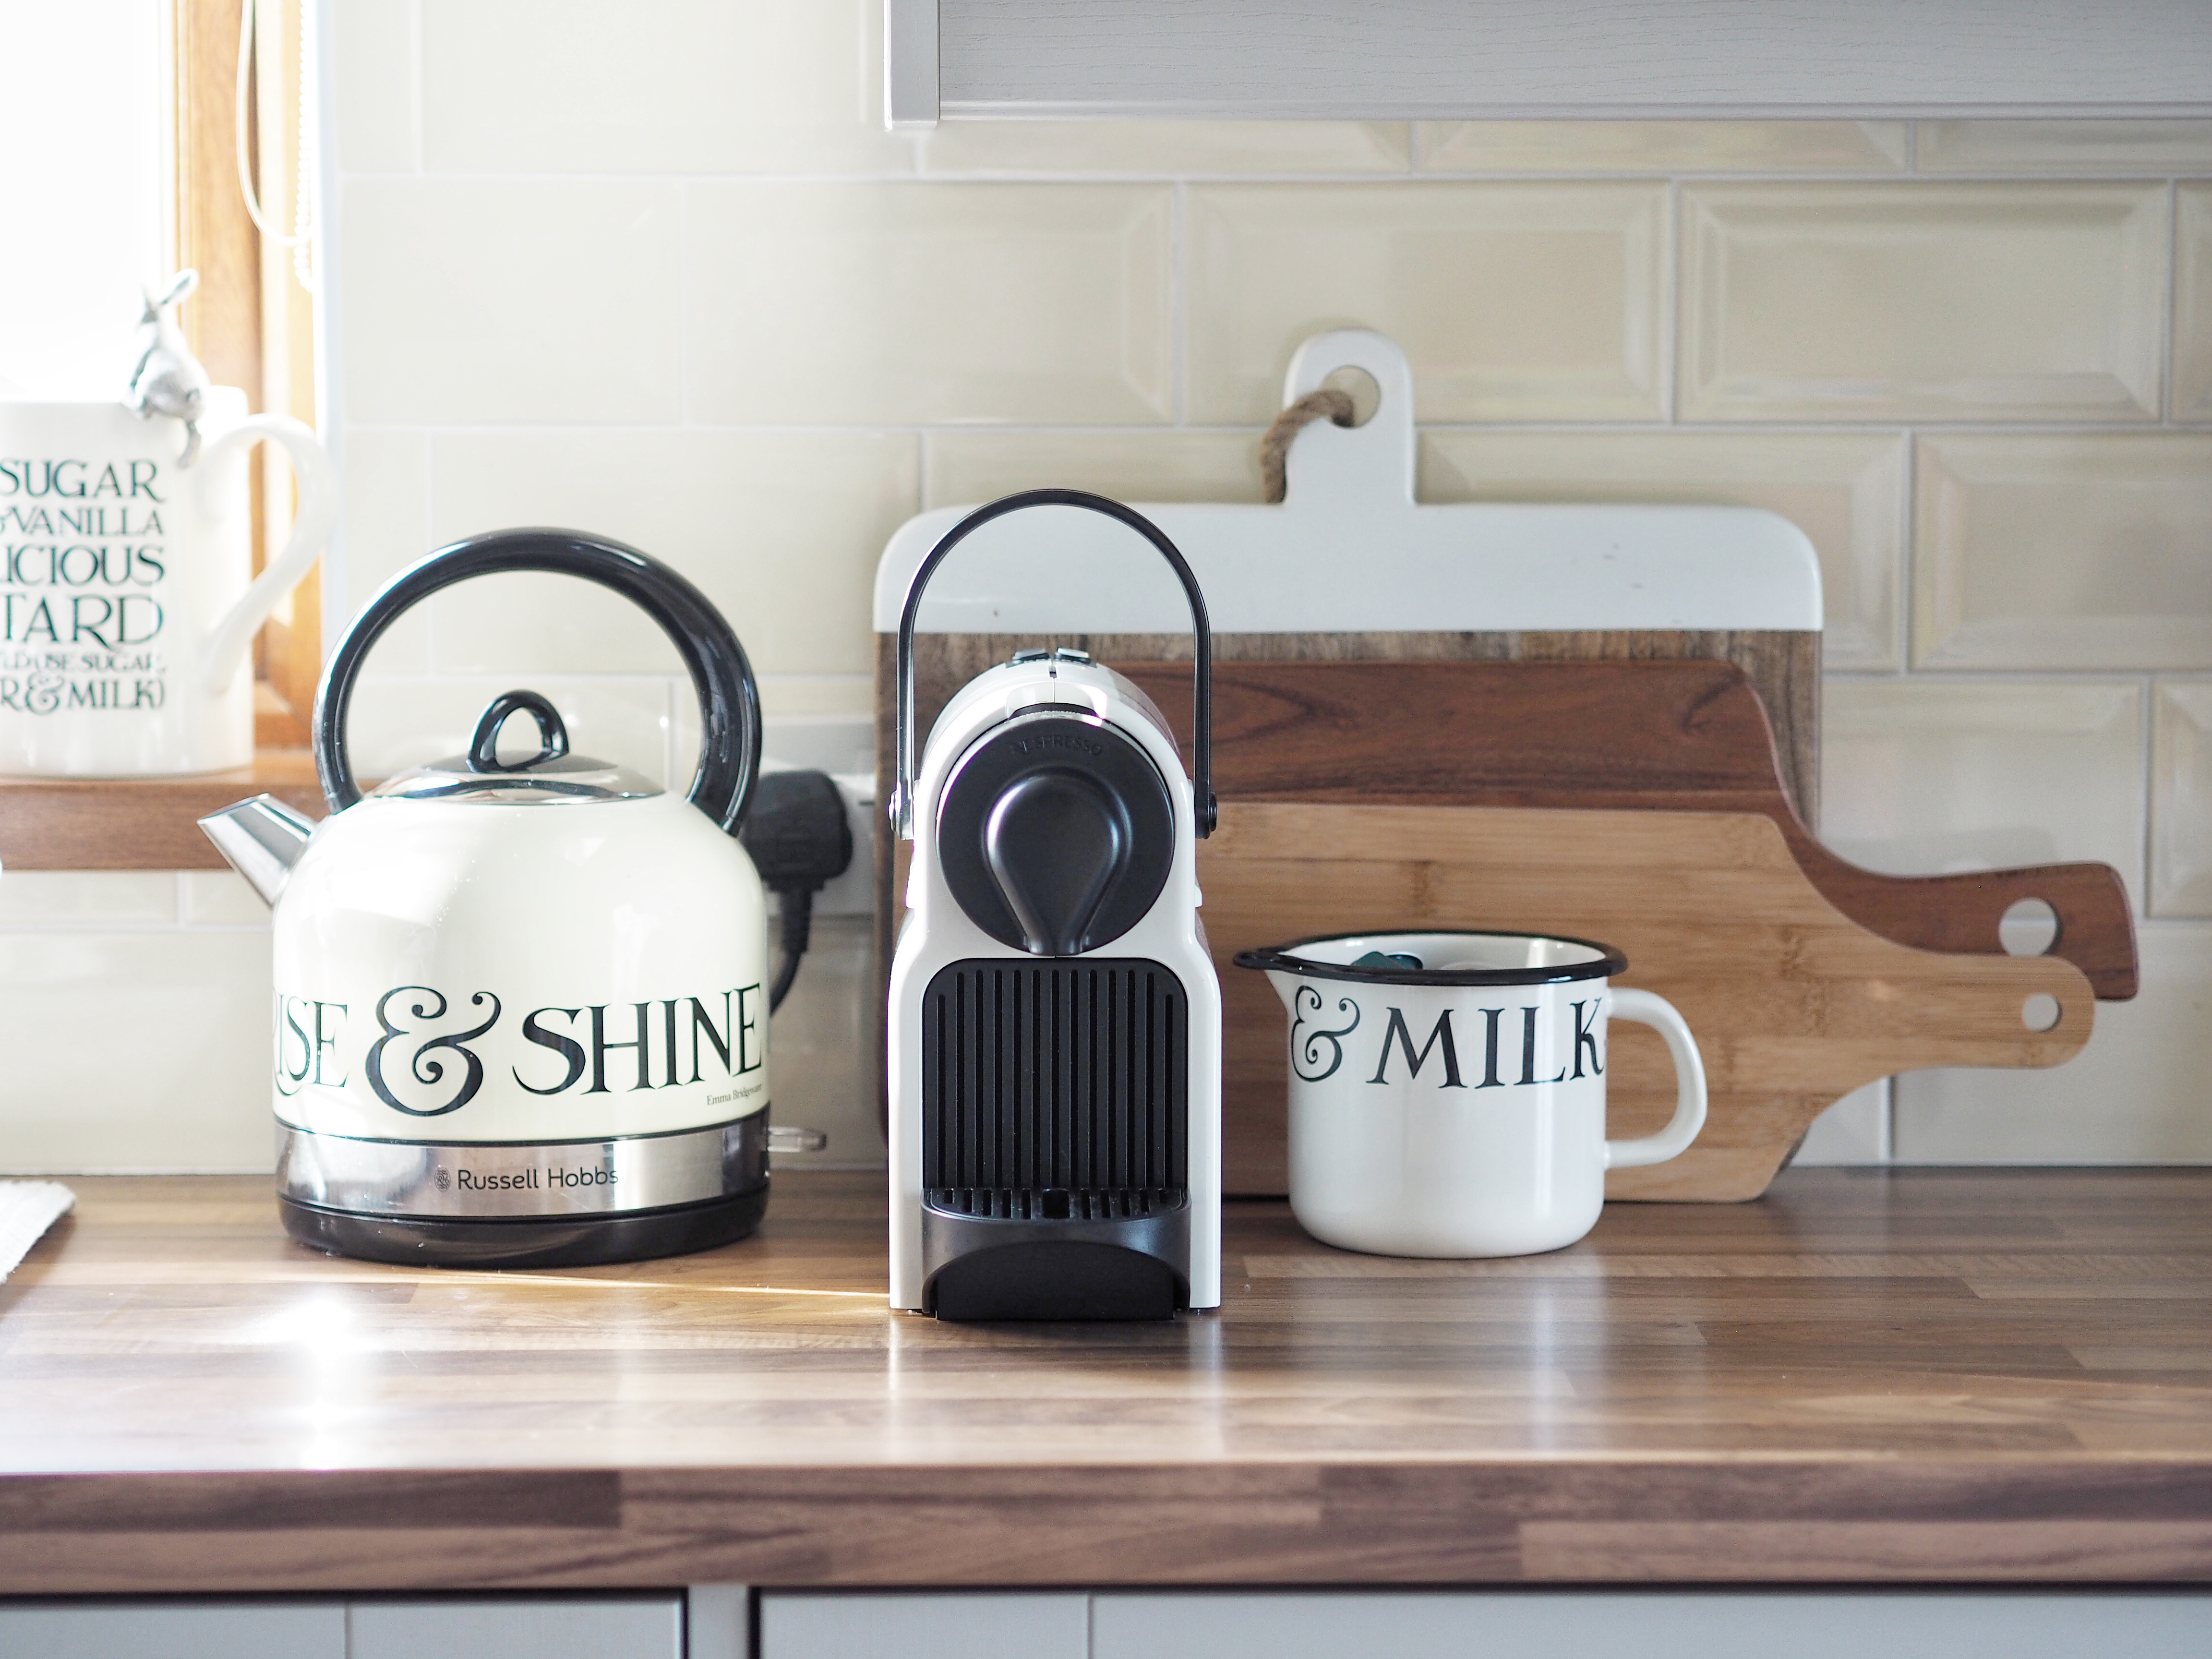
4. Think about things you might want to hide

I am not a fan of seeing plug sockets in my kitchen so often use chopping boards, platter plates and framed prints to hide them where i can. I also hide the plugs and leads of appliances using the same techniques.

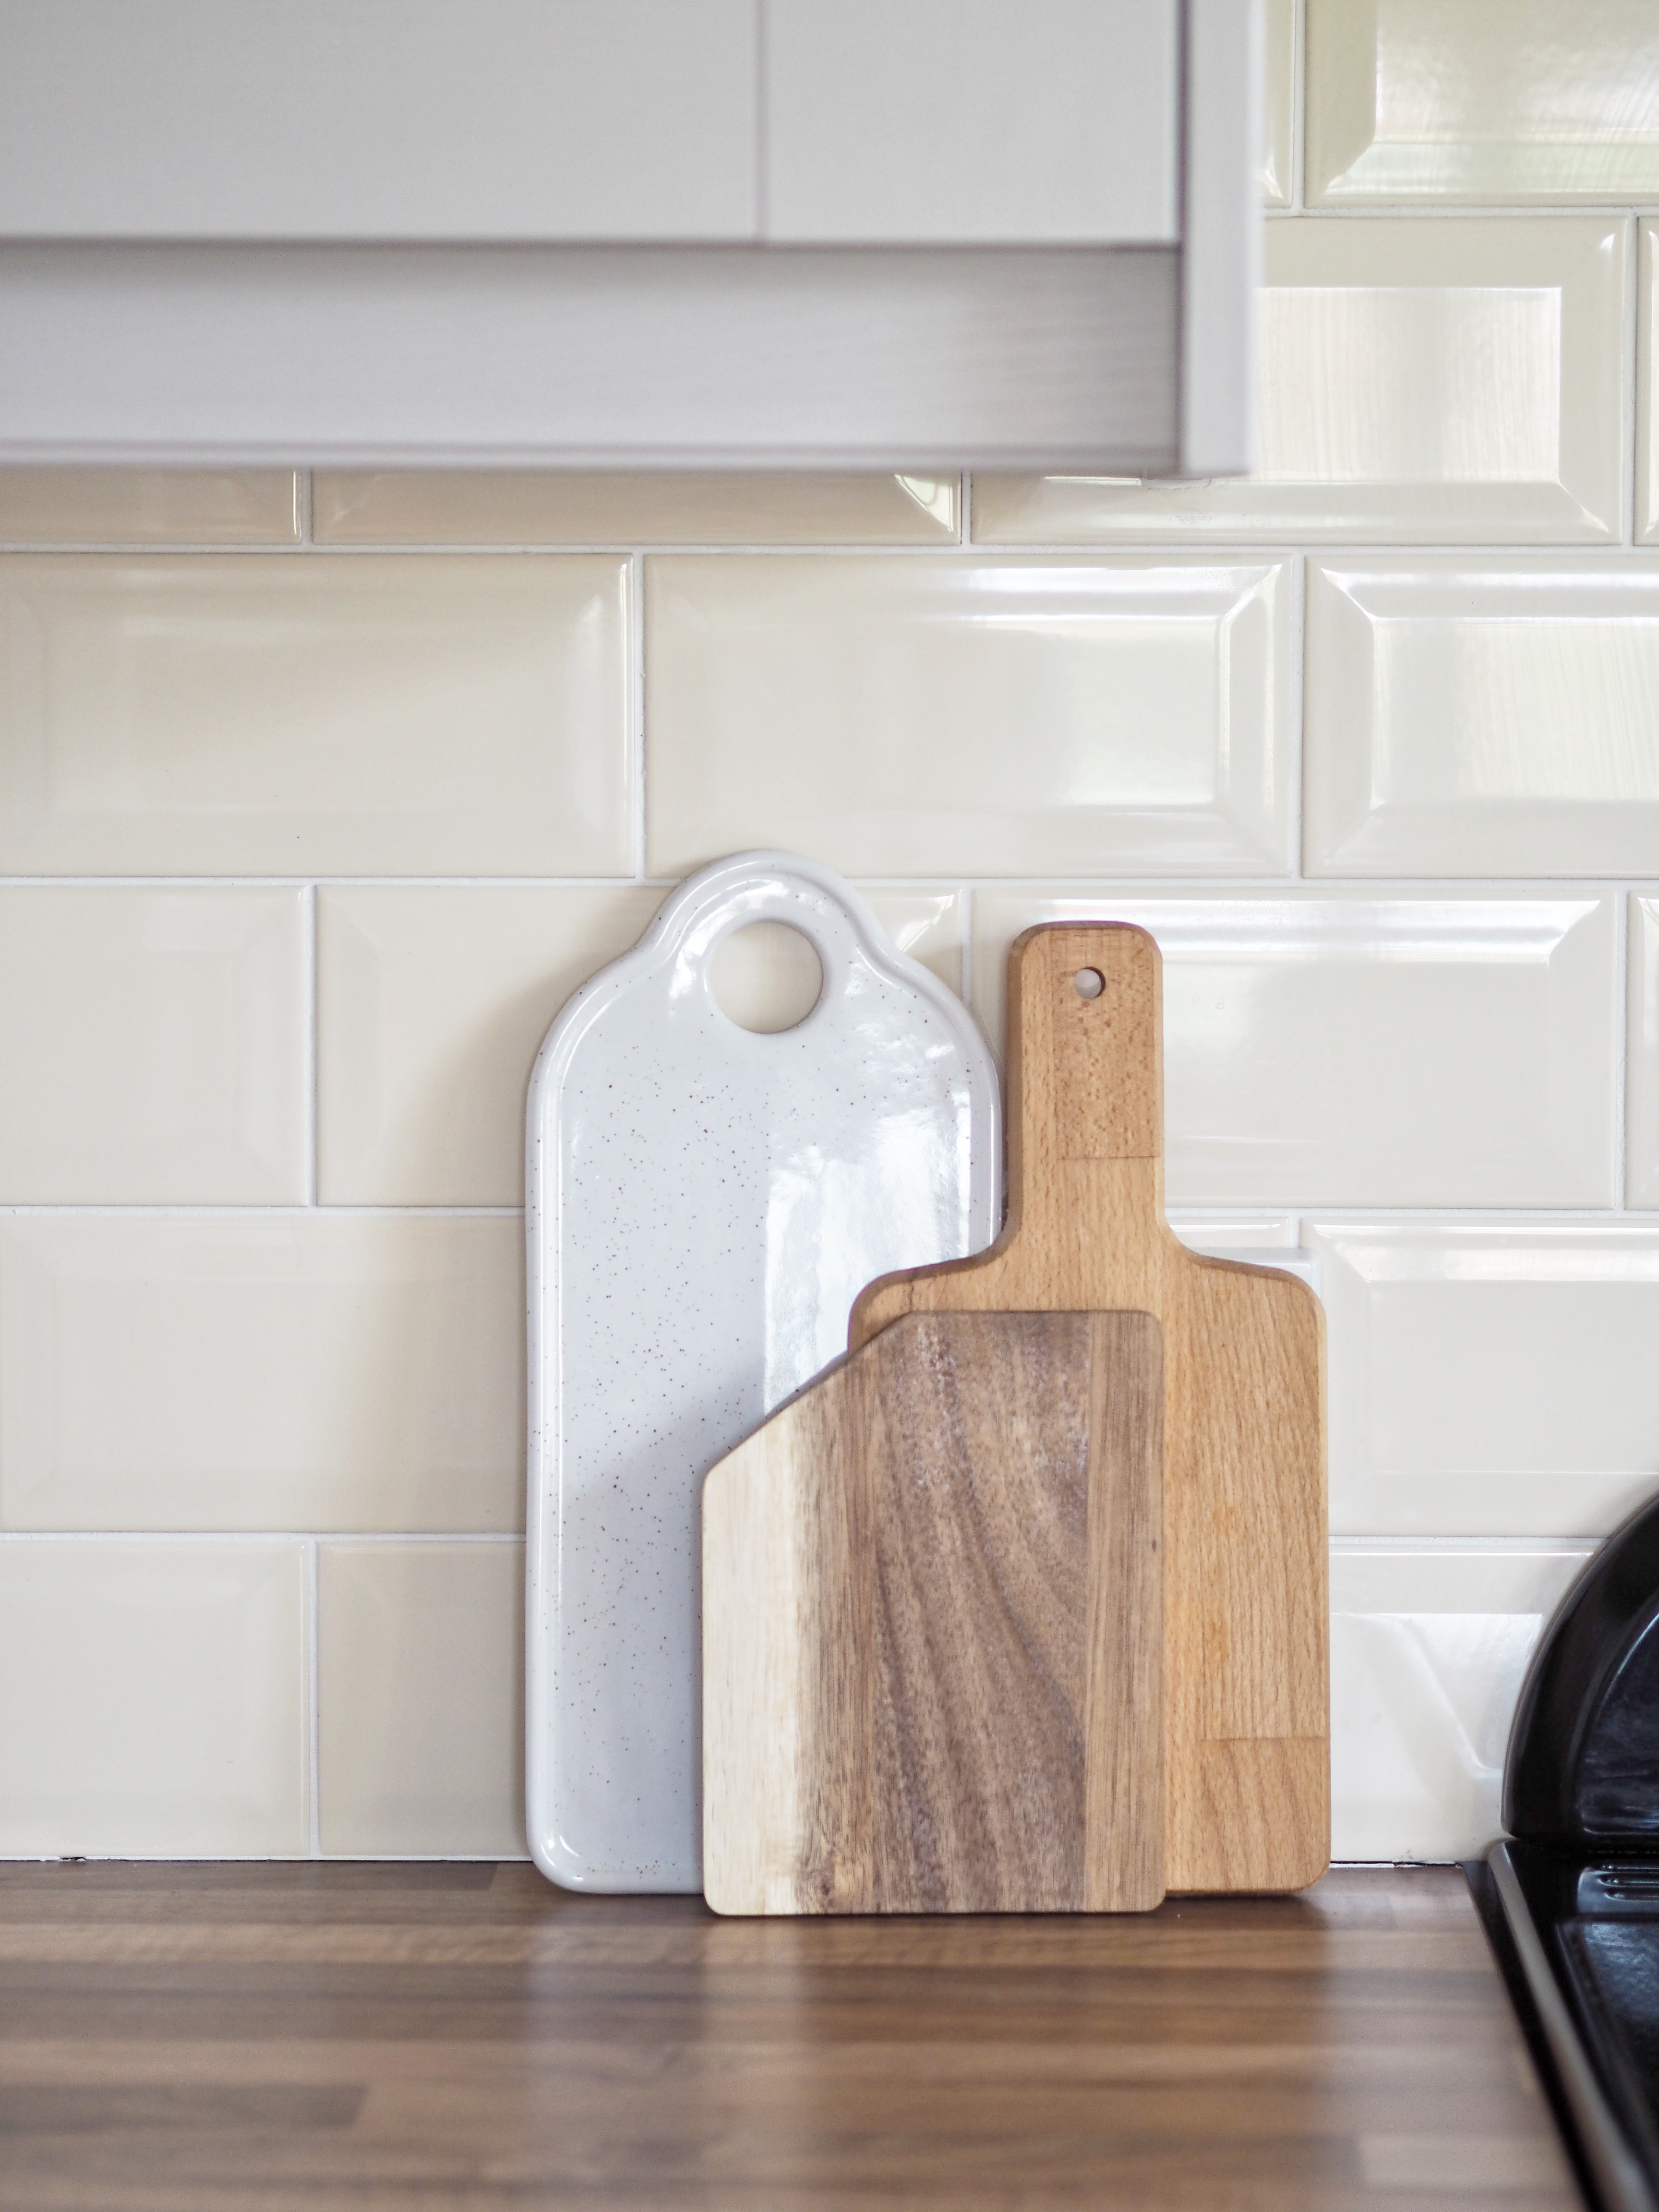
5. Add height, colour and texture

Setting appliances and accessories on top of chopping boards can help create a feature and add height.

Adding hooks from the cupboards above is a great way to incorporate accessories without taking up counter space.

6. Accessorise, accessorise and accessorise!

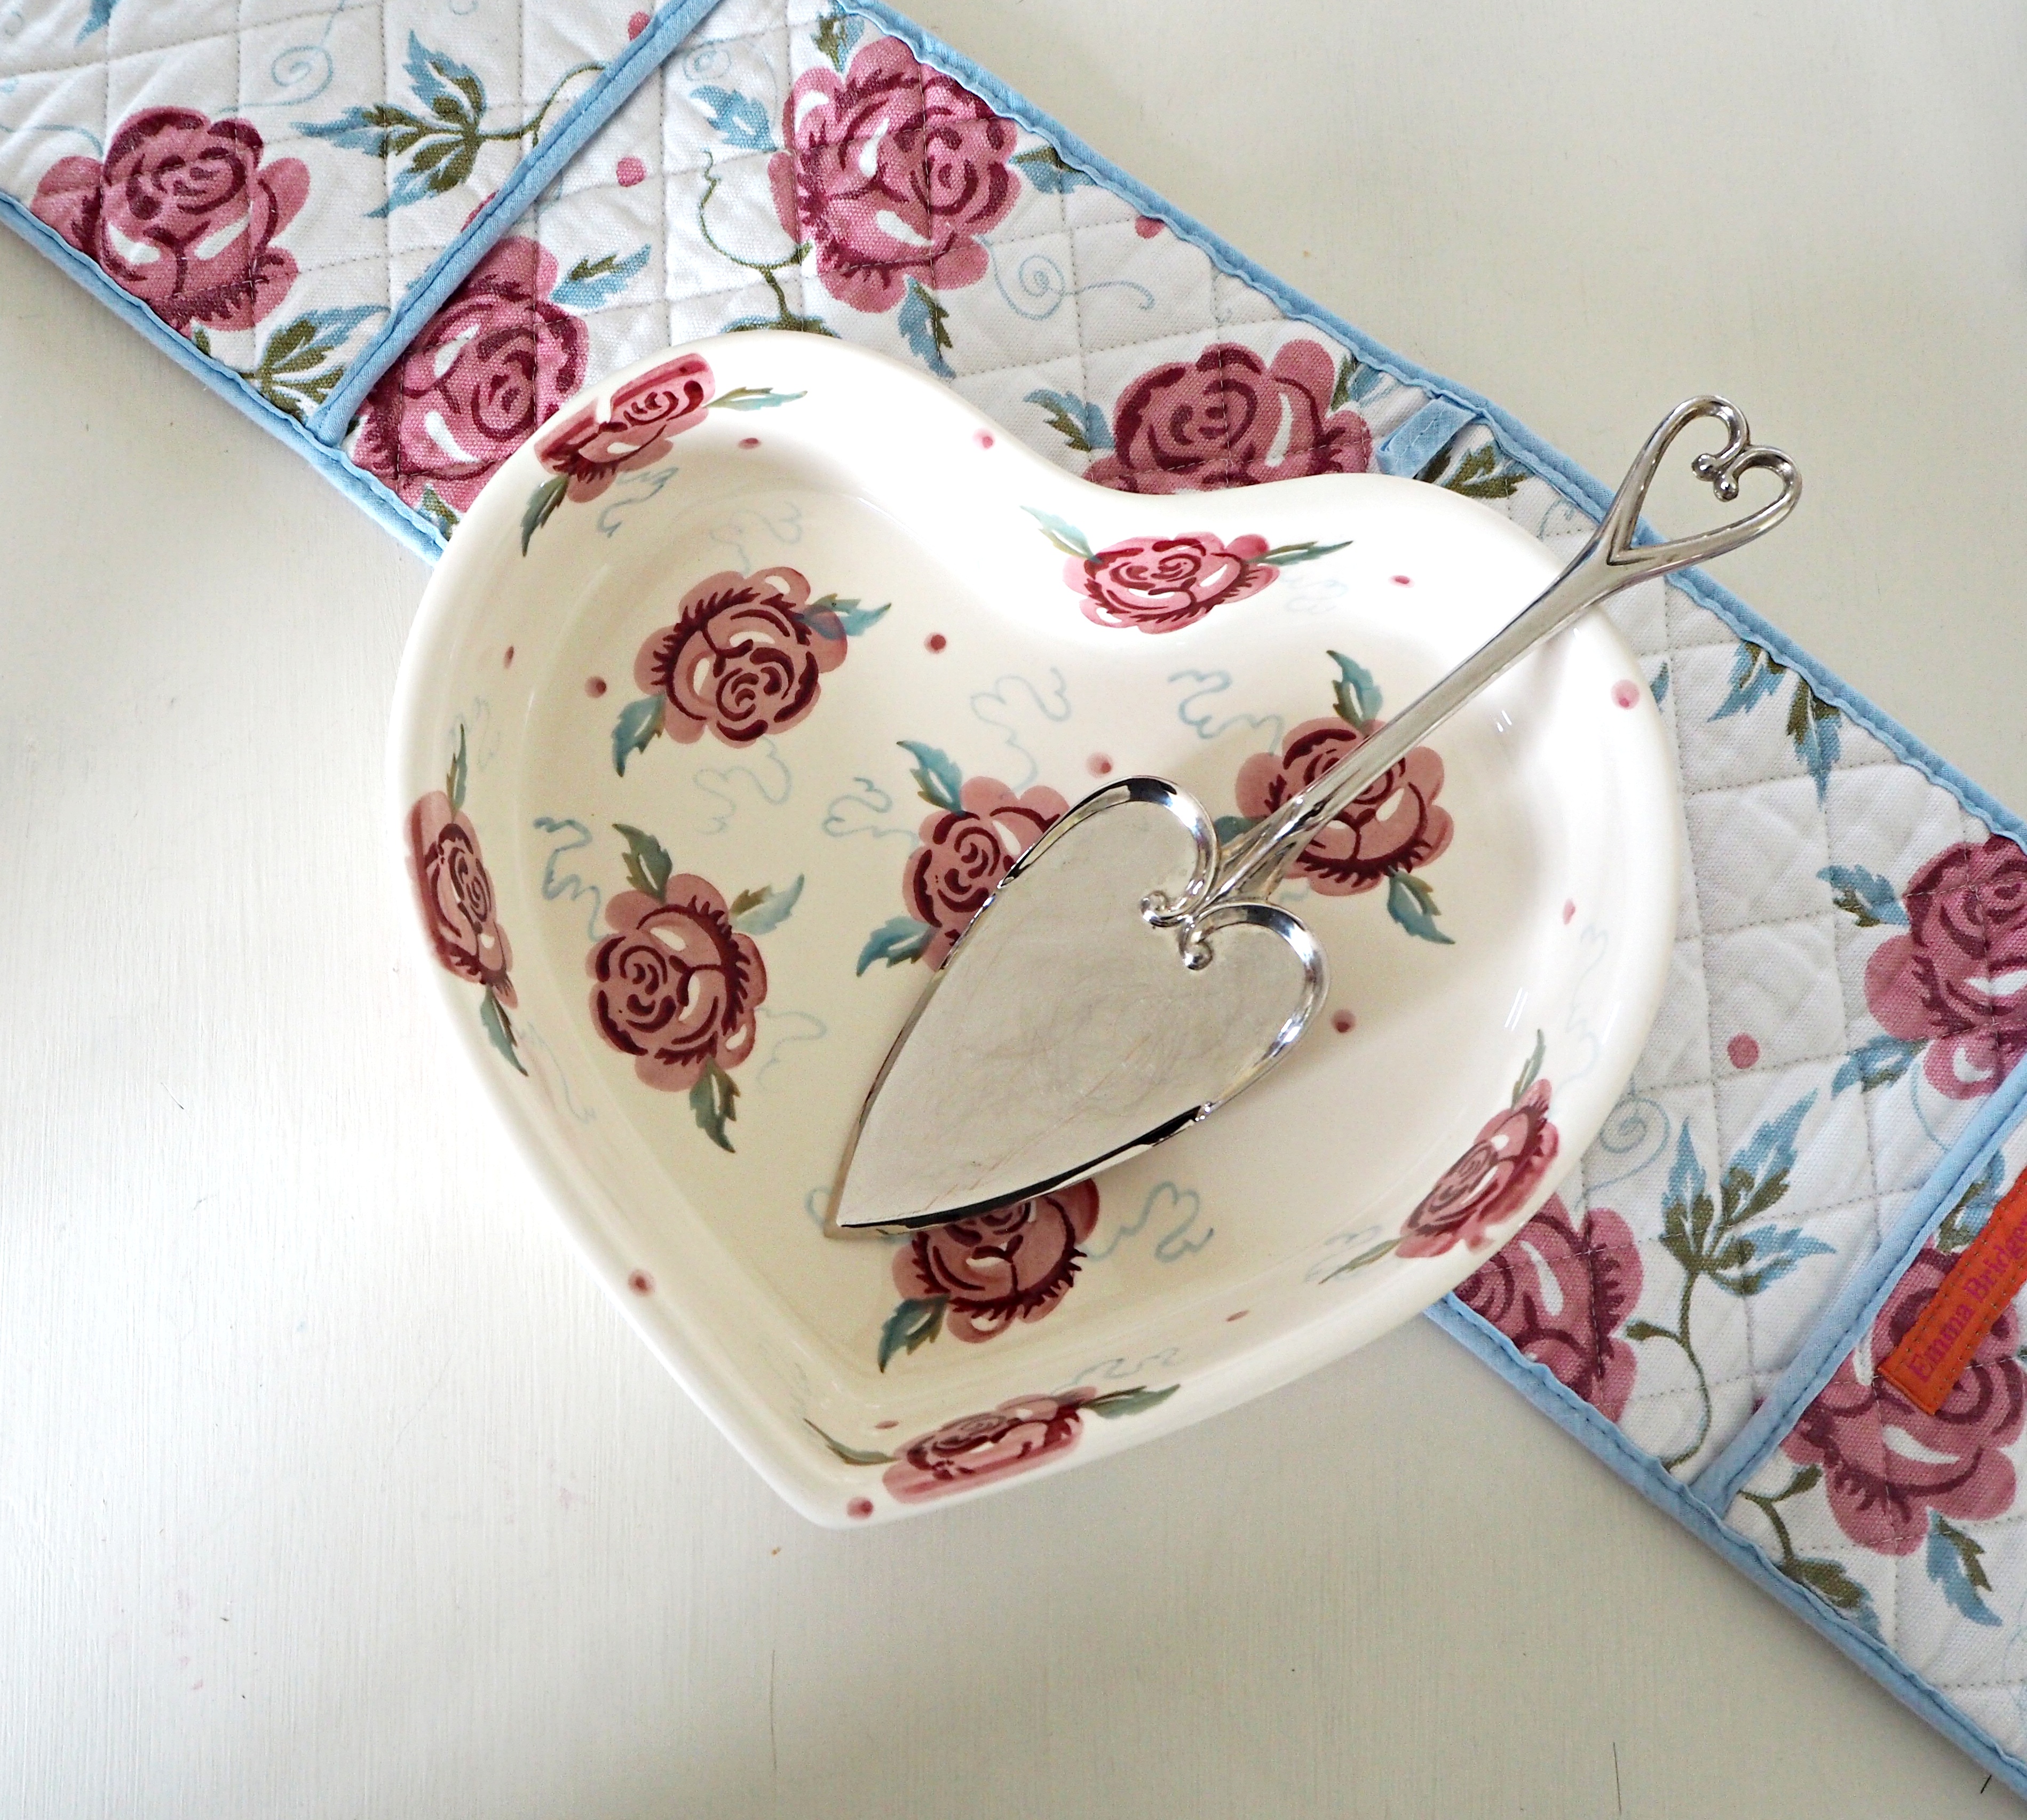
The majority of the accessories in my kitchen are Emma Bridgewater, I am a massive fan and enjoy the country kitchen feel they give. Think about mixing colours, textures and sizes when using accessories, adding plants and flowers too.

Have you any great tips on how you style your own kitchen? I’ll love to hear them!

Hope you enjoyed reading, as much as I enjoyed writing!

blog

Everything you need to know about appearing in an Interior Magazine

Hello there!

If you follow me over on Instagram you will know I’ve had a photographer in today taking some photos of Rose Cottage for a local magazine.  We have featured in one before just over a year ago, so it was a pleasure to do it again!  My inbox has been flooding with messages asking about the experience so I thought it would be easier to put all the info into a blog post.

Here’s everything you need to know about appearing in an Interior Magazine (in my own experience!!!)

  1. You don’t always need to be asked

From the messages I’ve received, everyone assumes you always get asked to feature; but, this is not always the case! If you think you have a beautiful home you can contact the magazine yourself, send over some images and ask to be considered.

OLYMPUS DIGITAL CAMERA

2. You will most definitely feel like a dirty bruit

Because you become this mad cleaning person, who wants to clean everything in sight, you will find masses of dirt in places you didn’t even know existed!…Queue thinking you could grow spuds behind your sofa!

OLYMPUS DIGITAL CAMERA

3. You will spend alot of time faffing

Painting over toothpaste splatters, delicately positioning potatoes in a crate and karate chopping cushions will only be a few crazy activities you will undertake in preparation.

OLYMPUS DIGITAL CAMERA

4. Hiding anything that is even remotely ugly

This may include bins, tv buttons, multi-coloured plastic toys and even family members; which leads me on to….

OLYMPUS DIGITAL CAMERA

5. Bailing your family out

You most definitely will not want any small people hanging about on the day of the shoot (Kids and expensive camera equipment will not mix) so I recommend getting rid of them as soon as you can – a week before the shoot is just about perfect!!

OLYMPUS DIGITAL CAMERA

6. You will become the most awkward and out of place thing in your own home

Trying to keep out of the way of the photographer is hard, especially if you don’t live in a big house.

OLYMPUS DIGITAL CAMERA

7. You will be out of money

You will convince yourself your home needs to be able to feed the 5000 and have more fresh flowers than chelsea flower show.

OLYMPUS DIGITAL CAMERA

8. The experience will be as enjoyable as you make it

Take your time, enjoy your home and soak it all up!

OLYMPUS DIGITAL CAMERA

As always if you have any questions, please get in touch!

Hope you enjoy reading, as much as I enjoy writing!

Jill

INTERIORS

Garden Transformation

Hello there!

Well…..hasn’t this post has been a loooooong time coming?! We have been in Rose Cottage over 3 years now and the outside has been left completely untouched. (Apart from my Dad taking the head staggers with the weed killer when they outgrow him!!!)  We have quite a lot of outdoor space and it has been overwhelming for us to know where to start.  A few weeks ago I decided I needed to start somewhere; I didn’t want to let another year go by without doing anything.  Neither the Hubby or I have any skills in the gardening department, but with some guidance from my Dad I got to work!

When my Grandparents lived in Rose Cottage, my Granda would be out pottering about outside everyday rain or shine.  For his 70th Birthday my parents bought him a greenhouse, which Dad constructed outside the backdoor on top of some old reclaimed brick.  This greenhouse stood proudly there until around 2 years ago, when we sent it off to another home to be loved.  From then, like the rest of the outdoors, it was let go wild!

Before:

I started by weeding and clearing the whole area.  This was a hard graft both physically and emotionally; I was finding little pots and gardening tools I remembered my Granda having in the greenhouse, so it was bringing lots of memories back.  This made me annoyed at myself for letting it get so out of hand, but it also made me more determined to make it a space which he would be proud of.

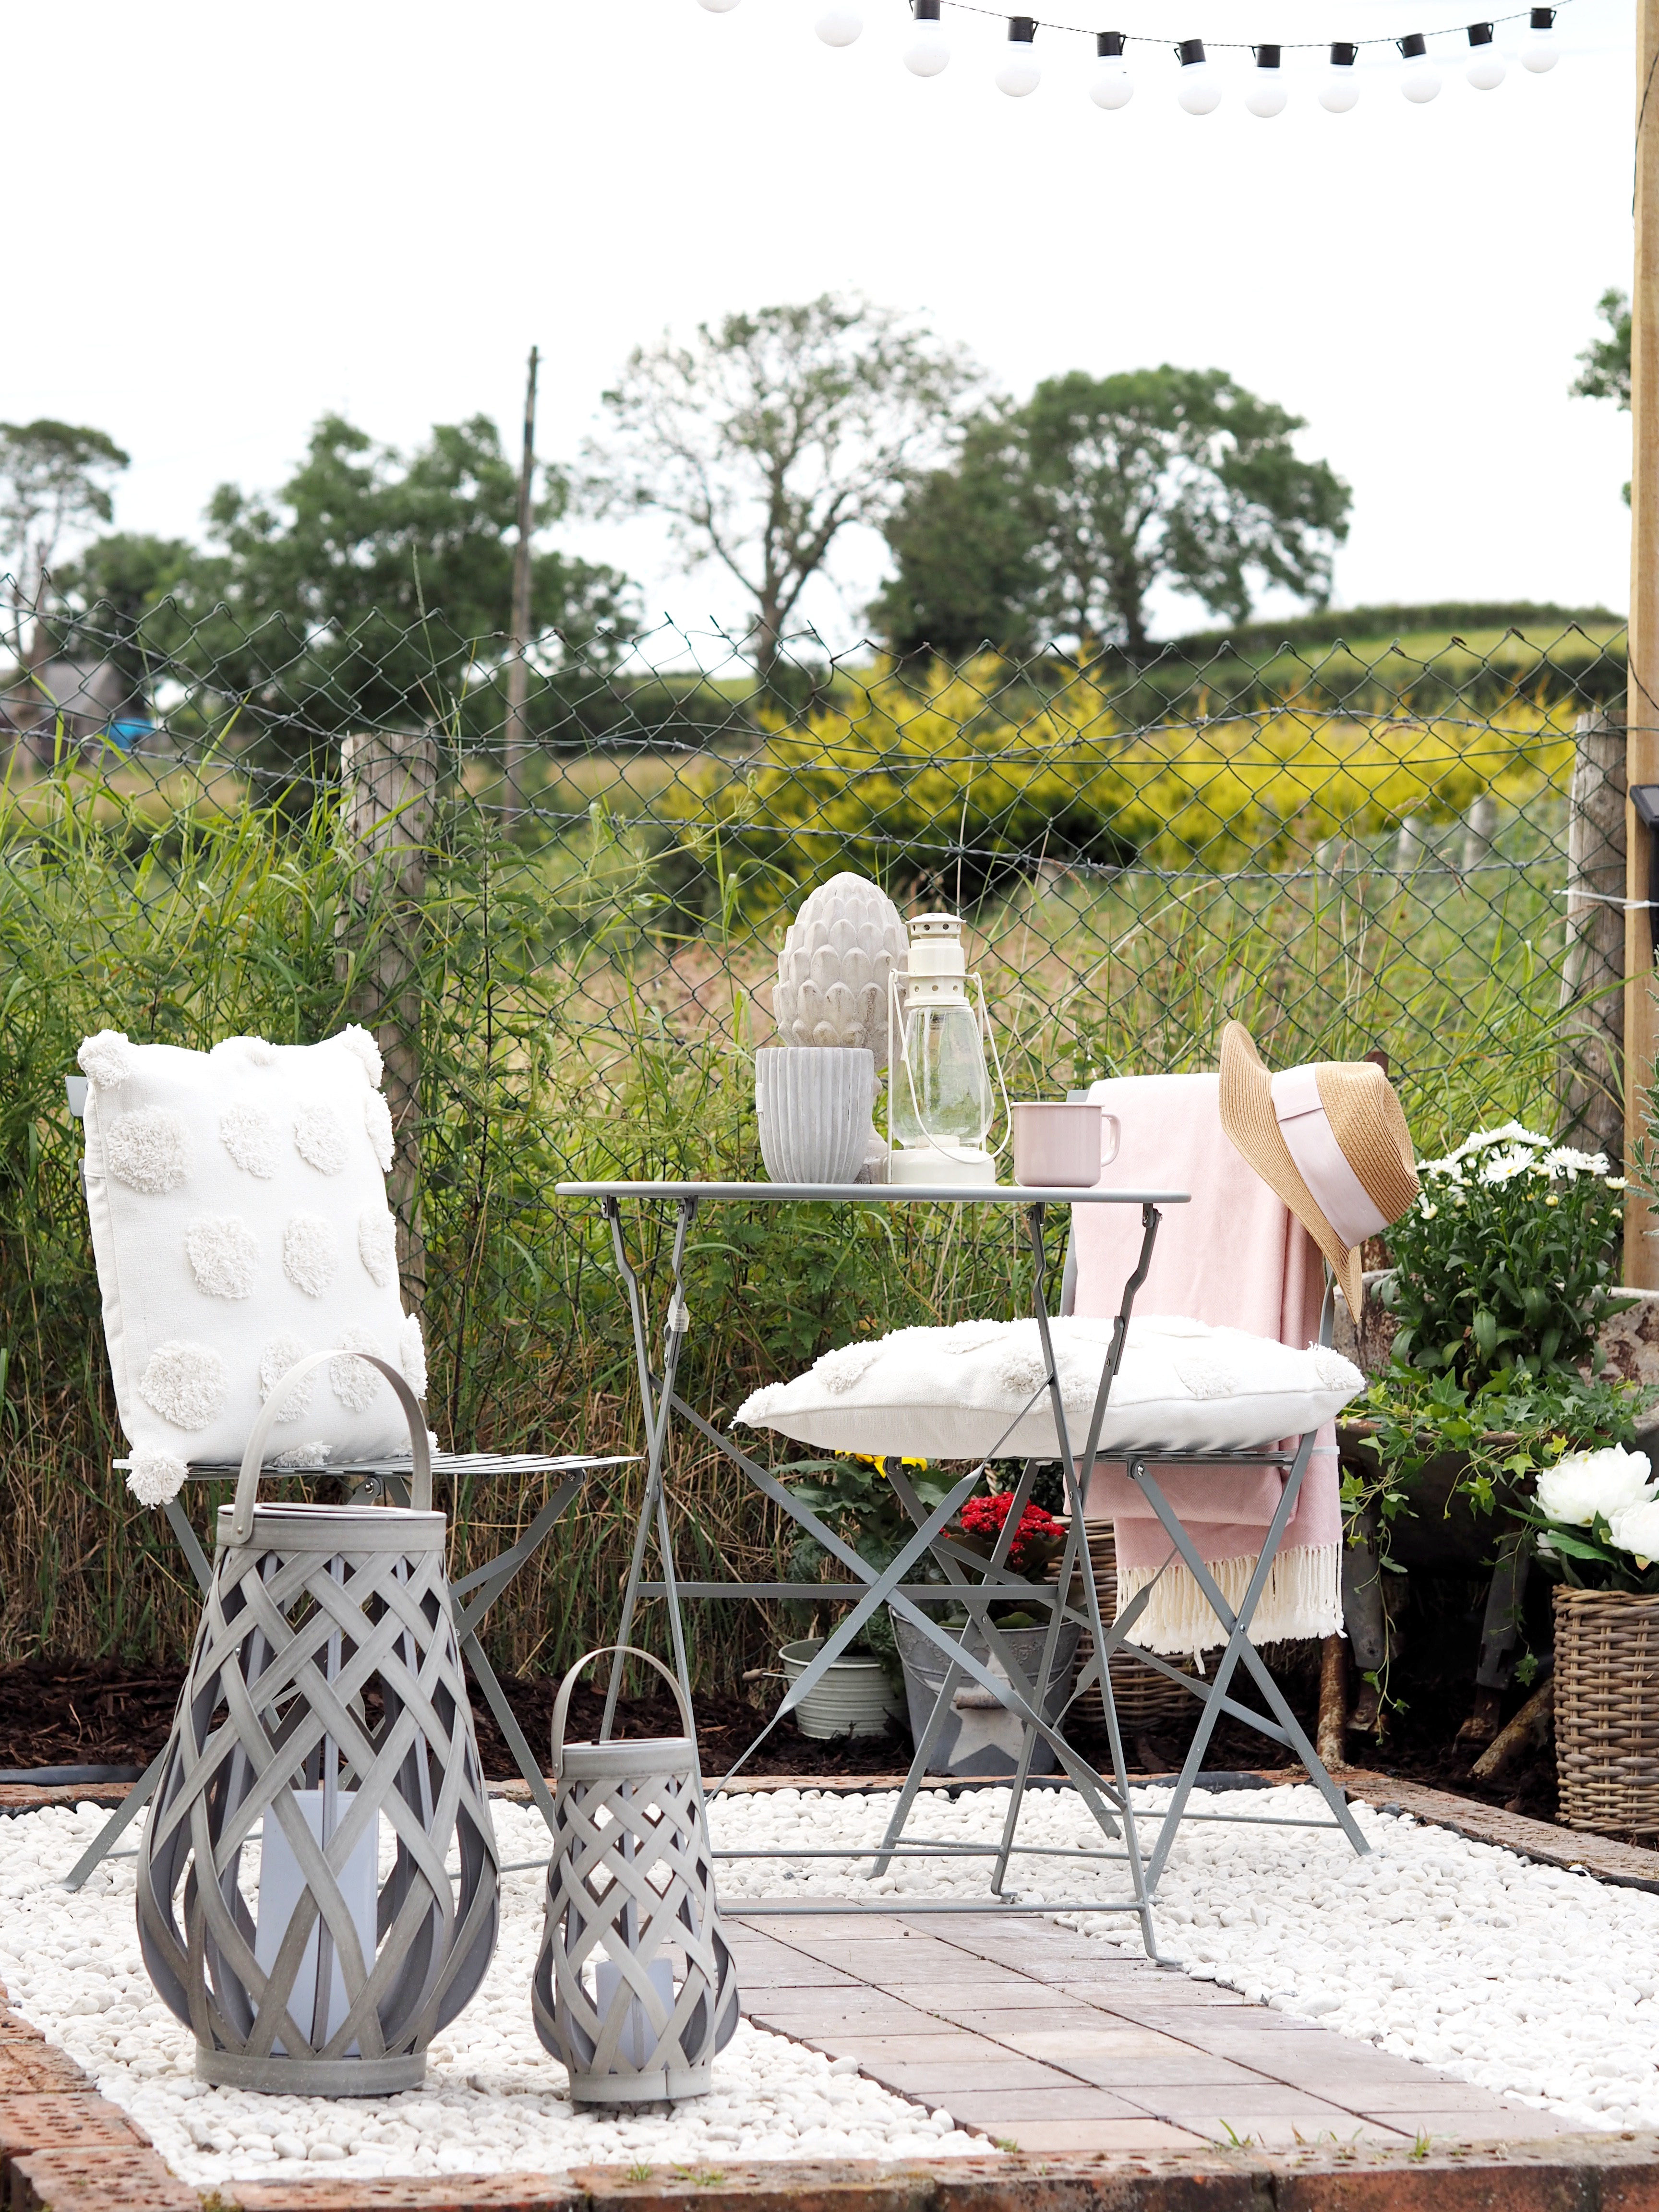
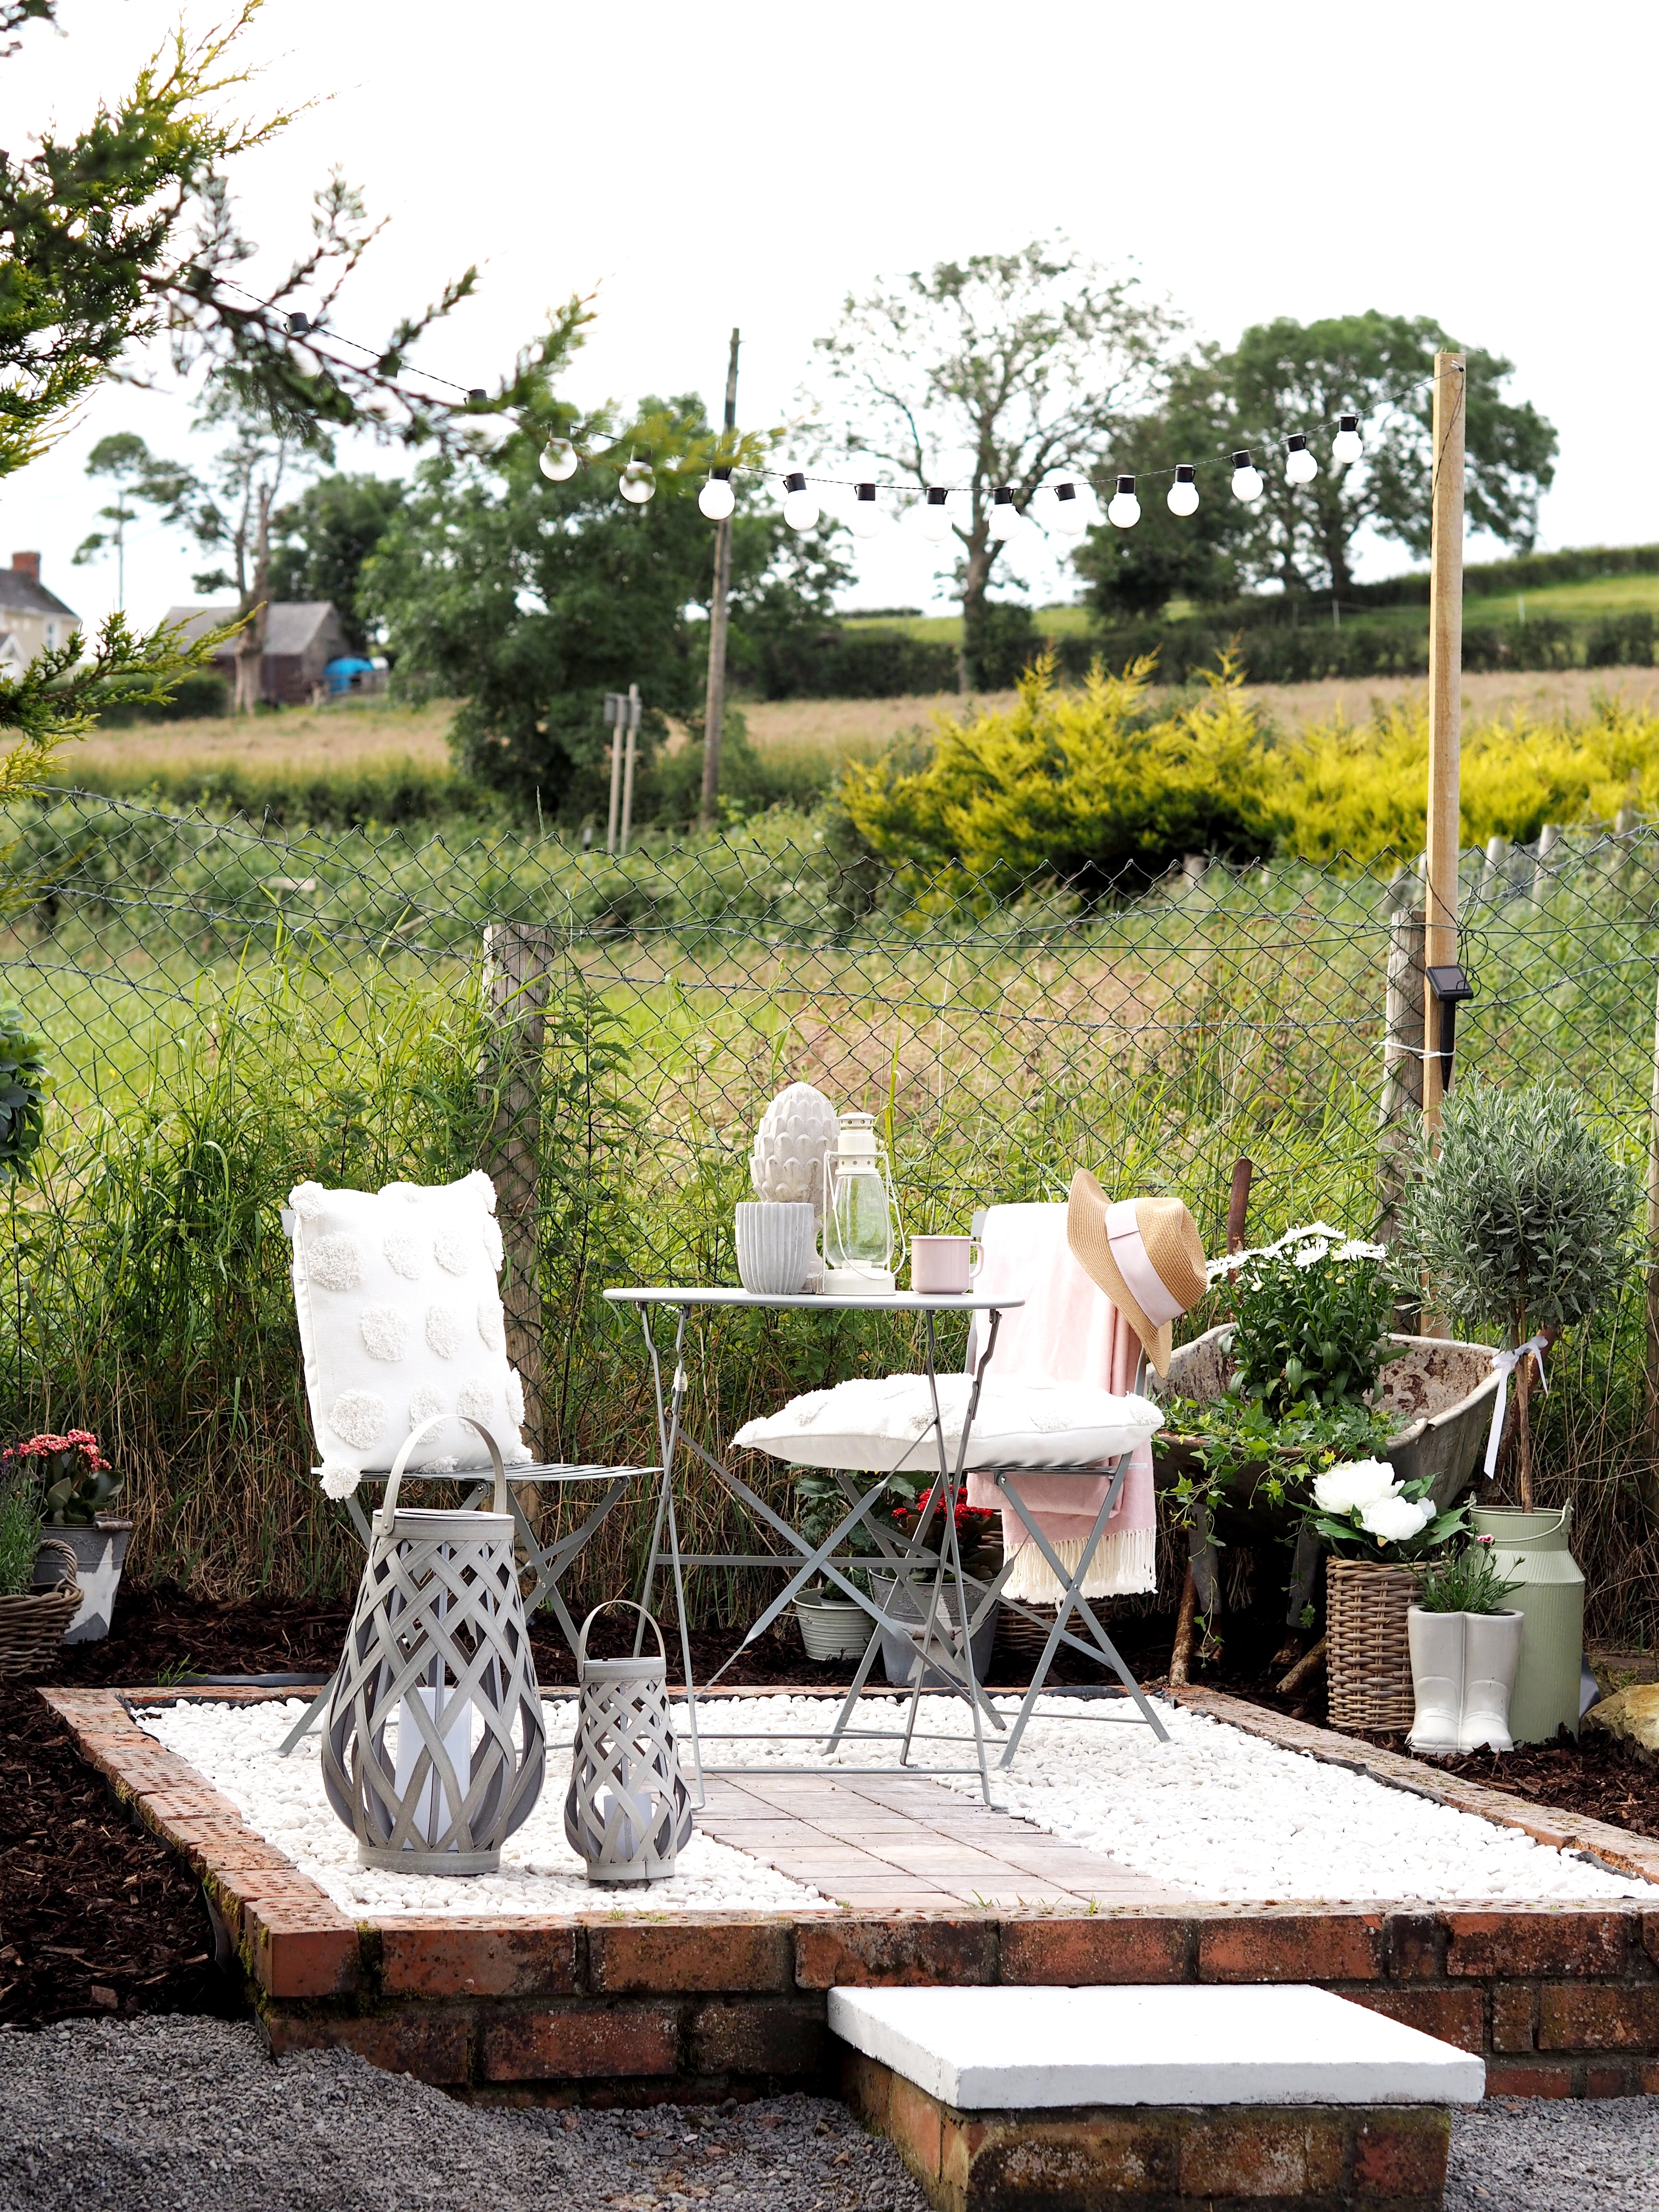
After it was cleared, I put down some heavy plastic both inside and outside the bricked area to keep the weeds at bay; then white stones inside and large bark on the outside.  I added some slim wooden posts to the fencing and attached solar powered festoon lights on top from B&M.

I wanted to put all the plants in pots as my track record at keeping them alive is not good! (Means I can replace them when needed!) I am also a massive fan of faffing, so can easily move them about as often as I like!!

All the pots and plants were picked up from Home Bargains, B&M, TKMaxx and B&Q.

The table and chairs are from Argos and linked here (its currently on offer too!)

Solar powered lanterns are from B&M.

OLYMPUS DIGITAL CAMERA

I cannot believe I have such a nice outdoor space now to enjoy!  It was such hard work, but boy was it worth it!  Now to sort out the rest!!!

OLYMPUS DIGITAL CAMERA

If you have any questions as always please get in touch.

Hope you enjoyed reading, as much as I enjoyed writing!

Jill


INTERIORS

Collecting Emma Bridgewater on a Budget

Hello there!

When we starting planning our move into Rose Cottage, my mind immediately went into overdrive picking things to furnish it.  When I thought about pottery, I knew I wanted to collect Emma Bridgewater.  I admired the unique and colourful patterns, and appreciated the time and patience which went into each piece.

Having built up quite a collection, I thought I would share with you some tips on how I buy Emma Bridgewater without it ending in divorce or featuring on the next series of ‘Cant pay, we’ll take it away’!

So here goes:

  1. Look out for Emma Bridgewater items popping up on local selling sites.  You can be lucky with websites such as Gumtree, Buy and Sell pages, Shpock and EBay.  If the seller has little/no knowledge of the true value, you can pick up a real bargain.OLYMPUS DIGITAL CAMERA

2. Watch out for Sale time on the Emma Bridgewater website.  Sales happen on the website a few times throughout the year and further reductions follow the main sale.  You can pick up mugs from as little as £4.99 at the sales final reductions!

OLYMPUS DIGITAL CAMERA

3. Reduction codes – There are always codes floating about which can entitle you to things like free personalisation, free postage and packaging, 15% off, 10% off etc.  These are discount codes which you can enter on the Emma Bridgewater website at checking out.  Before completing a transaction, please get in touch with me if you’d like a code (best to get me over on Instagram @homeatrosecottage).

OLYMPUS DIGITAL CAMERA

4. Buy from the seconds and discontinued section on the Emma Bridgewater website.  This is where I normally pick up my dinner plates and mugs as I don’t worry about using them daily and throwing them in and out of the dishwasher.  If something gets broken or chipped I won’t worry as much as I haven’t spent too much money on it.

OLYMPUS DIGITAL CAMERA

5. Buy from small businesses selling decoupaged items/ items using Emma Bridgewater fabric/ items inspired by Emma Bridgewater to compliment your collection.  A few of my favourite pages to buy from are @thekookyfox @natyshasvintagehome @bettys_shabby_chic_boutique @loveheartlane @katrina.lyall_dippyduck.  You will find them over on Instagram.

6. Buy from the melamine range.  This is more like picnic wear in the same pattern as the pottery but at a fraction of the price.  These pieces are also great to use when children are about – they can use what they think is the same crockery as the adults without the worry!

OLYMPUS DIGITAL CAMERA

7. Don’t keep any item you don’t love – sell it to buy something which you do!  If you keep looking at a piece of Emma Bridgewater which you have bought and just can’t fall in love with it, don’t hold onto it.  Sell it on to someone who will love it and treat yourself to something on your wish list!

OLYMPUS DIGITAL CAMERA

Let me know if you have any other tips and happy shopping!

Hope you enjoy reading, as much as I enjoy writing!

Jill

FASHION & BEAUTY, LIFESTYLE

Our Wedding Day

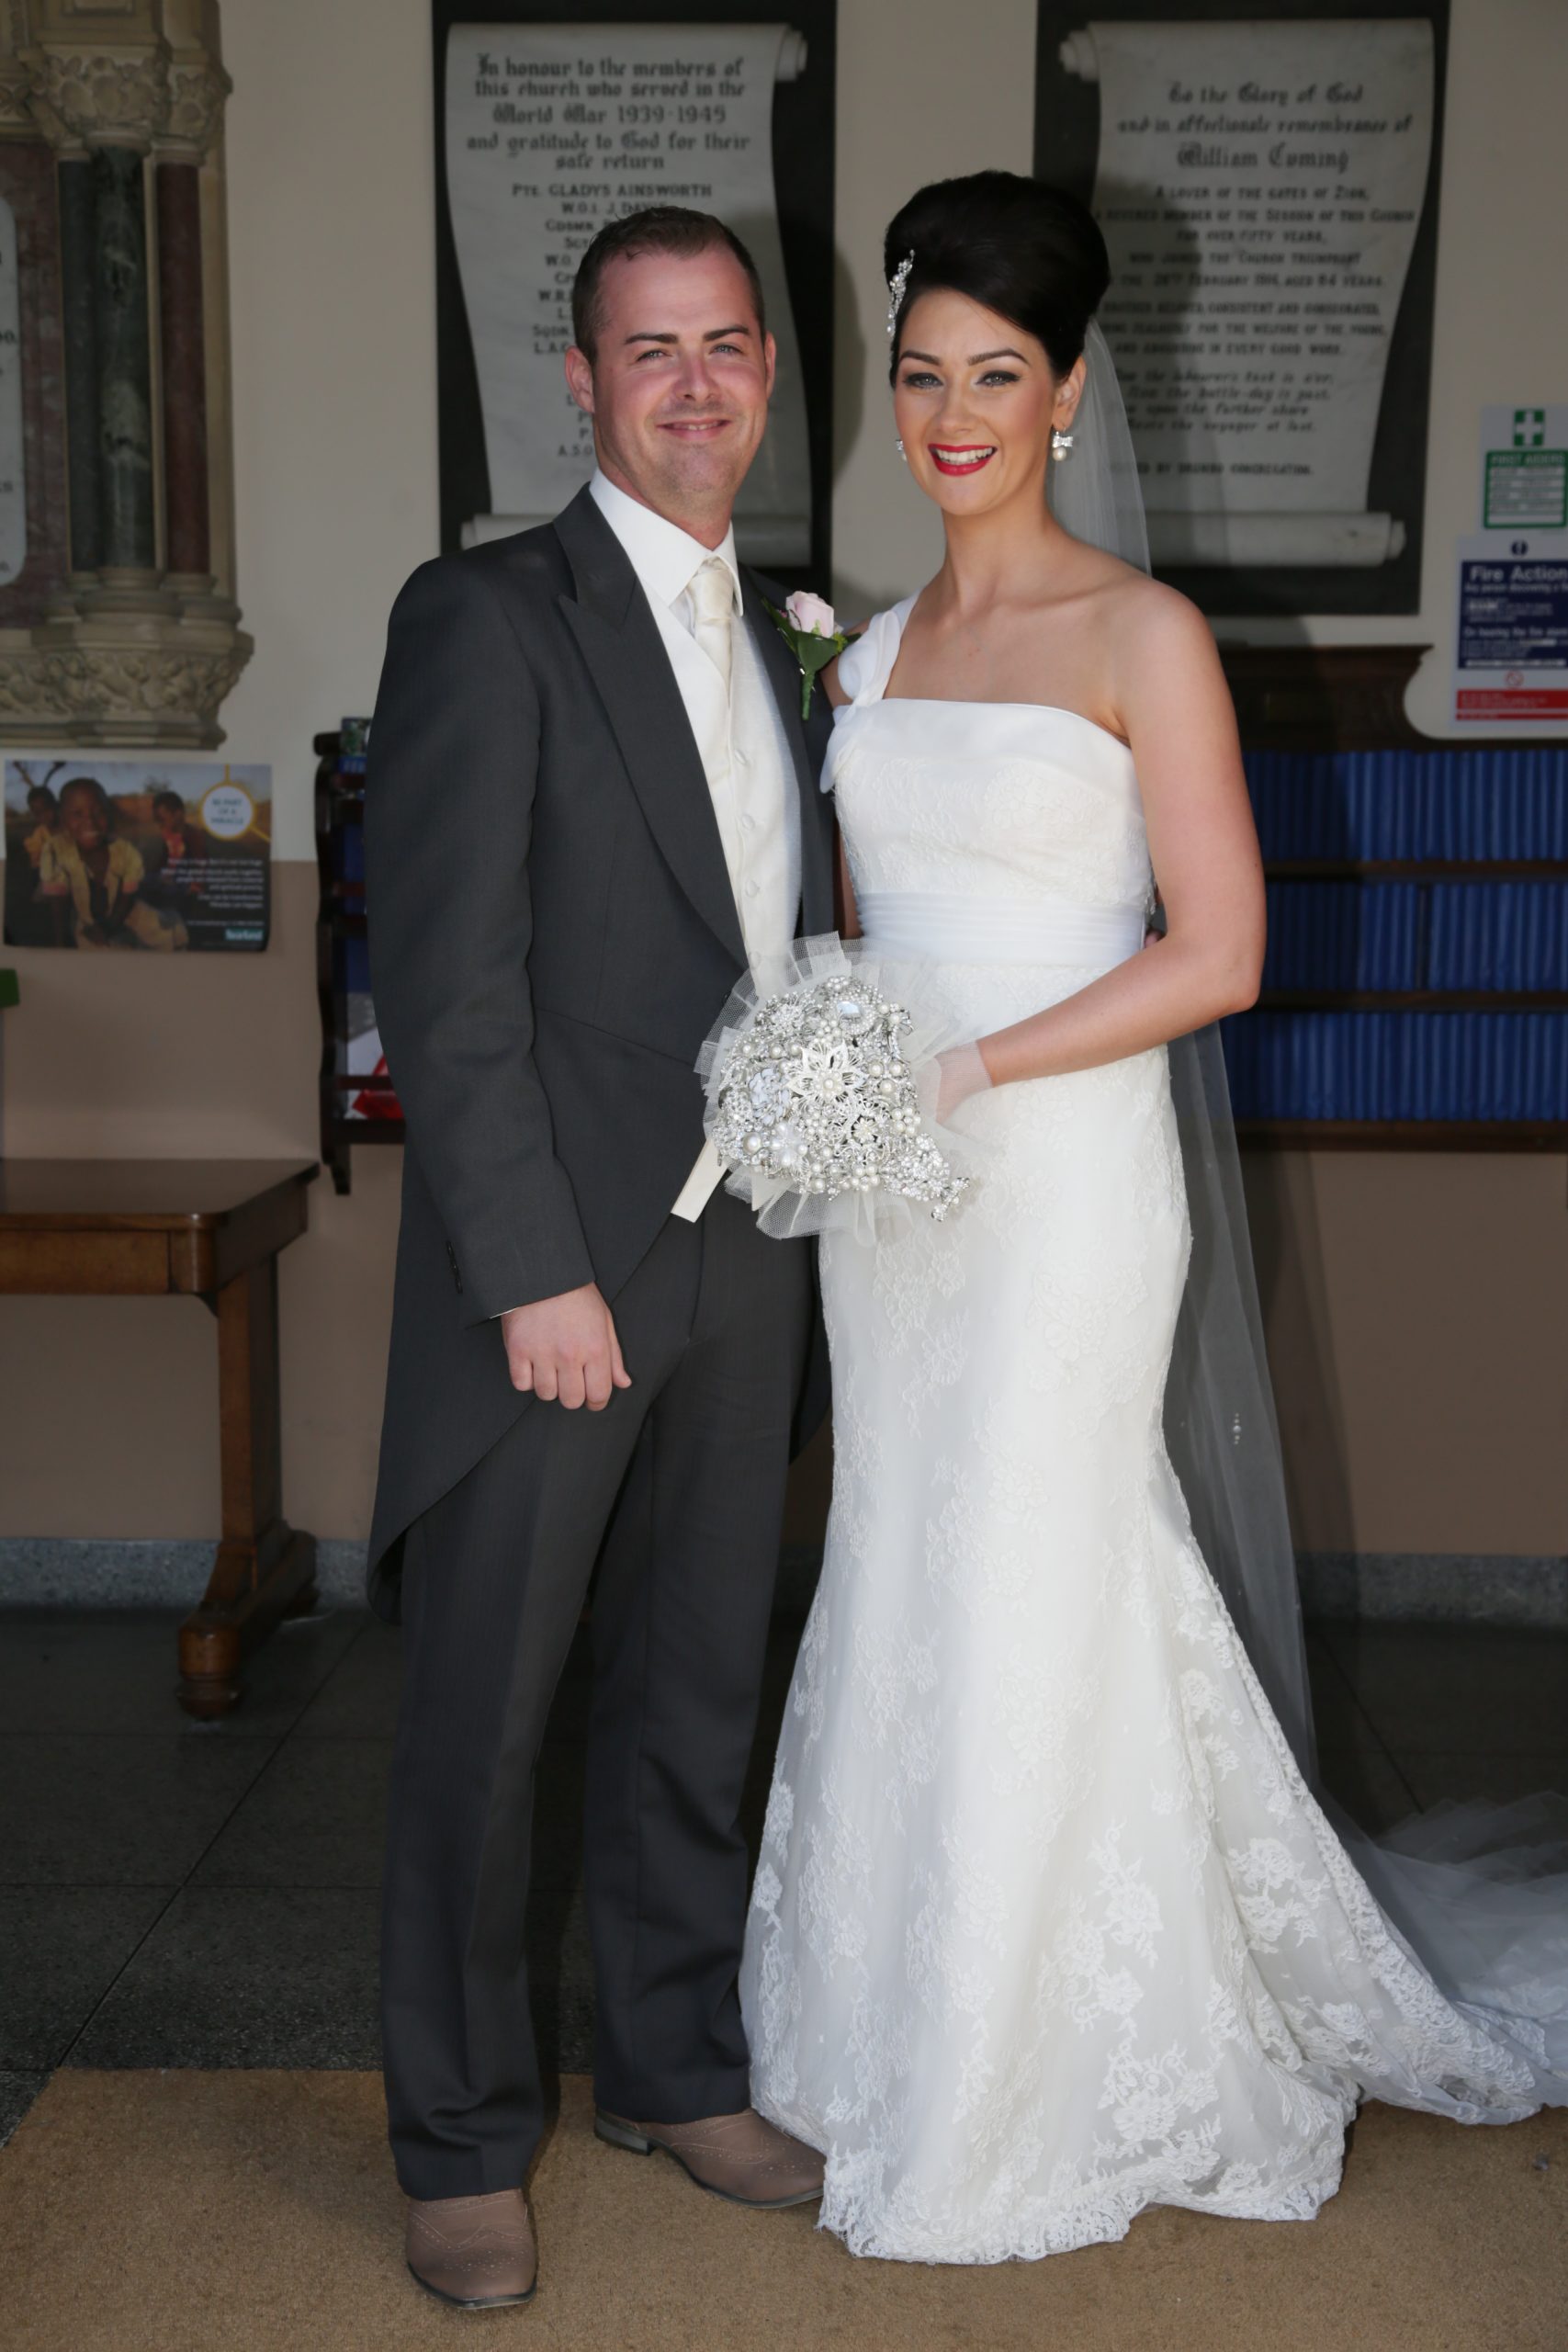
As wedding season is fast approaching, I thought I would give you all a little peak into our very special day!

fst_5449

I met my hubby in the summer of 2010 through a mutual friend – love at first sight is an understatement! We immediately hit it off and from that day have been inseparable! He proposed in April 2012 at his parents caravan which was so lovely as it was a place which he had spent a lot of summers at as a child creating beautiful family memories.  Now this is one of those special memories!

The hubby let me take the lead in organising the big day as he knows how much of a control freak I am!  From a little girl obsessed with dressing up daily as a princess I knew exactly how I wanted the day to run from start to finish.

We had the marriage ceremony at my church where from a young age I attended everything going – Sunday School, GB, Youth Fellowship, you name it, I was there!  We had my minister and Ashley’s minister both take part in the ceremony which made it extra special for both families.

We visited a few different venues for the reception but completely fell in love with The Galgorm.  The room which we picked was perfect for our 80 guests and it needed very little dressing which suited our budget.  My creative side went into overdrive and I dressed the church and venue myself (with the help of a local florist and my very patient and understanding family!!)  By making the centre pieces and a few other details myself it helped keep the costs down and I really loved how personal this made the day.

I based the whole day around my love of lace and bows – this theme flowed throughout the day from the dresses to the flowers, the church and the venue.  I just loved walking into the room and seeing all my little creations and ideas jotted around the place.  This made the stress, time and planning spent in the months running up to the day totally worth it.

So here’s some photos:

The Church:

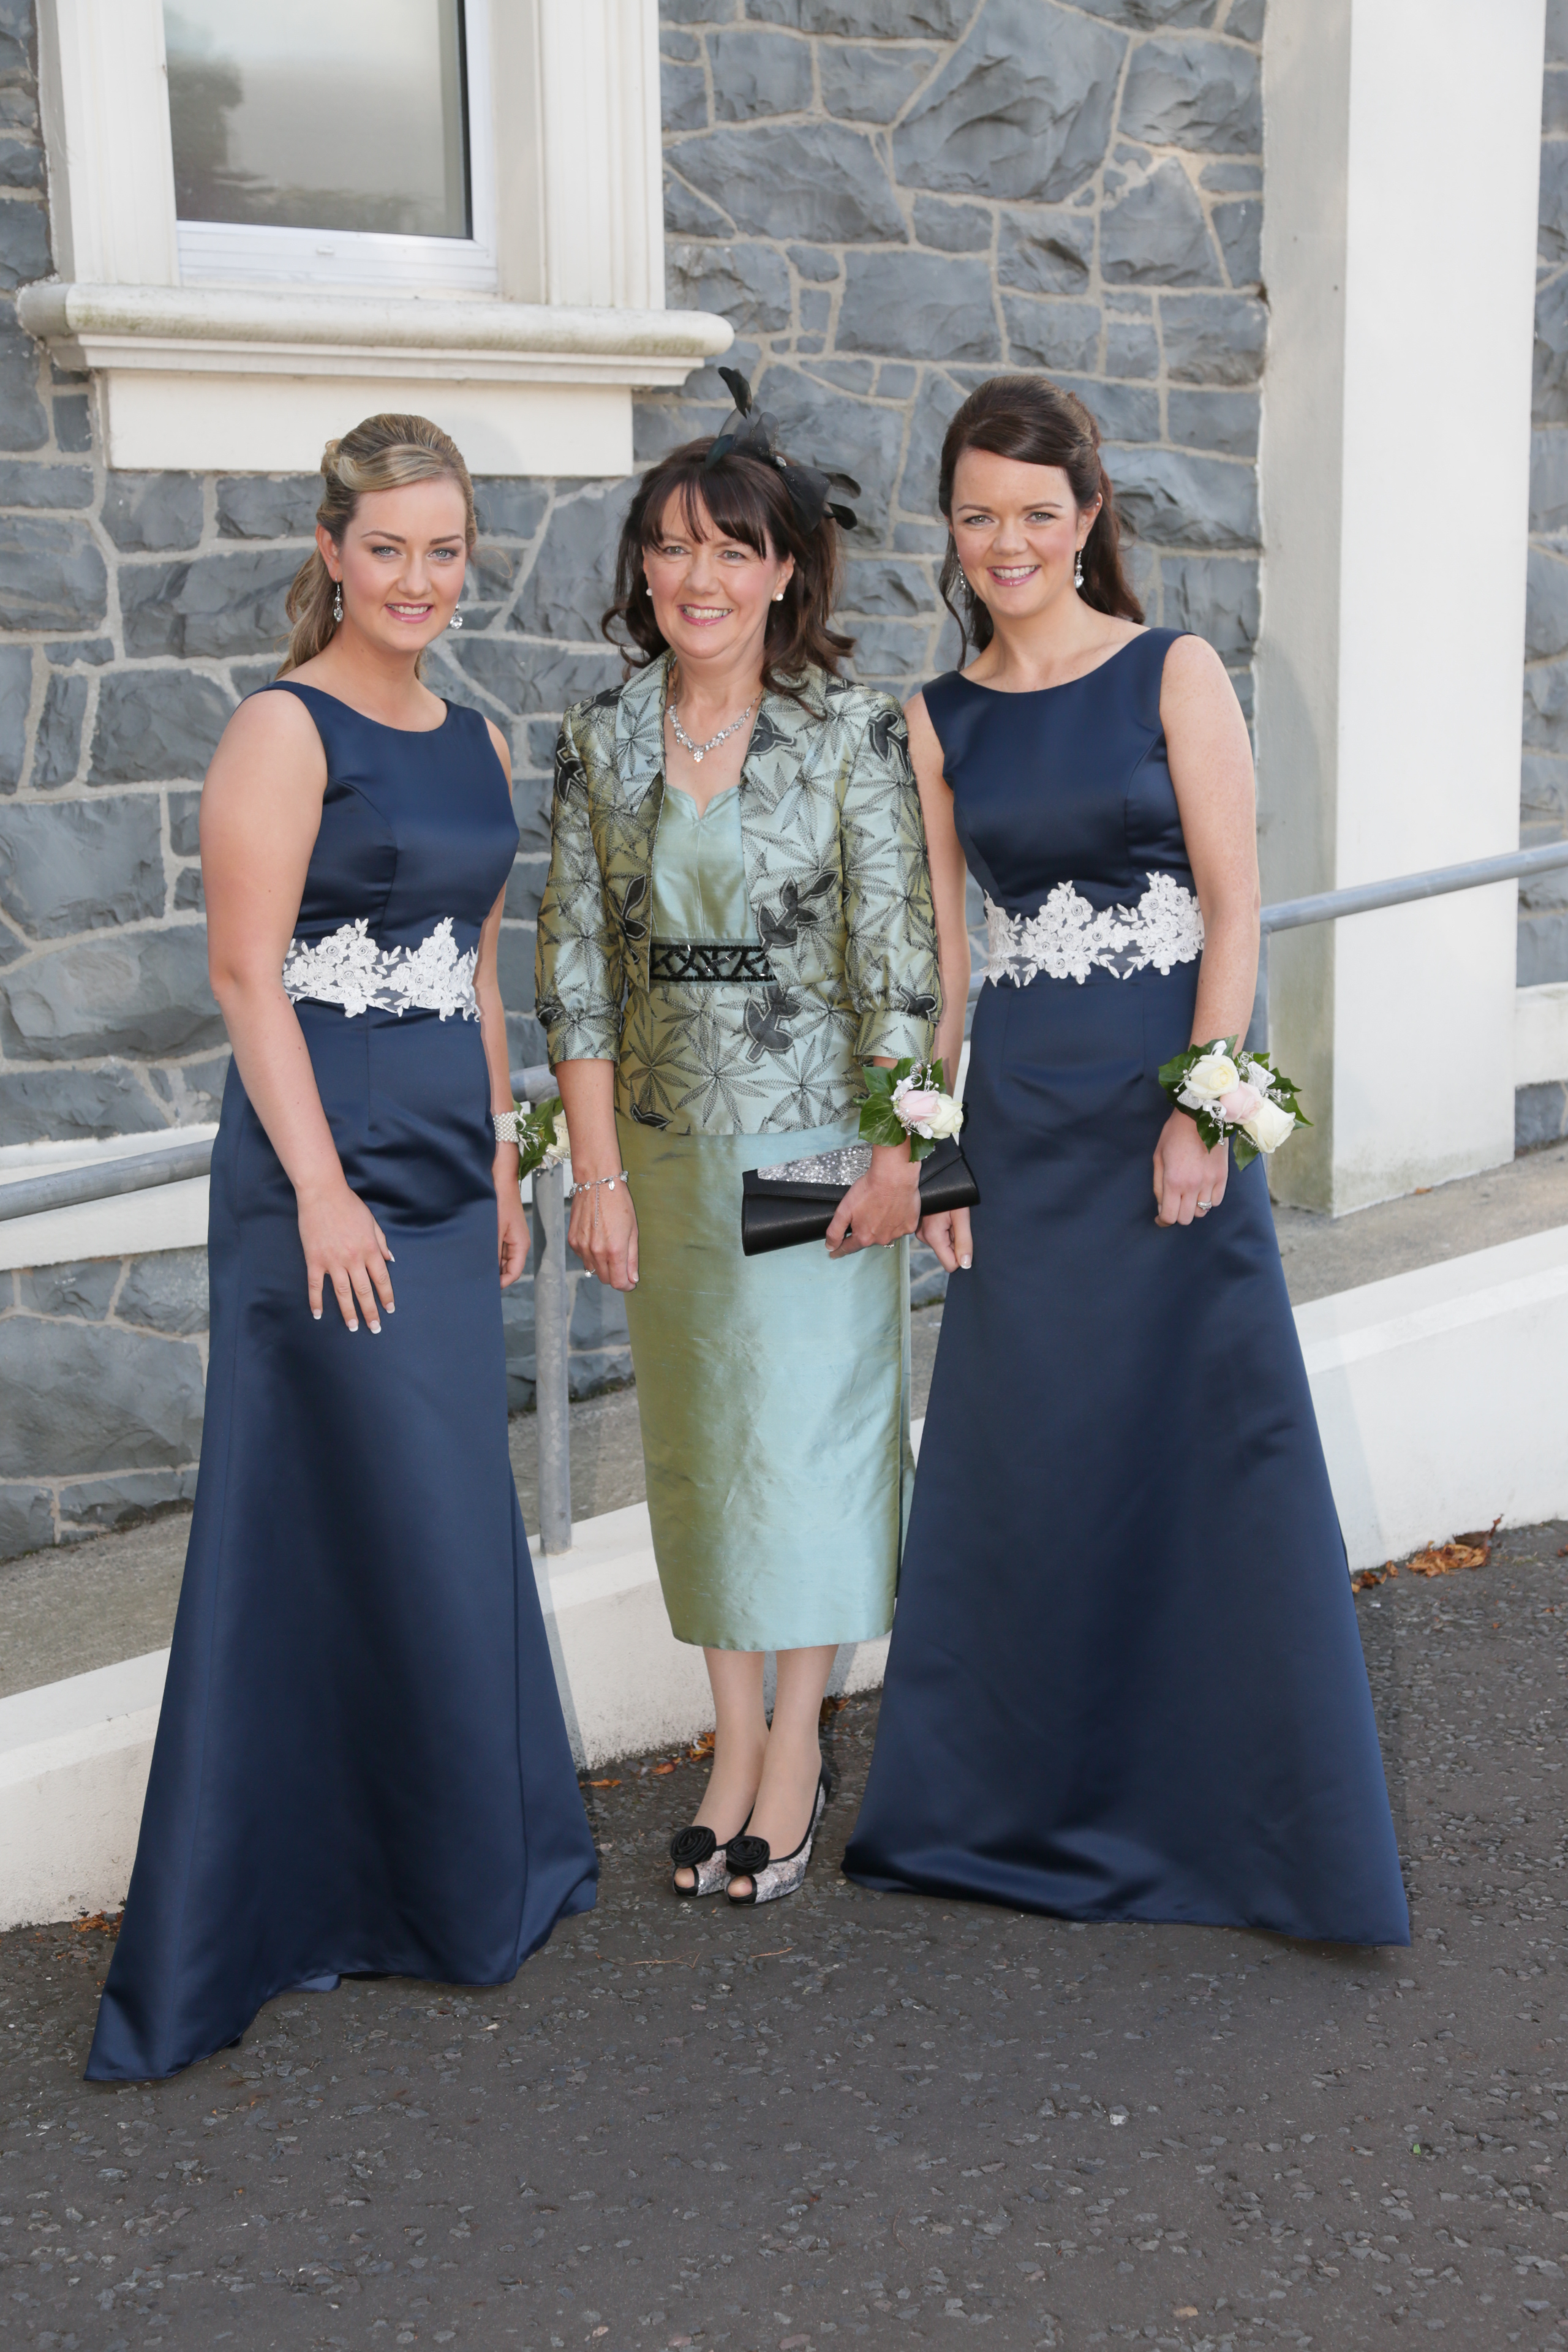
My yummy mummy and gorgeous sisters:

fst_4798

I arrived to the church in my Dad’s car – this was his pride and joy!

fst_4834

I made these little sweet cones for the guests to munch on route to the reception:

fst_5018

The Reception:

These are a few examples of how I dressed the venue:

This is my bouquet, which I made from a selection of vintage and new brooches:

cover3

This is our beautiful cake:

ima_4888

I put some diamonte stickers on the bottom of our shoes – mine said ‘I Do’, Hubby’s said ‘Me Too”

The evening:

The bridal party done a routine for the first dance!

If anyone would like a DIY tutorial of any of the bits I made myself for the day or to see any more- please get in touch!

Hope you enjoy reading as much as I enjoy writing!
Jill

FASHION & BEAUTY, LIFESTYLE

What I’m Loving Lately

Hello there!

As I get asked a lot of questions on Instagram about where I purchase things and what I would recommend, I thought I would put together a blog post on a few things I have picked up recently which I really love! I’m thinking this could maybe become a monthly feature if there is any interest? Sure let me know what you think!  This will be a random collection of items, so hopefully everyone will find something they like too.

Interiors

Firstly, these little metal star tea light holders.  As soon as Homely Rose put them up on their Instagram as incoming stock, I tortured Helen to put them onto the website so I could purchase a set!  When I saw them I knew they would look great hanging from my ladder, especially with candles inside at night time. You can find Homely Rose on Instagram here: https://www.instagram.com/homely_rose/?hl=en Give them a follow as they have some really gorgeous home interiors!

Next up is this Toast rack from One Vision cnc.  If you follow me on Instagram you will know how much I love Emma Bridgewater.  This company engrave wooden items which compliment the pottery just perfectly.  I purchased one of their chopping boards over a year ago with Rose Cottage engraved on the side and it’s as good as the day I bought it!  So pleased now to have this little toast rack to match.  You can purchase it here: http://www.onevisioncnc.co.uk/oak-toast-rack—engraved–4-slice-39-p.asp

OLYMPUS DIGITAL CAMERA

You can read here: Making my home beautiful with Zoflora! how much of a huge fan I am of using Zoflora when cleaning.  This next little purchase is the perfect tool to use alongside it.  I picked it up from Amazon after seeing it recommended on another blog.  I have been really impressed by this electric device, which makes cleaning small, more difficult areas a lot quicker and easier.  Get yours here: https://www.amazon.co.uk/s/ref=sr_pg_1?rh=i%3Aaps%2Ck%3Asonic+scrubber&keywords=sonic+scrubber&ie=UTF8&qid=1492355786&spIA=B01MT80ROH,B018NZ85D2,B06XS16LDN,B01MQ6GXCT

Baby

The lovely Julie has took the plunge and set up an amazing business selling beautiful children’s items.  Her stock is so different from what you would find on the high street, which is why I really love it!  Here are some items from her website, so please check it out and follow her on Instagram for stock updates.  Her website is: https://daisybelledreams.com

OLYMPUS DIGITAL CAMERA

Beauty and Fashion

So I picked up this fake tan after it being recommended by a local blogger I follow.  I normally stick to what I know with fake tan but this was on offer in Boots so I thought I would give it a go.  I have to say I am really impressed with this tan – the colour is so natural, smell isn’t too bad and develops almost immediately.  Definitely will be using this one if I don’t have time to tan the night before an event.

OLYMPUS DIGITAL CAMERA

And lastly, these shoes!! I ordered these from H&M after seeing a few people/ celebs wearing similar ones.  I wasn’t too sure if I would suit them or if I could style them well, but I am totally in love! I am a huge fan of the metallic shoes which are in fashion at the moment, as they can be easily dressed up or worn casually.  They are also really comfy to wear, which is a big bonus!  Find them here: http://www2.hm.com/en_gb/productpage.0474111004.html#Silver

Let me know what your loving lately!

Hope you enjoy reading as much as I enjoy writing!

Jill


LIFESTYLE

Hoppy Easter!

Hello there!

‘No matter how long the Winter, the Spring is sure to follow.’

Like most of you, I am always happy to welcome Spring.  Longer days, warmth of the sun and all the bright colours out and about.  I’ve been spending this weekend putting some Easter decorations around Rose Cottage so thought I would share some ideas with you!

Firstly, an Easter tree.  I used this porter vase from Emma Bridgewater and put in 6 strands of artificial pussy willow from Dunelm.  You can find it on this link: http://www.dunelm.com/product/artificial-pussy-willow-stem-1000001995?itsearchTerm=flowers%20artificial

I bought these beautiful eggs from Katrina at DippyDuckHQ on Instagram – she is really talented and decorates these eggs by hand.  I love Instagram for connecting with small businesses and finding quirky little items you can’t get on the high street.  Here’s the link to her page: https://www.instagram.com/katrina.lyall_dippyduck/

OLYMPUS DIGITAL CAMERA

OLYMPUS DIGITAL CAMERA

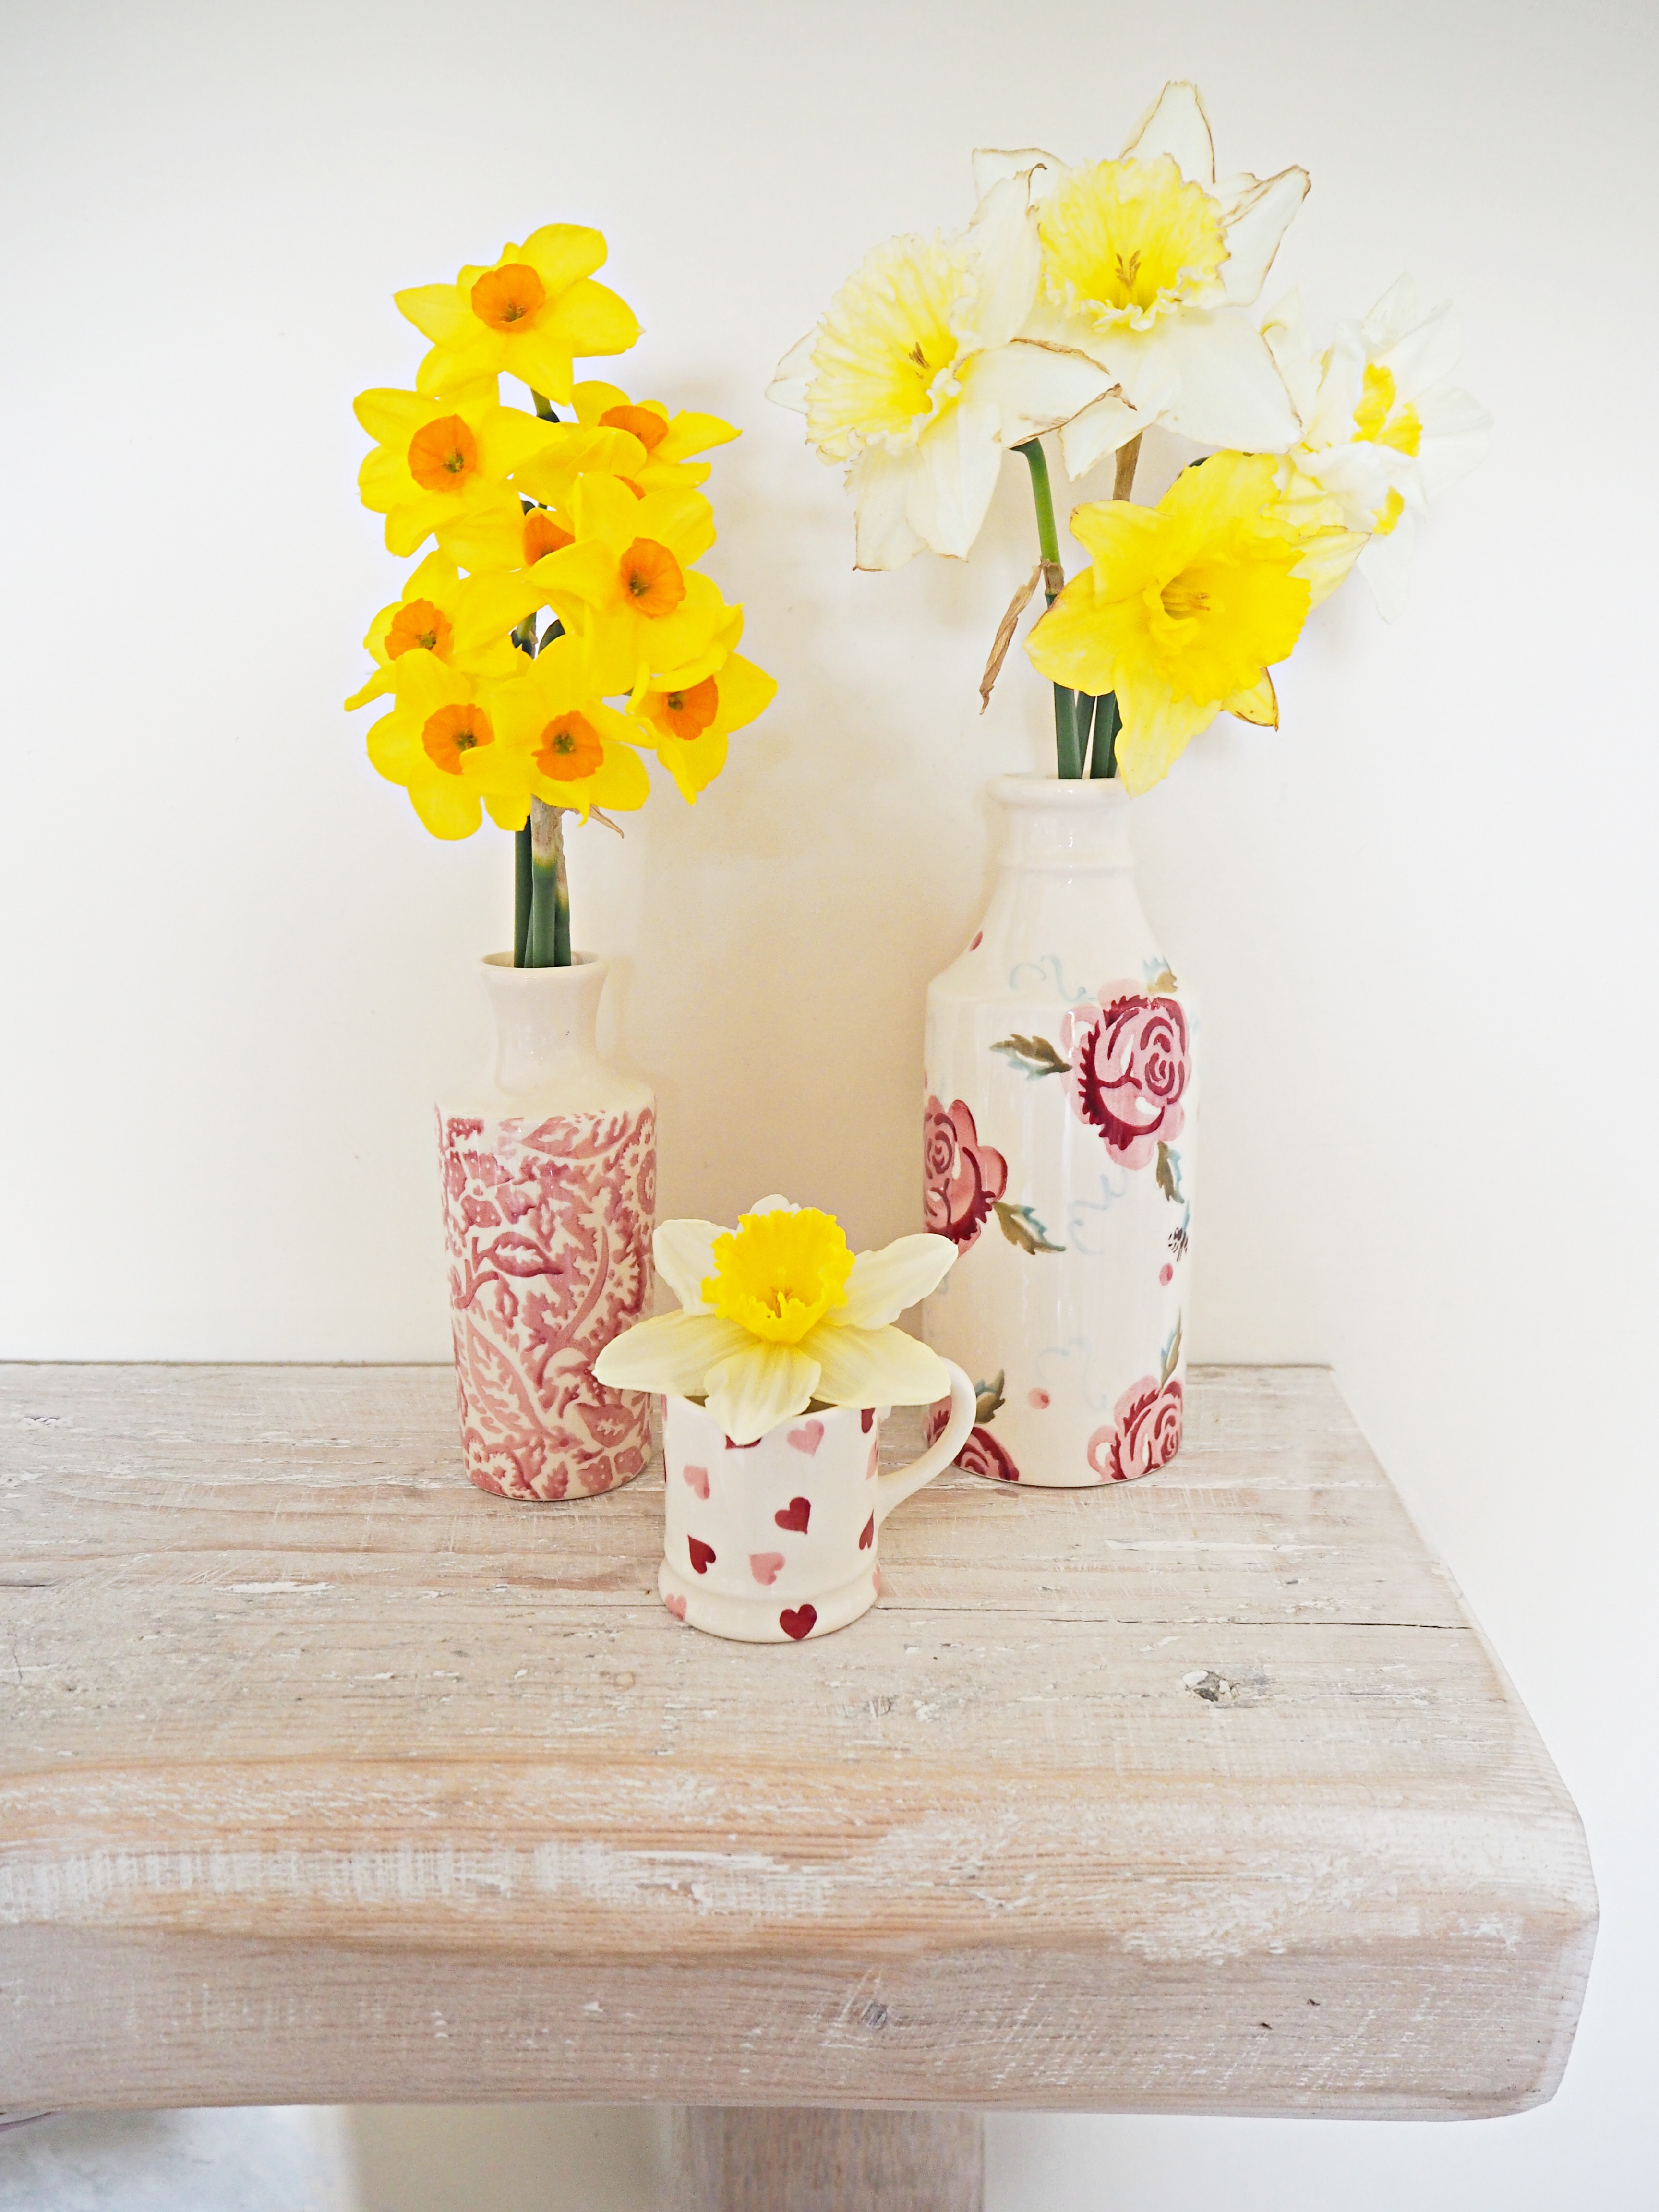
A cheap and cheerful way to make your home look bright and cheery for spring is daffodils.  I picked these this morning from our garden and have them scattered around the cottage in little vases.

OLYMPUS DIGITAL CAMERA

I don’t like to spend a lot of money on Easter decorations as they are only out on display for a short time.  I brought together some of my favourite pottery pieces and stacked them up, largest at the bottom to smallest at the top.  I think it looks really effective yet so simple.

And lastly, how cute are these little rabbit spoons which I picked up from here: https://www.tuttidecor.co.uk/product/rabbit-spoon/  Adding a little Easter touch to some afternoon tea!

The hubby and I normally go to his family’s caravan over the Easter holidays so we are excited now to bring Harry along this year too.  Hope you all have a lovely Easter celebrating with friends and family!

Hope you enjoy reading as much as I enjoy writing!

Jill

LIFESTYLE

Mother’s Day Gift Ideas

Hello there!

This will be my first Mother’s Day as a Mummy! To say I’m excited is an understatement! I never really thought I would see this day as a big deal for myself but I am really looking forward to spending the day celebrating with my Hubby and Harry.  We are planning a quiet day together going for a meal and then a long walk.

I thought I would show you a few items I have got recently which I think would be lovely ideas for Mother’s Day gifts.  So here goes:

Firstly this Emma Bridgewater mug.  How adorable is this mug and currently on offer on the website for only £14.95!  I am a huge Emma B fan and would love this mug in all the designs available! Find it here: http://www.emmabridgewater.co.uk/en/uk/icat/mugdiscount

Does your Mum love snuggling up on the sofa? How about doing it with this gorgeous pom pom throw?  This is from Matalan and is only £15! I couldn’t find it on their website but there were lots in store when I bought this one.  It’s a really good size and super soft to the touch.

Next are these personalised socks from Alphs.  This company specialises in personalised socks and have a beautiful range to choose from for Mother’s Day and lots of other occasions.  I really love these and will definitely be wearing them with pride on Sunday!  Check out the range here: https://alphs.co/collections/mothers-day   Use the code MOTHERSDAYSOCKS for 20% off their range and if you order before midday you will get free next day delivery!

OLYMPUS DIGITAL CAMERA

Another little personalised item which I purchased recently with the addition of my little man to our family is this cross stitch.  I love how pretty it is and how Amy (the creator) has captured us all!  Her attention to detail blew me away!  Get in touch with her now to see what she can create for you – https://www.etsy.com/uk/shop/MamaSewGoodGifts

I got this little necklace as a Birthday gift and it hasn’t been off my neck since!  I love the mix of both silver and rose gold and the chain is fully adjustable which means it can be worn as a choker or a longer chain.  I have hinted to Harry that I would like the matching bracelet for Mother’s Day so lets hope he produces the goods!!  You can find the necklace here: http://www.argento.co.uk/en/Olivia-Burton-Silver-and-Rose-Gold-Bow-Necklace/m-57984.aspx

Screen Shot 2017-03-20 at 12.00.05

And lastly, you can’t go wrong with a picture of yourself!!  Whose Mum wouldn’t love that?!  Find these canvases here:https://www.photobox.co.uk/shop/wall-decor/canvas-prints#page=details

OLYMPUS DIGITAL CAMERA

If you have any other great ideas for Mother’s Day gifts please let me know!

Hope you enjoy reading as much as I enjoy writing!

Jill

INTERIORS

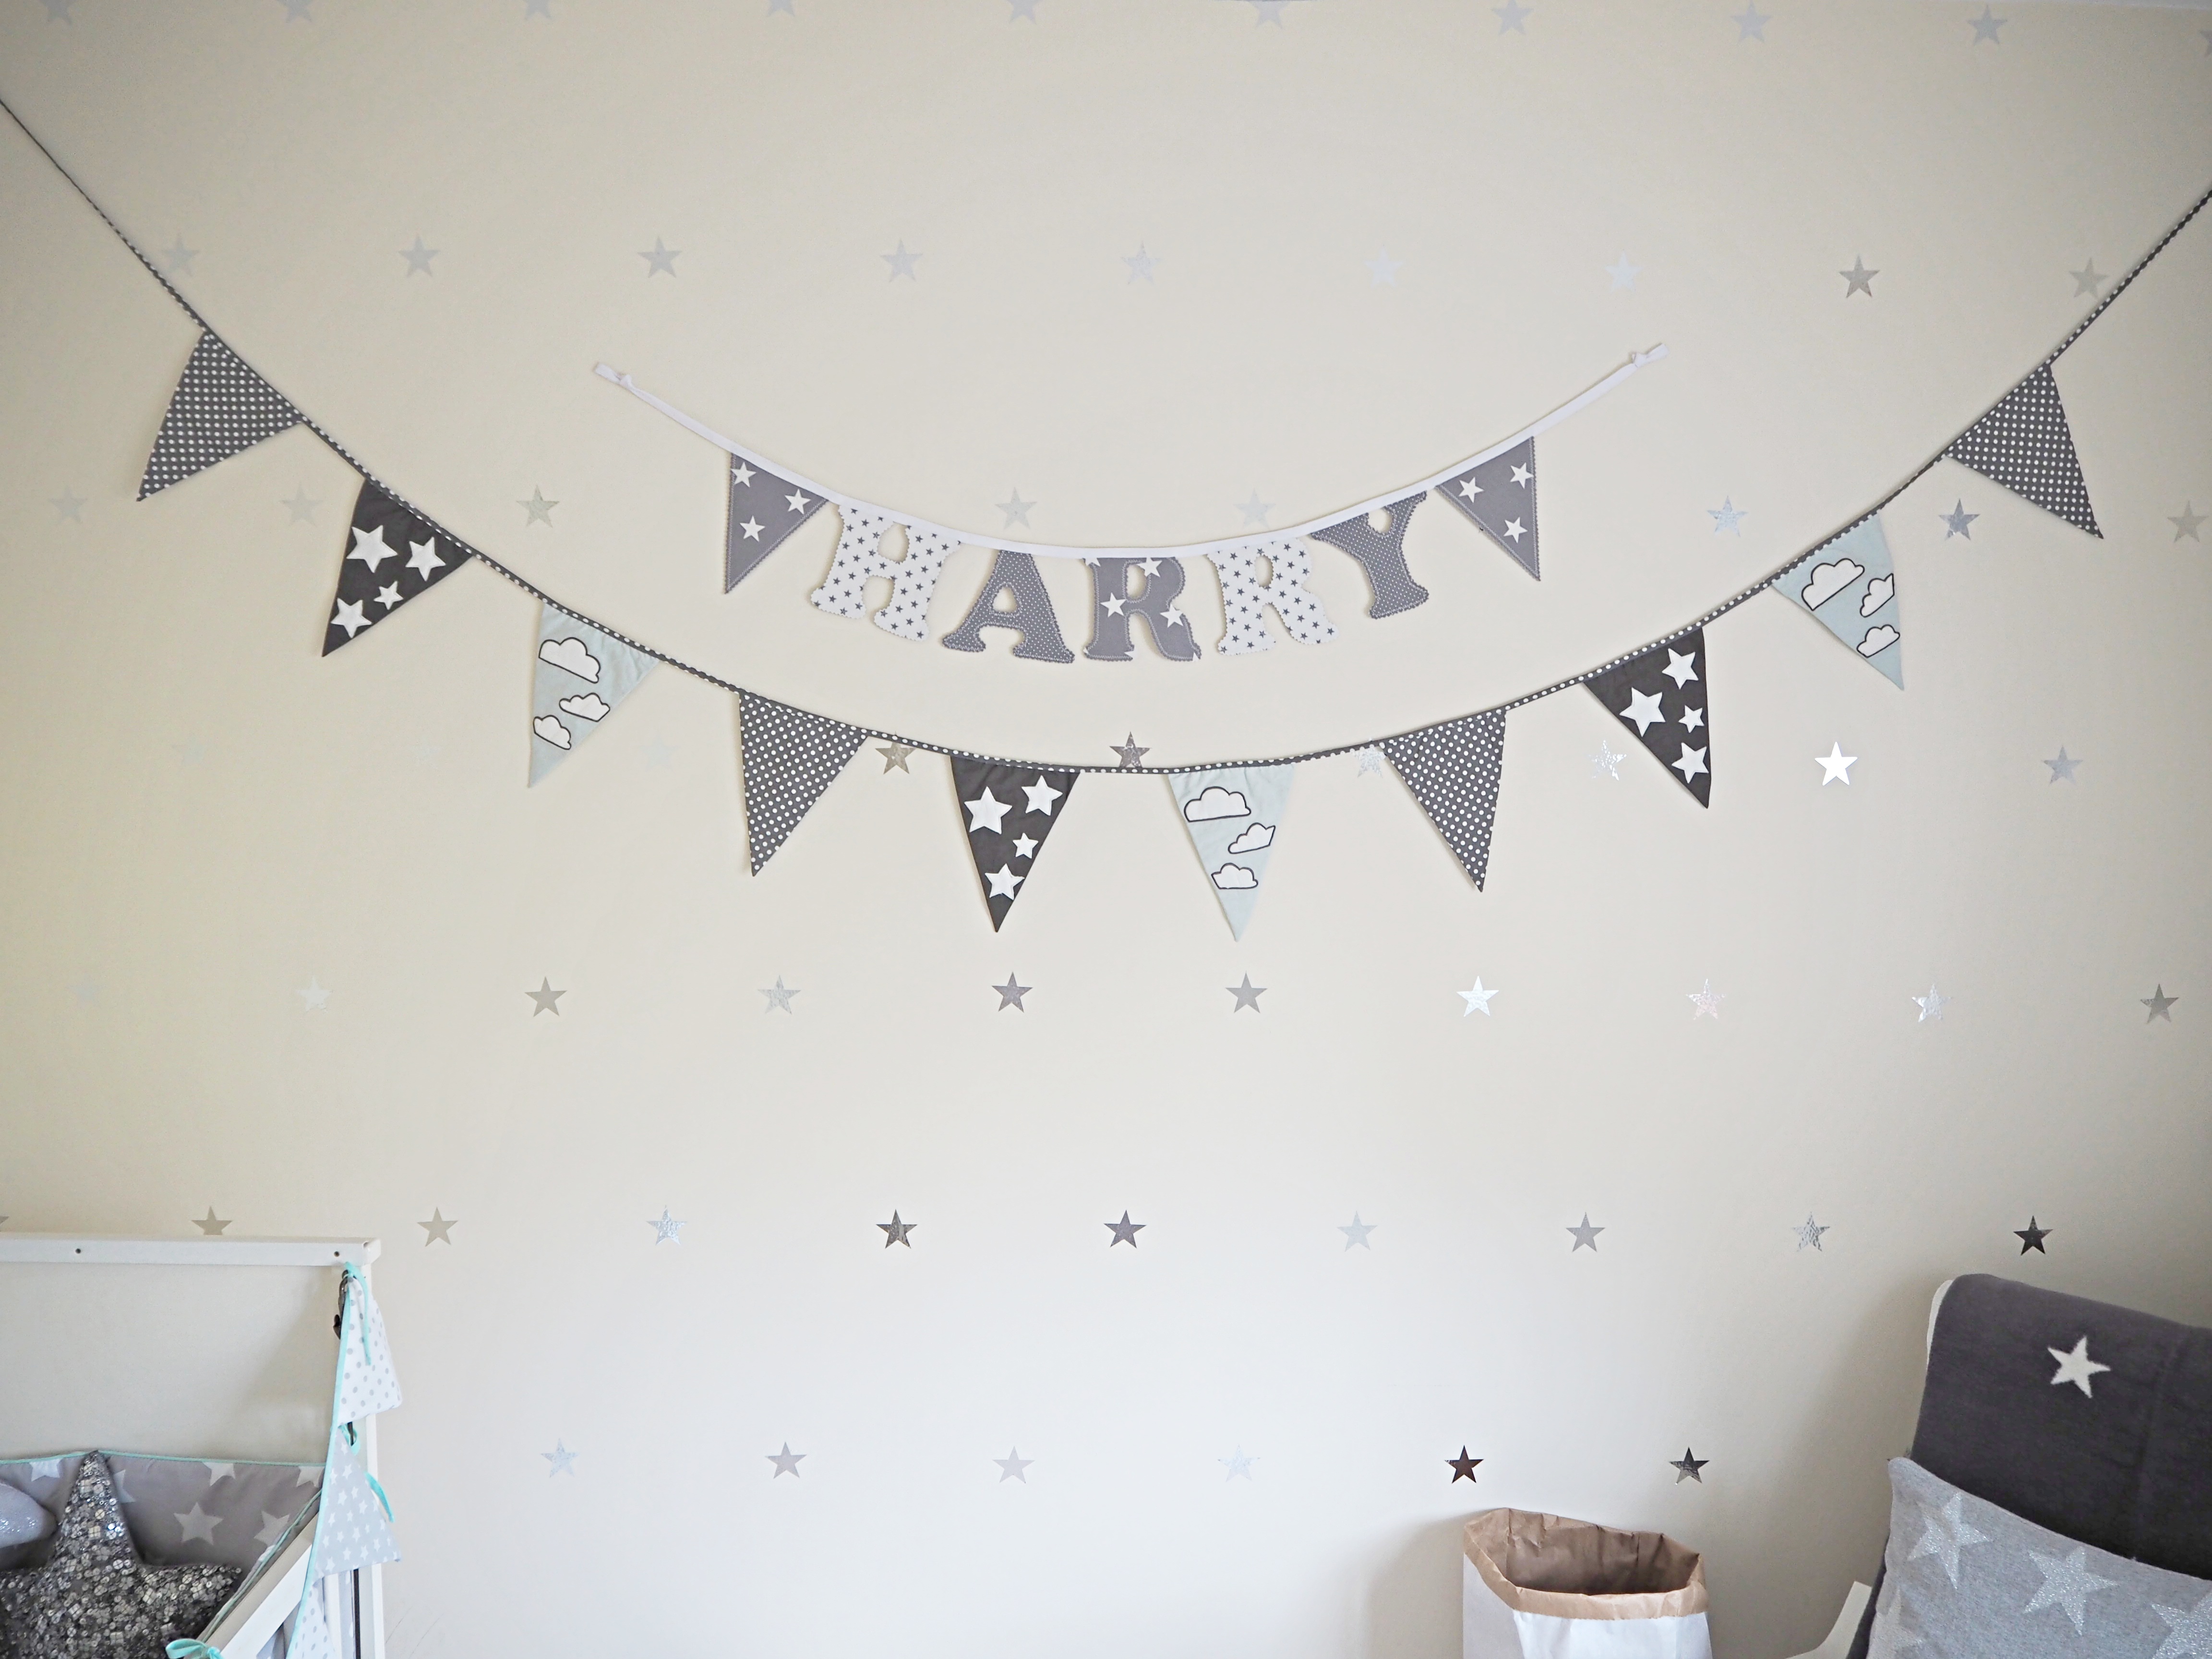
Harry’s Little Room

Hello again!

OLYMPUS DIGITAL CAMERA

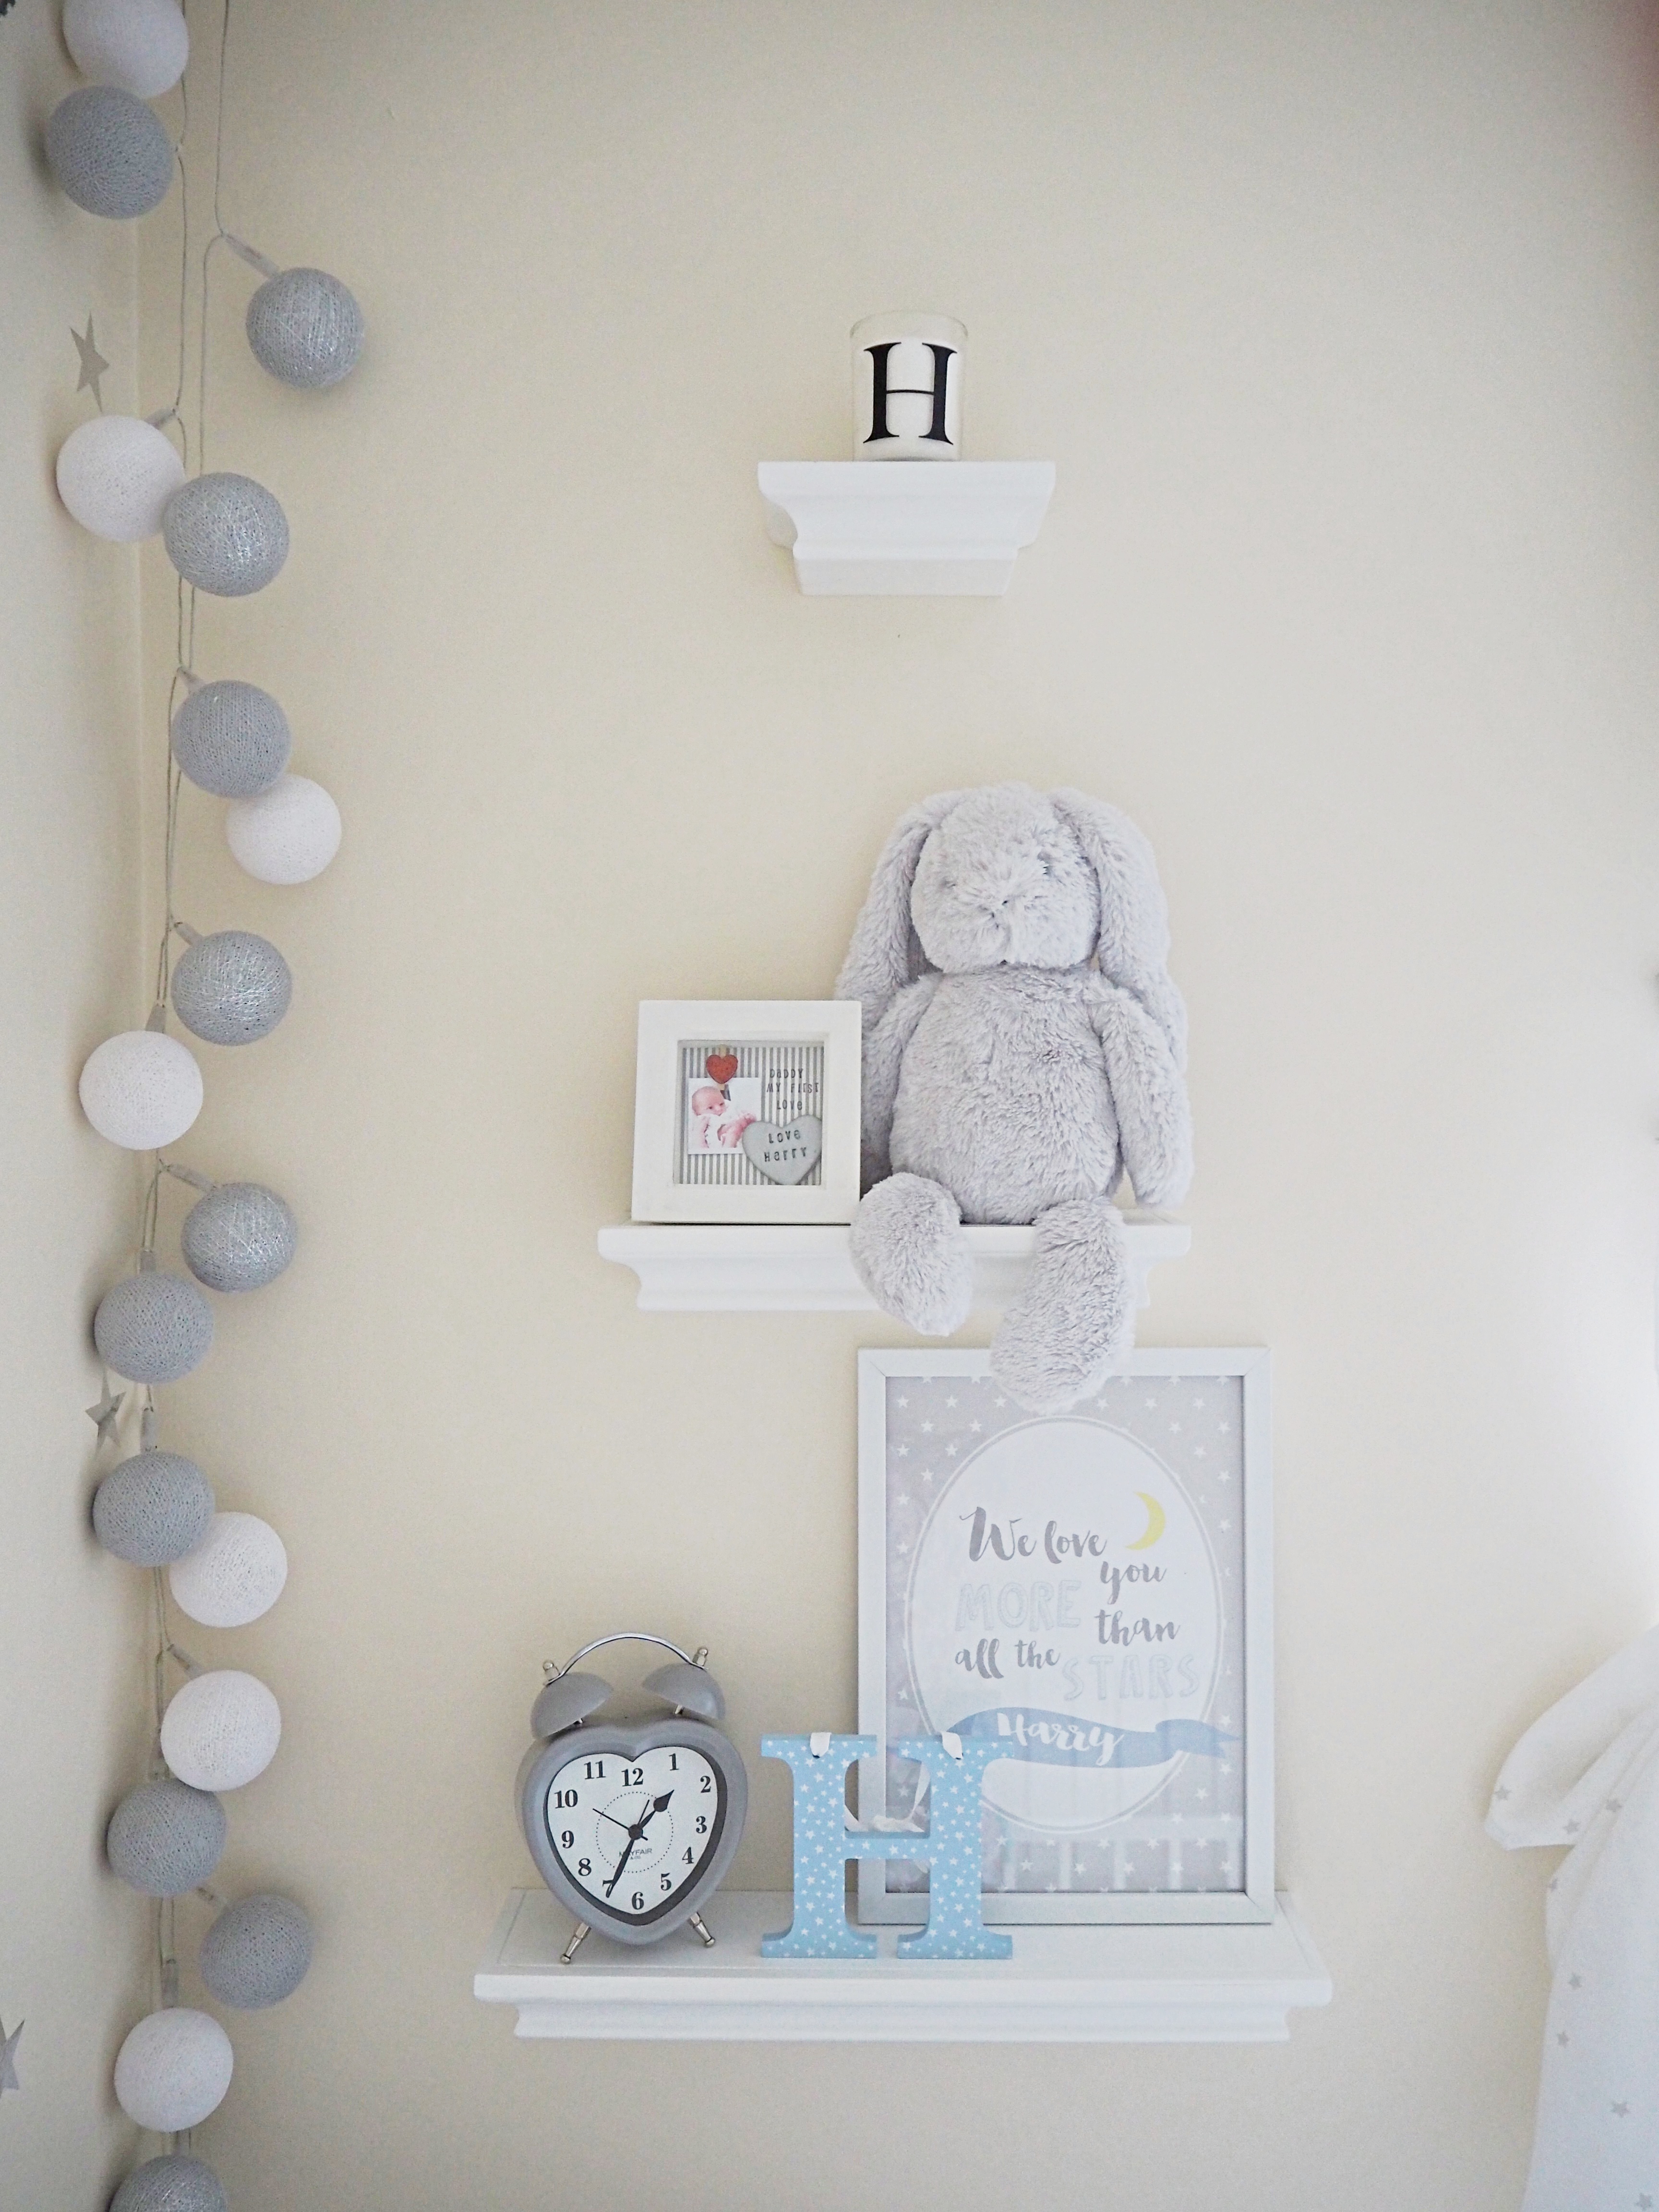
Harry has the first room in the whole house to be totally finished!  We have now been living in Rose Cottage a year and there are still so many finishing touches needed for each room.  I have had to start taking lists out with me shopping to remind me of what I need to get to complete the other rooms! (I’m blaming this on baby brain!!)

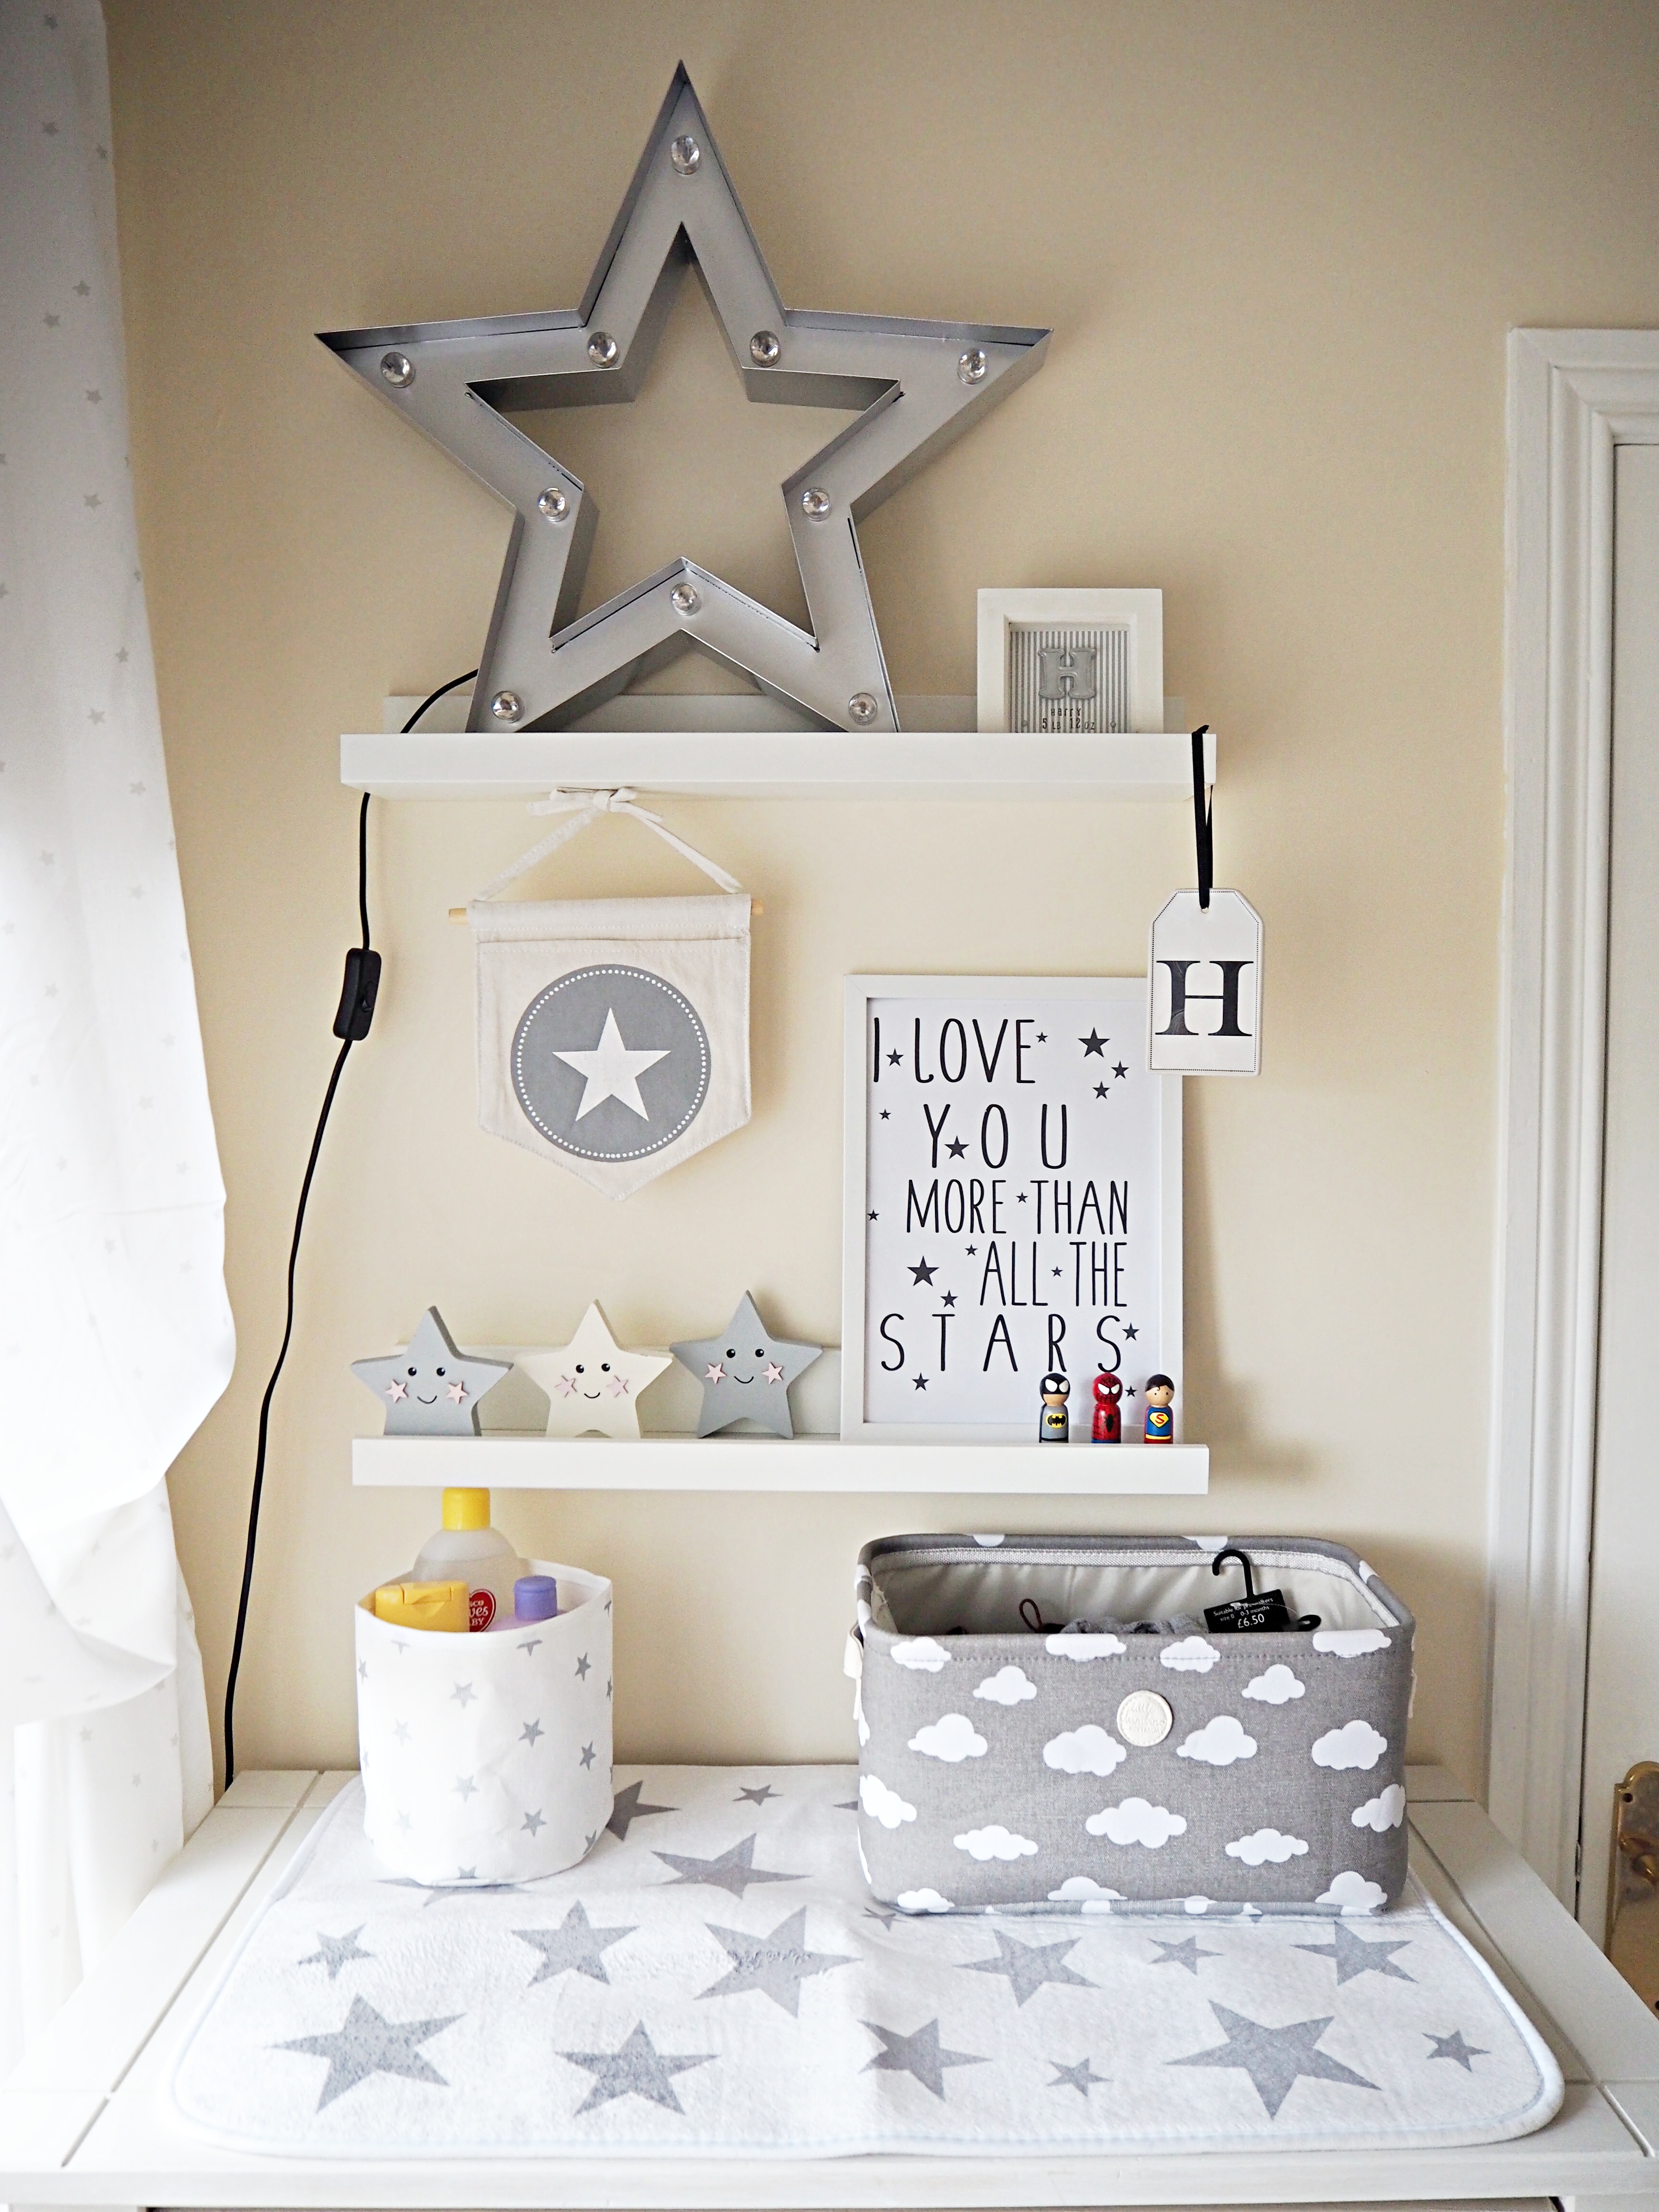
Lots of lovely people on Instagram have commented on Harry’s room so I’ve decided to take you on a little tour!  Some of you may notice I have moved it around a bit – and I think its a much better layout and makes the room feel bigger.

I’ll try my best to provide links of where the items are from, but if I have missed something please feel free to ask!

Chair – http://www.ikea.com/gb/en/products/sofas-armchairs/armchairs/poäng-rocking-chair-white-smidig-black-spr-59163269/

Star Storage Bag – https://www.instagram.com/hello___henry/

OLYMPUS DIGITAL CAMERA

Cotton Ball Lights – http://www.prettyprintsuk.co.uk/product/cotton-ball-lighting

Shelves and Clock – B&M

Print – https://www.etsy.com/uk/shop/FreddieTheKid

Letter H – Matalan

Rabbit – M&S

Small ‘Love Harry’ frame – http://mymummymakes.bigcartel.com

H Candle – Asda

OLYMPUS DIGITAL CAMERA

Personalised Bunting – https://www.instagram.com/dimpledthimble/

OLYMPUS DIGITAL CAMERA

Star Light, H Tag and Star Flag – Next

Small ‘H is for Harry’ frame – http://mymummymakes.bigcartel.com

3 Stars – https://www.instagram.com/homely_rose/

Print – https://www.instagram.com/booandco.designs/

Small Star Storage bag – H&M

Cloud Storage – TKMax

Star Mat – https://www.instagram.com/perfectlylovelyjen/

3 Superhero Pegs – https://www.instagram.com/blossomandwood/

OLYMPUS DIGITAL CAMERA

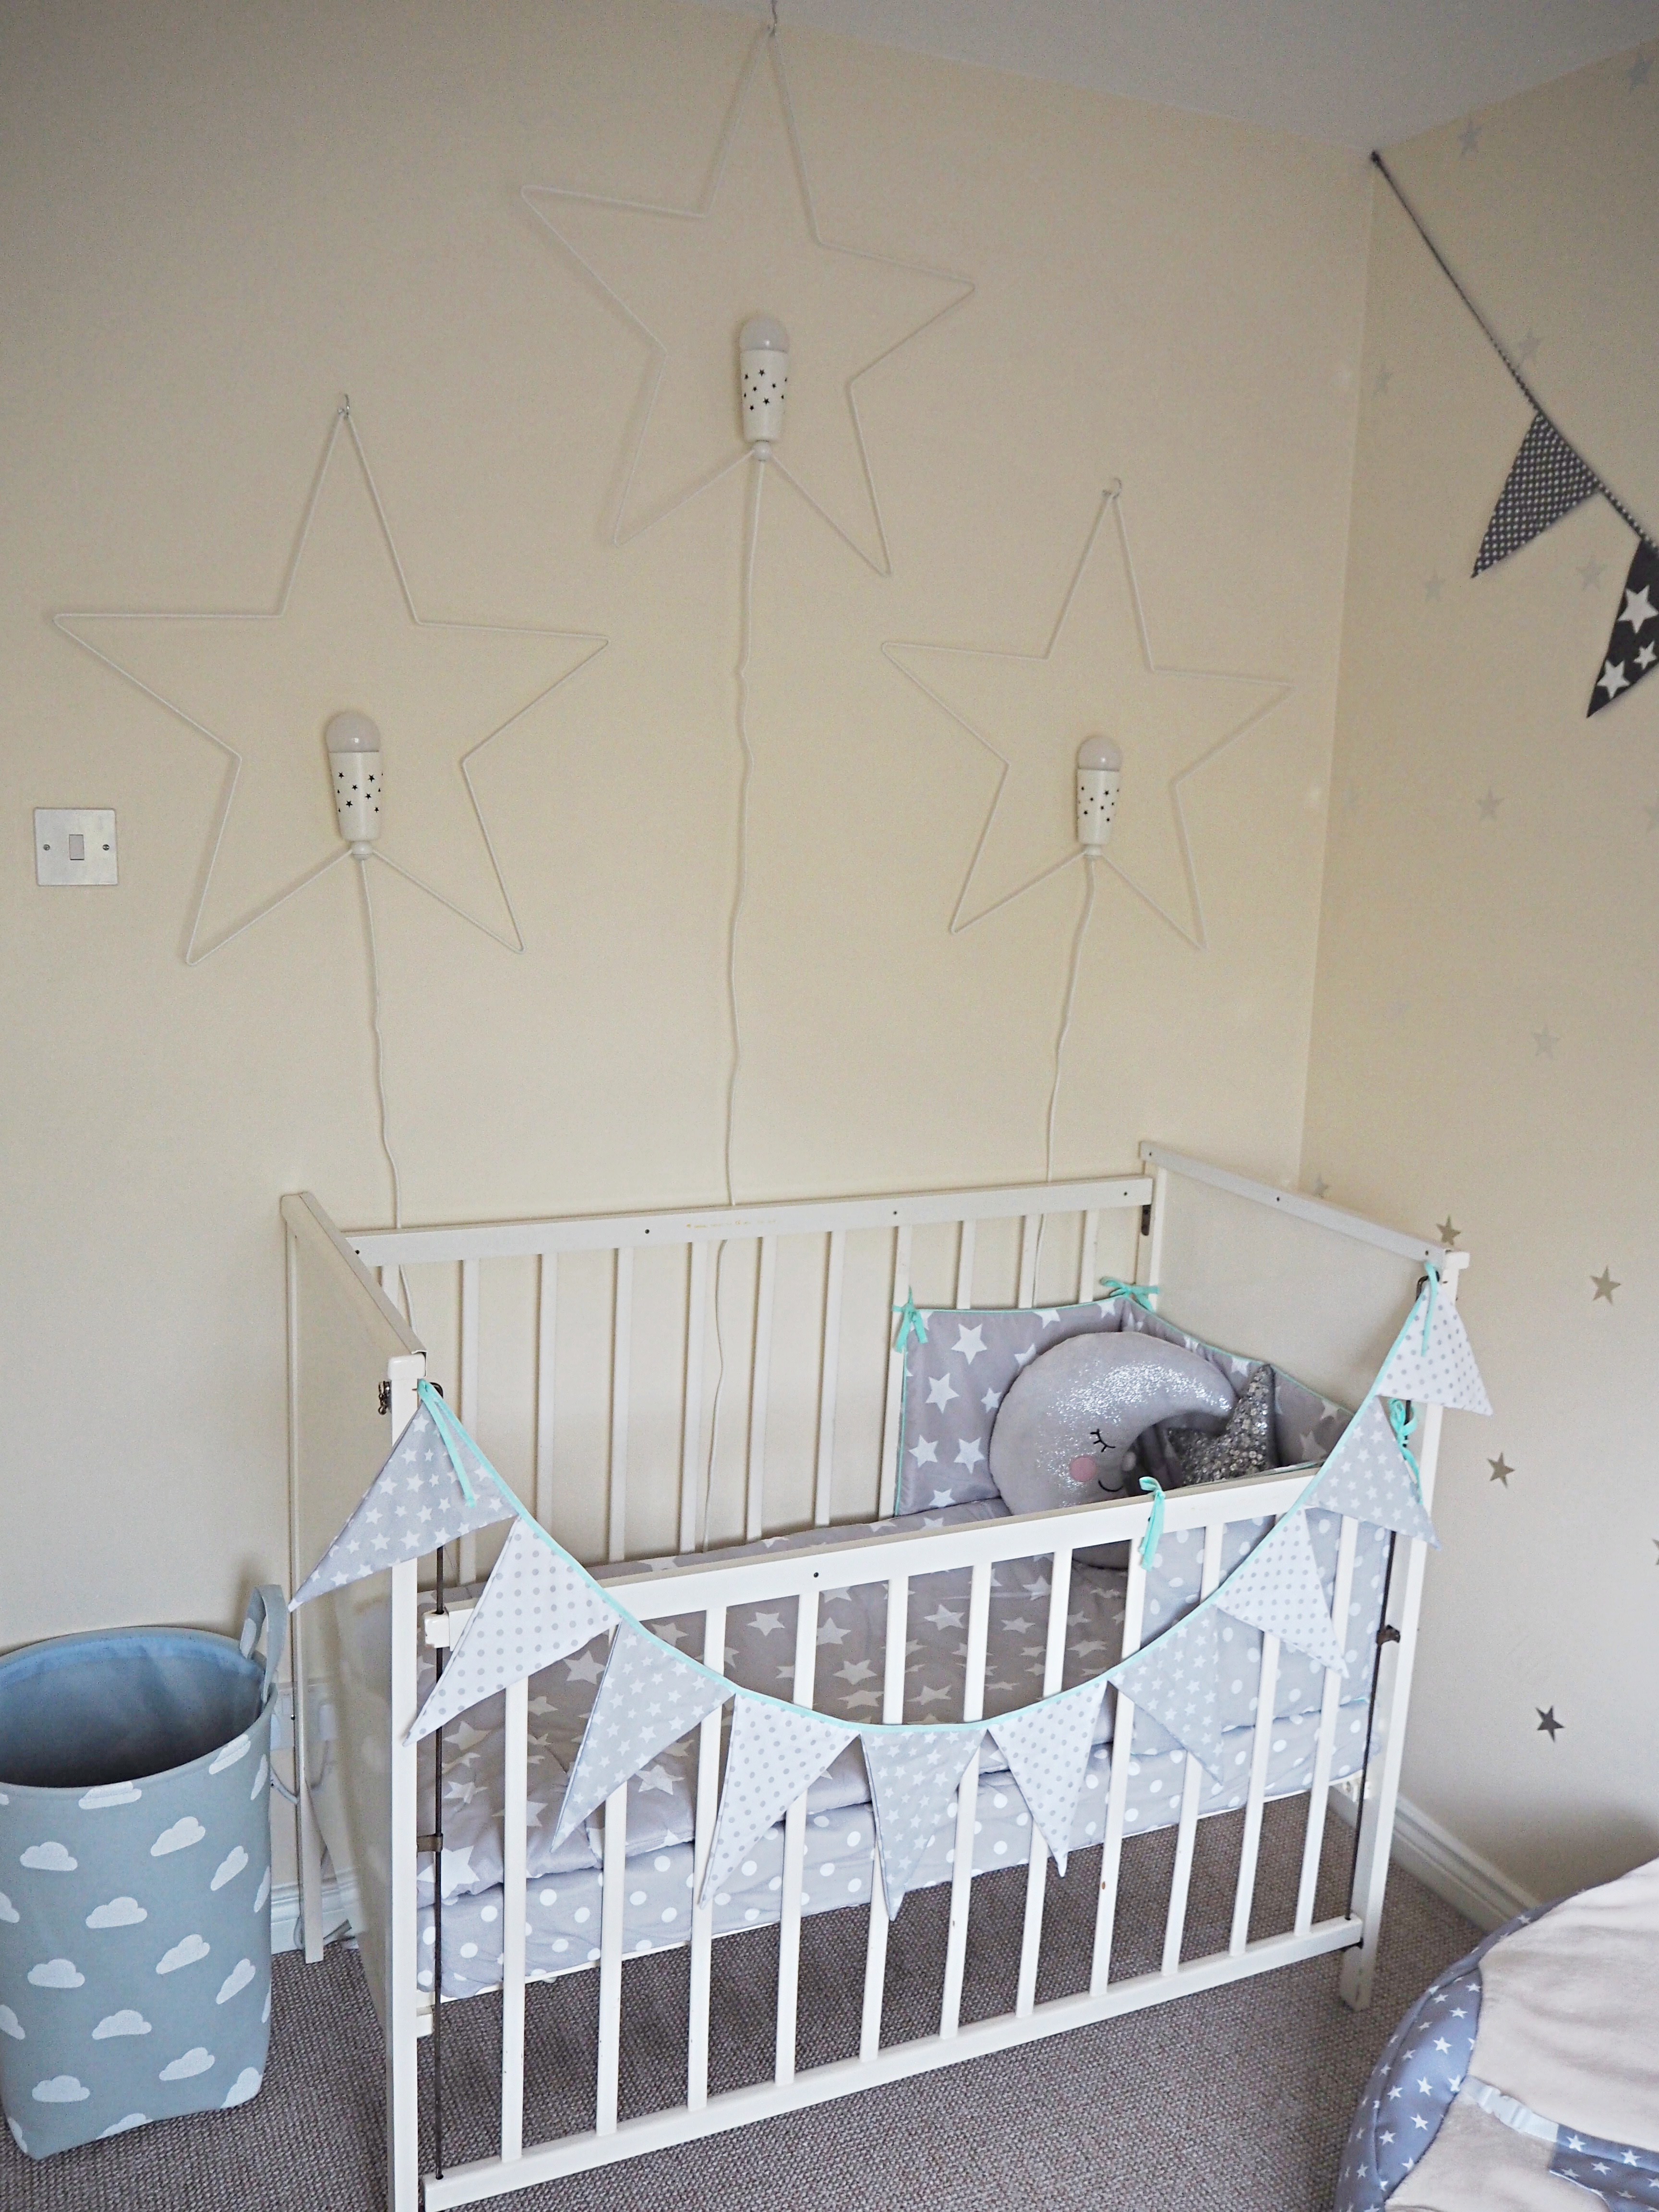
This cot has been passed down through the generations!

Bunting and bedding – B&M

Moon cushion – H&M

Star Lights – Ikea (Christmas range)

Cloud laundry basket – B&M

OLYMPUS DIGITAL CAMERA

Voil curtains – Ikea

Roller Blind – The Range (I added the pompoms)

Hope you enjoy reading as much as I enjoy writing!

Jill

LIFESTYLE

Putting up the Christmas Tree at Rose Cottage

Hello there!

We are in week 2 of the preparations for Christmas at Rose Cottage and hope you’ve been enjoying the run up so far! On Wednesday we put the tree up and showed this in a time lapse video over on insta stories….if only it went up that quickly in real life!!

We have an artificial tree here at Rose Cottage; Just like I talked about in the wreath tutorial (which you can find here), I like how you can manipulate the branches better and can perfect the overall look in comparison to a real tree. I love this tree as it has different styles of branches and a light dusting of snow.

So now to share some tips with you…

Starting with the assembly of the tree. Put on one tier of your branches at a time, starting at the bottom and working your way up. Every branch on your tree must be touched and fluffed out one at a time. This will help to give your tree a fuller look. Bend the branches up at the ends from the inside out, then point in all different directions to look like a palm leaf. We really recommend you spend time on this step as it’s the most important and will affect the overall look of the finished tree.

Moving onto the lights. A lot of people hate this step, as it can be really time consuming and hard to get right! To make it easier for yourself, turn your lights on when putting them onto the tree. This will help you to see exactly where they are going and if there are any gaps needing filled. Again start from the bottom and work your way up. Go up one side of the branch and down the other, weaving in and out. We would recommend using 100 lights per foot of the tree, eg a 7 ft tree will need 700 lights. Put your lights the whole way around your tree; The lights at the back will bounce off the walls and back into the room. When you finish a roll of lights, run the wire down the centre of the tree to the bottom and then to the plug socket. This will create a neater appearance, rather than wires poking out mid tree! Place a string of flashing lights up and down the centre of your tree to draw the eye in and create depth.

Next put on your ribbon. Wrap your ribbon, one roll at a time from the top of the tree to the bottom. We have used 2 different types – tartan and hessian, just like on the wreath, to tie in with our Christmas theme. Twist the ribbon as you go round, pushing some bits in and pulling others out at intervals. Wrap some hessian ribbon around the bottom of the tree to hide your wires.

Now for your decorations and baubles. Separate your baubles into small, medium and large. Put the larger ones at the bottom and smaller ones as you go up to the top. The more plain baubles are to be used as fillers and put in towards the centre on your tree. Baubles should not be touching the branches below, instead hanging mid air. At this stage you may need to rearrange some branches as you go along. Don’t put all your decorations on at once, put a few on a time, stand back to have a good look, then put some more on until happy. If your bauble string is a bit long, wrap it around the branch a few times to make shorter.

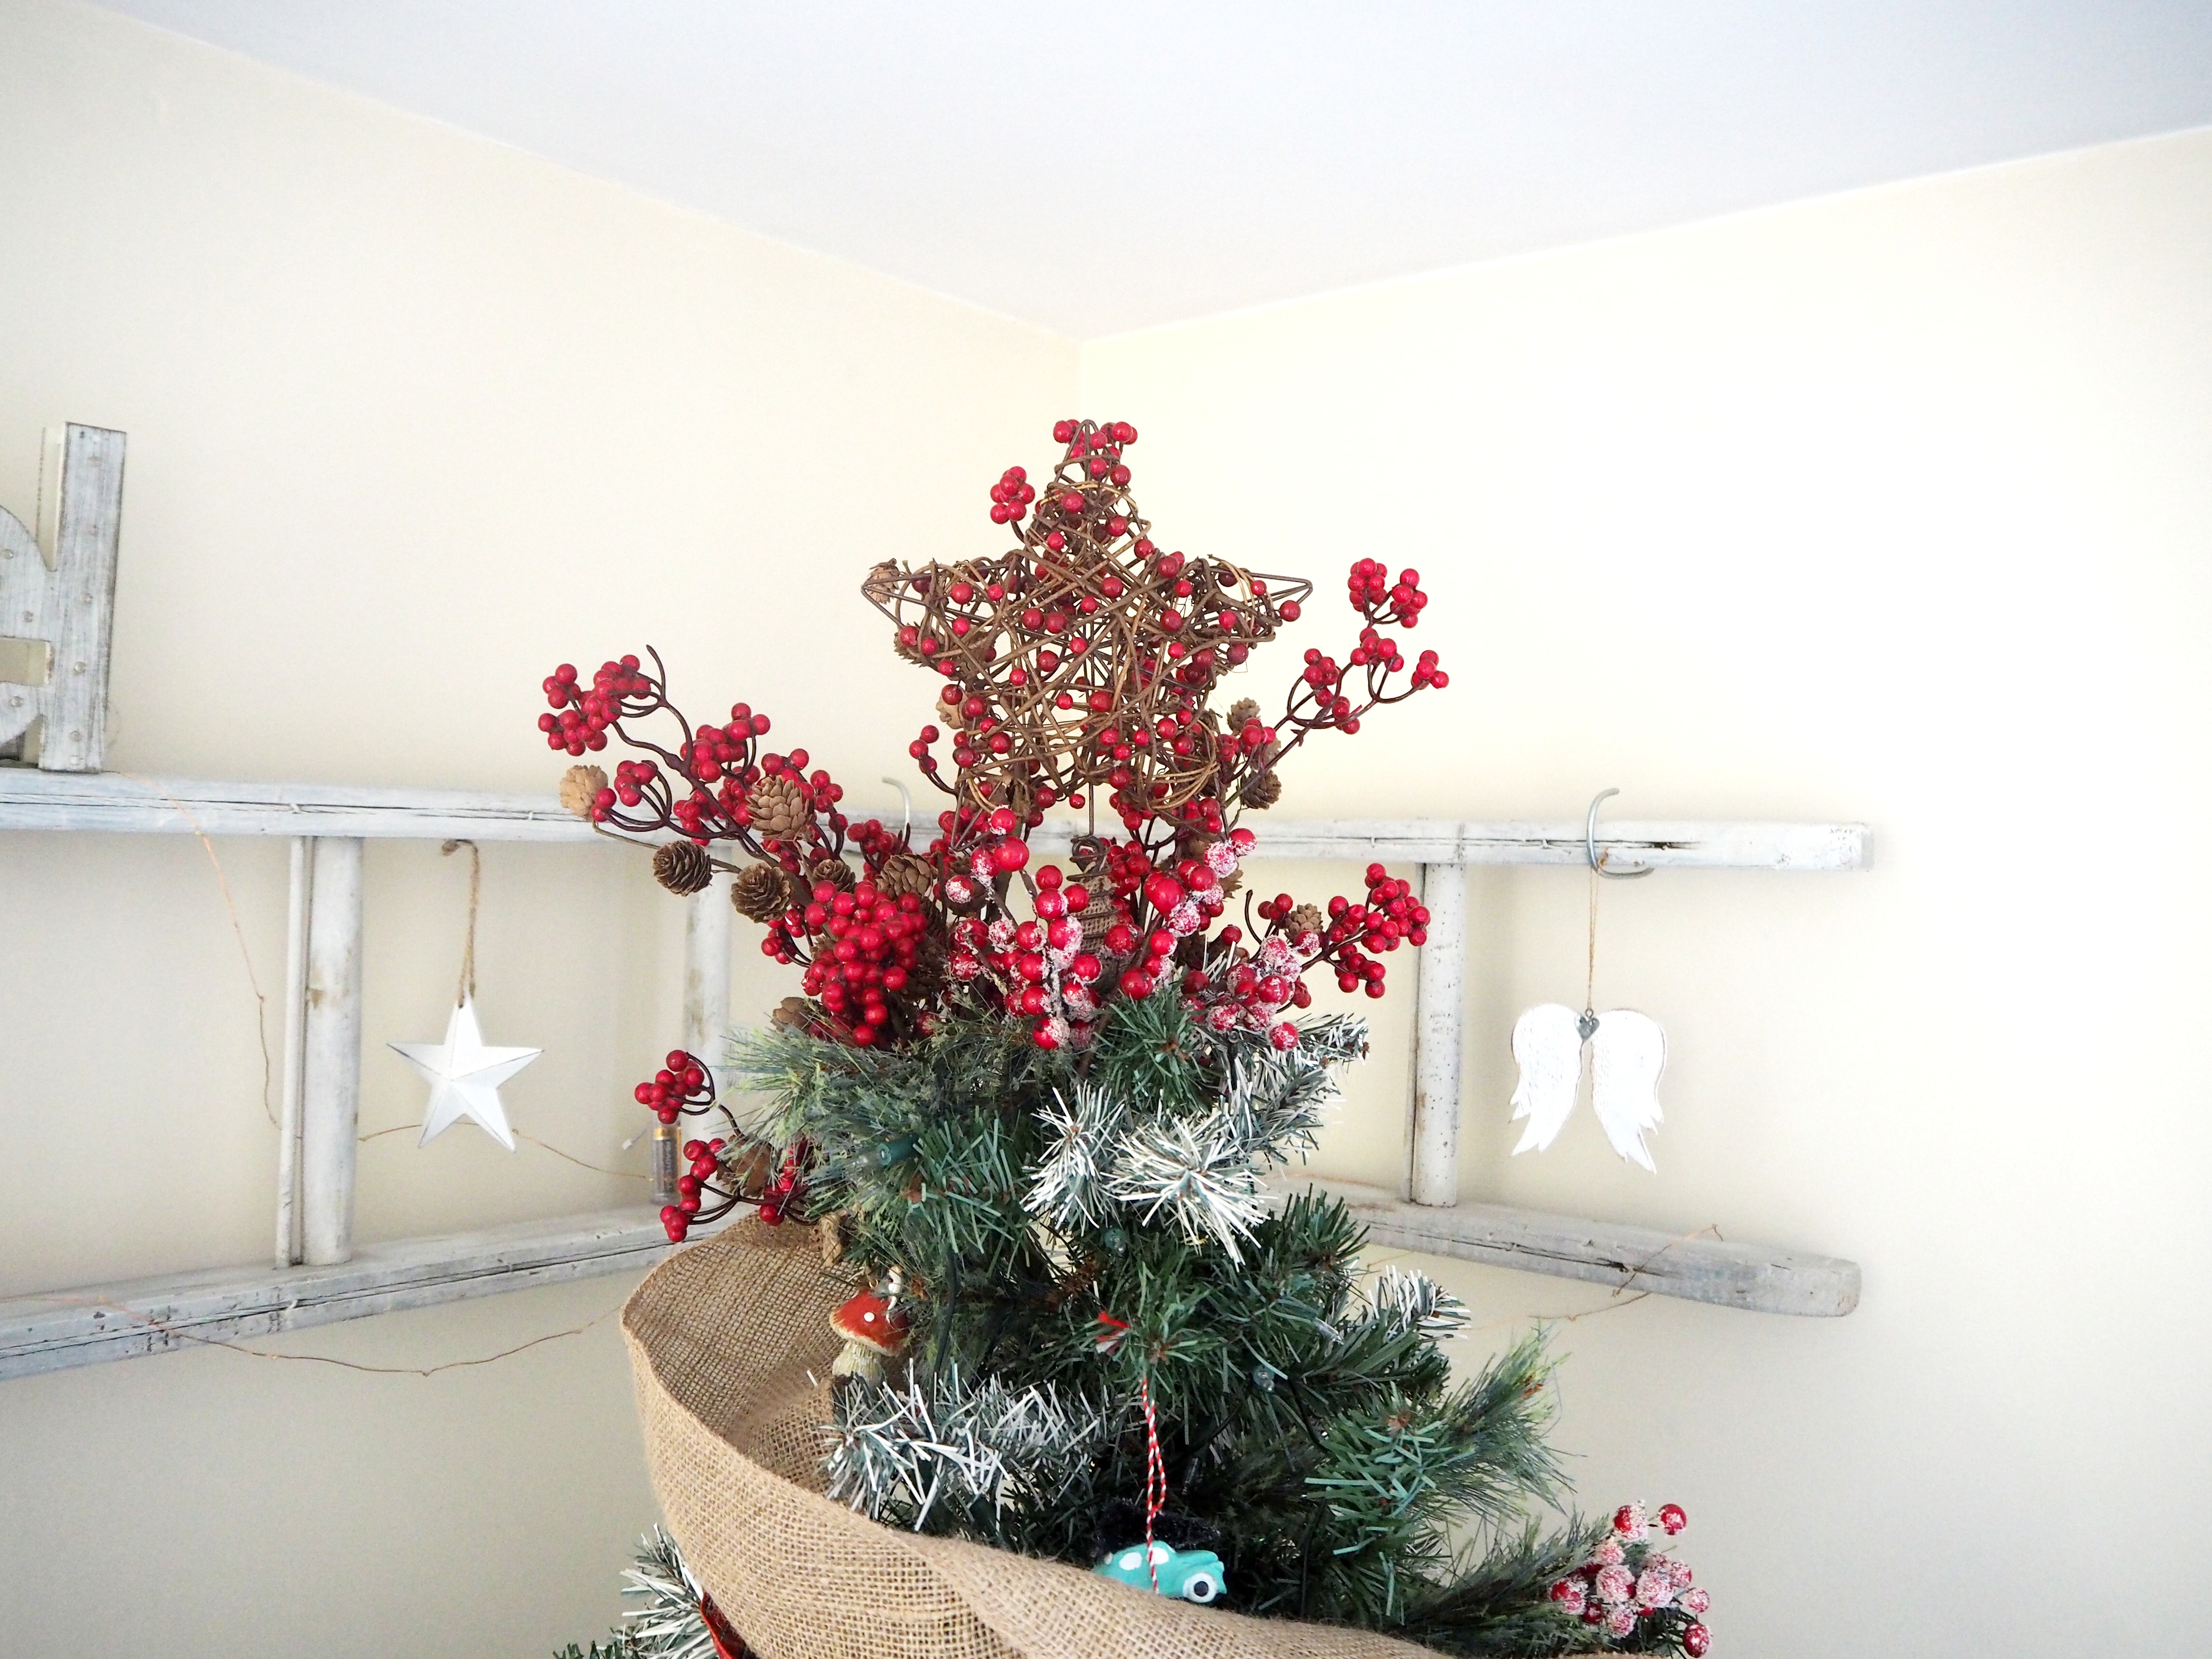
And lastly the focal point at the top of your tree.  We love the illusion of an explosion coming out of the top, so have used some berries and pinecones on sticks poking from the top and sides of the star.  We also added some of these berries on sticks peaking out from various branches around the tree.

OLYMPUS DIGITAL CAMERA

And here it is finished!

OLYMPUS DIGITAL CAMERA

We hope you find these tips helpful in perfecting your own tree and if you have any others we would love to hear them!

Hope you enjoy reading, as much as I enjoy writing!

Jill