LIFESTYLE

Putting up the Christmas Tree at Rose Cottage

Hello there!

We are in week 2 of the preparations for Christmas at Rose Cottage and hope you’ve been enjoying the run up so far! On Wednesday we put the tree up and showed this in a time lapse video over on insta stories….if only it went up that quickly in real life!!

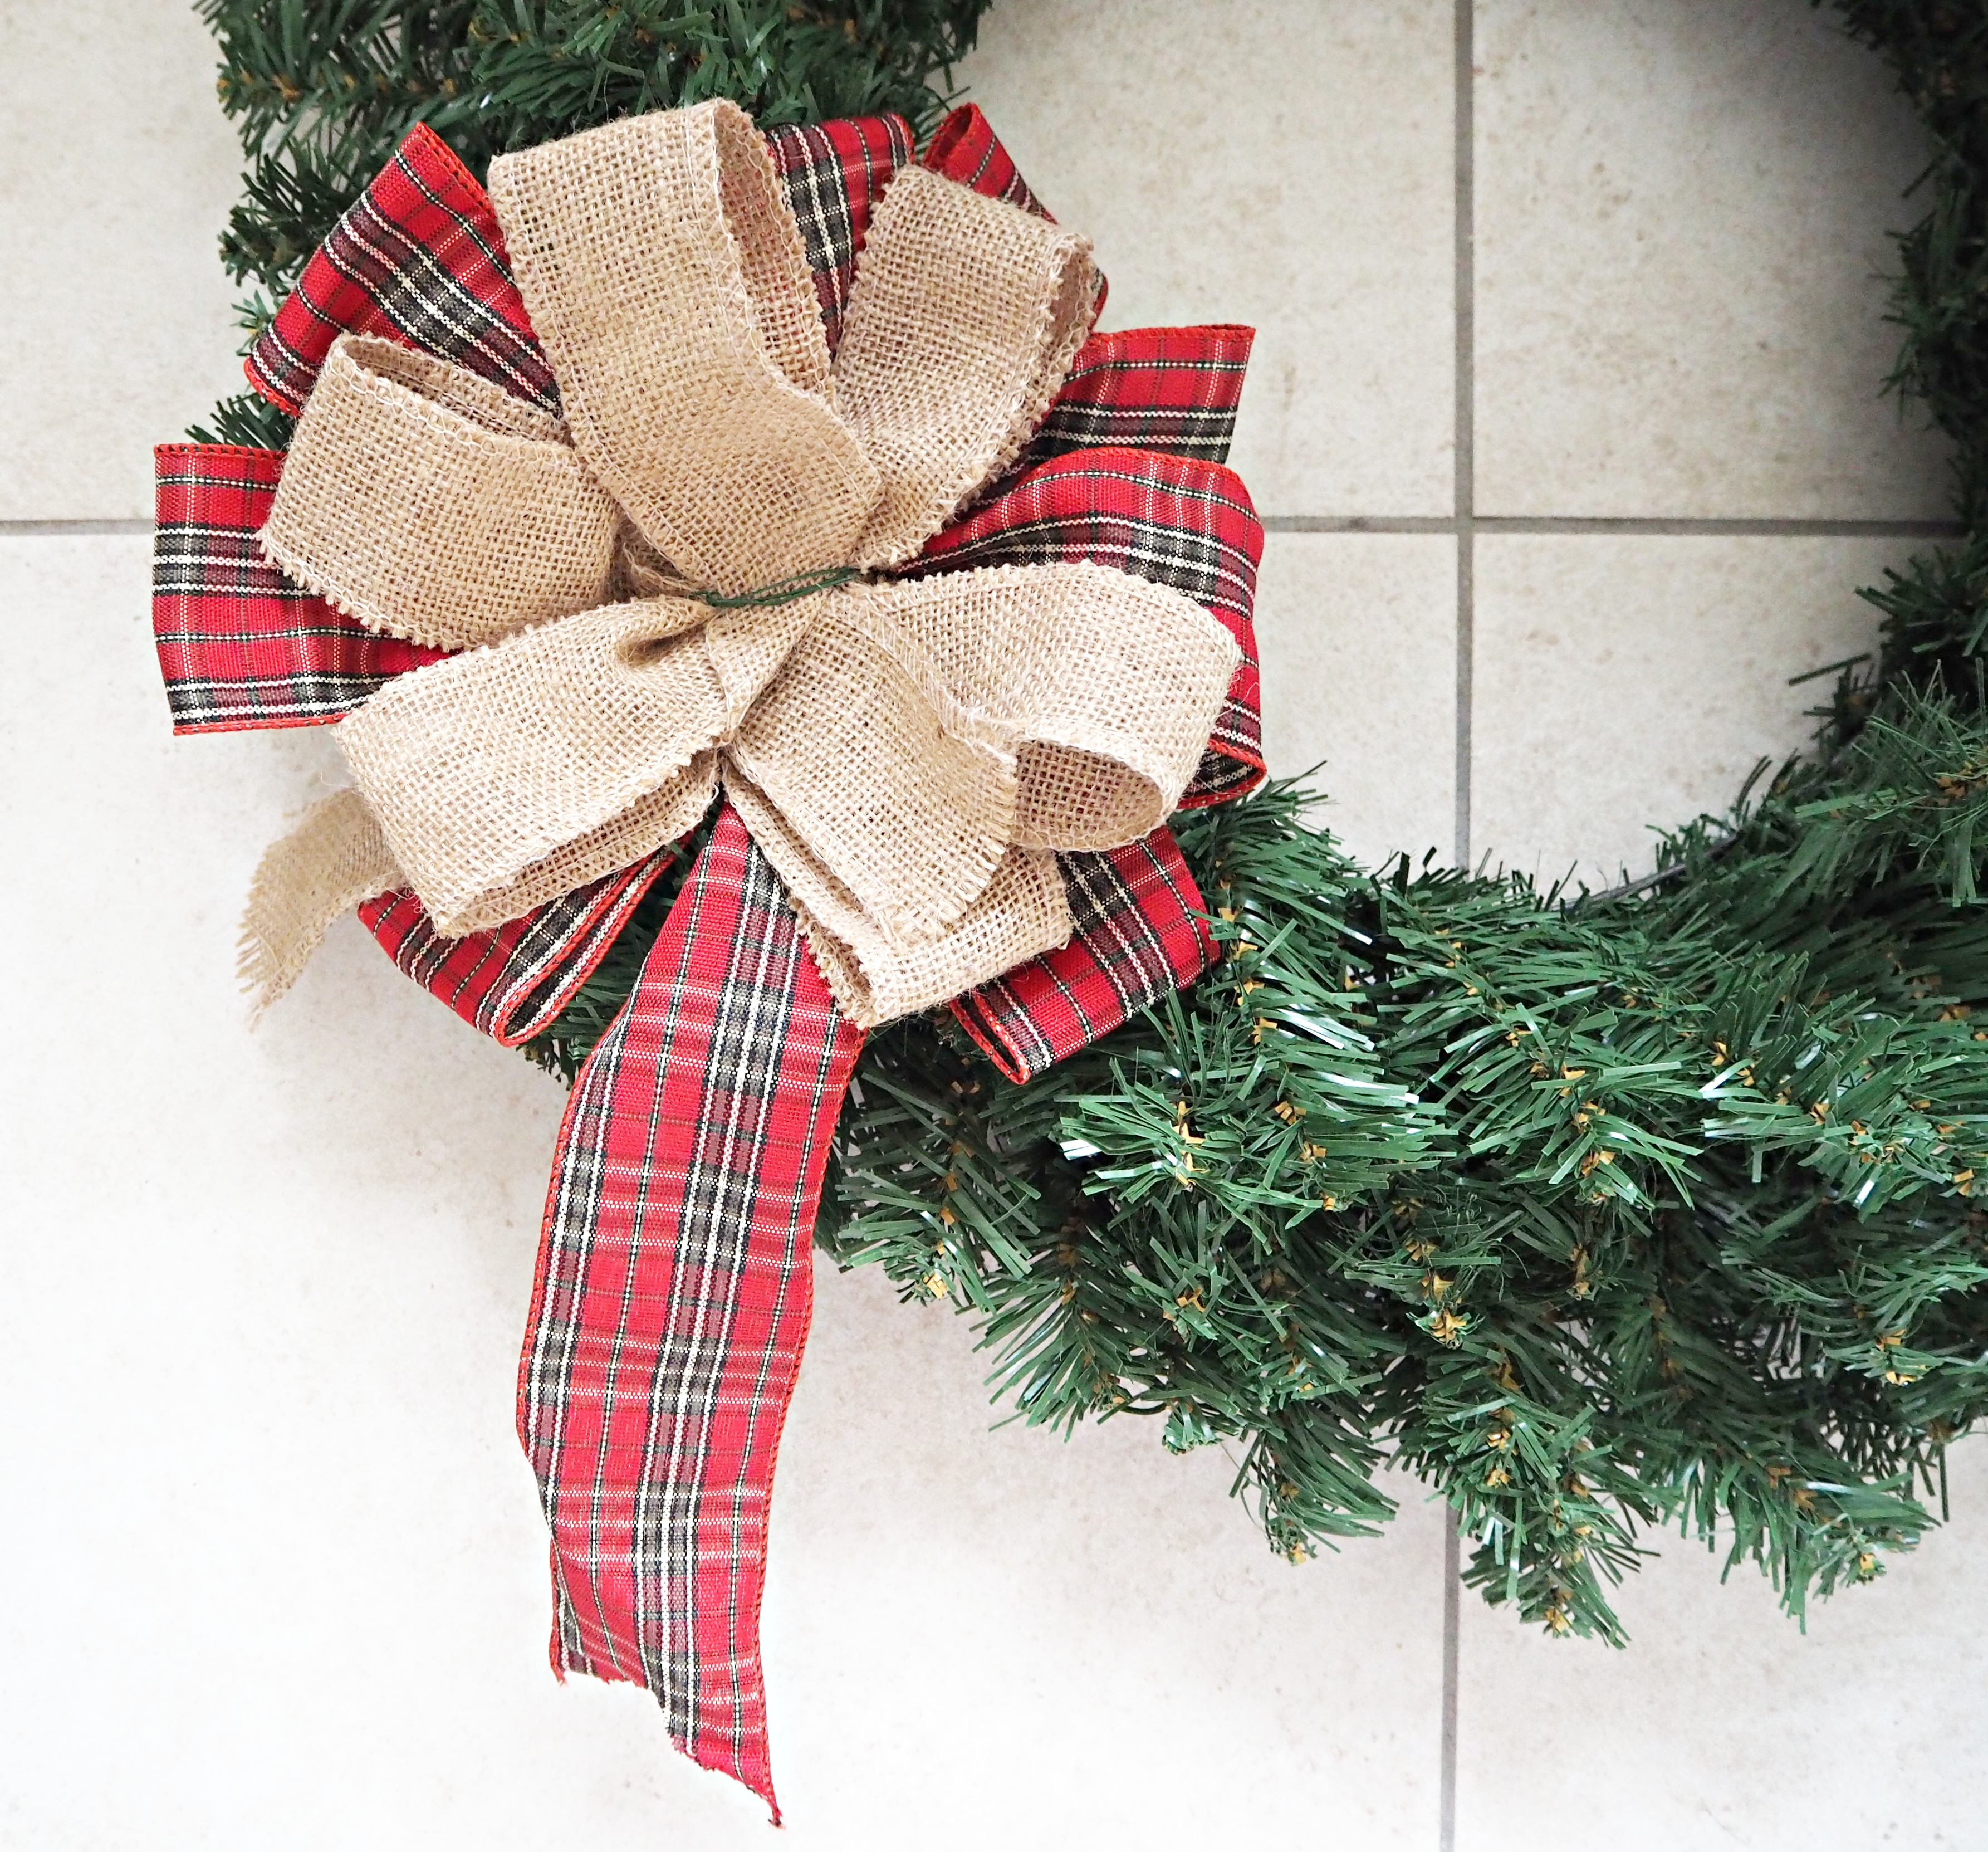
We have an artificial tree here at Rose Cottage; Just like I talked about in the wreath tutorial (which you can find here), I like how you can manipulate the branches better and can perfect the overall look in comparison to a real tree. I love this tree as it has different styles of branches and a light dusting of snow.

So now to share some tips with you…

Starting with the assembly of the tree. Put on one tier of your branches at a time, starting at the bottom and working your way up. Every branch on your tree must be touched and fluffed out one at a time. This will help to give your tree a fuller look. Bend the branches up at the ends from the inside out, then point in all different directions to look like a palm leaf. We really recommend you spend time on this step as it’s the most important and will affect the overall look of the finished tree.

Moving onto the lights. A lot of people hate this step, as it can be really time consuming and hard to get right! To make it easier for yourself, turn your lights on when putting them onto the tree. This will help you to see exactly where they are going and if there are any gaps needing filled. Again start from the bottom and work your way up. Go up one side of the branch and down the other, weaving in and out. We would recommend using 100 lights per foot of the tree, eg a 7 ft tree will need 700 lights. Put your lights the whole way around your tree; The lights at the back will bounce off the walls and back into the room. When you finish a roll of lights, run the wire down the centre of the tree to the bottom and then to the plug socket. This will create a neater appearance, rather than wires poking out mid tree! Place a string of flashing lights up and down the centre of your tree to draw the eye in and create depth.

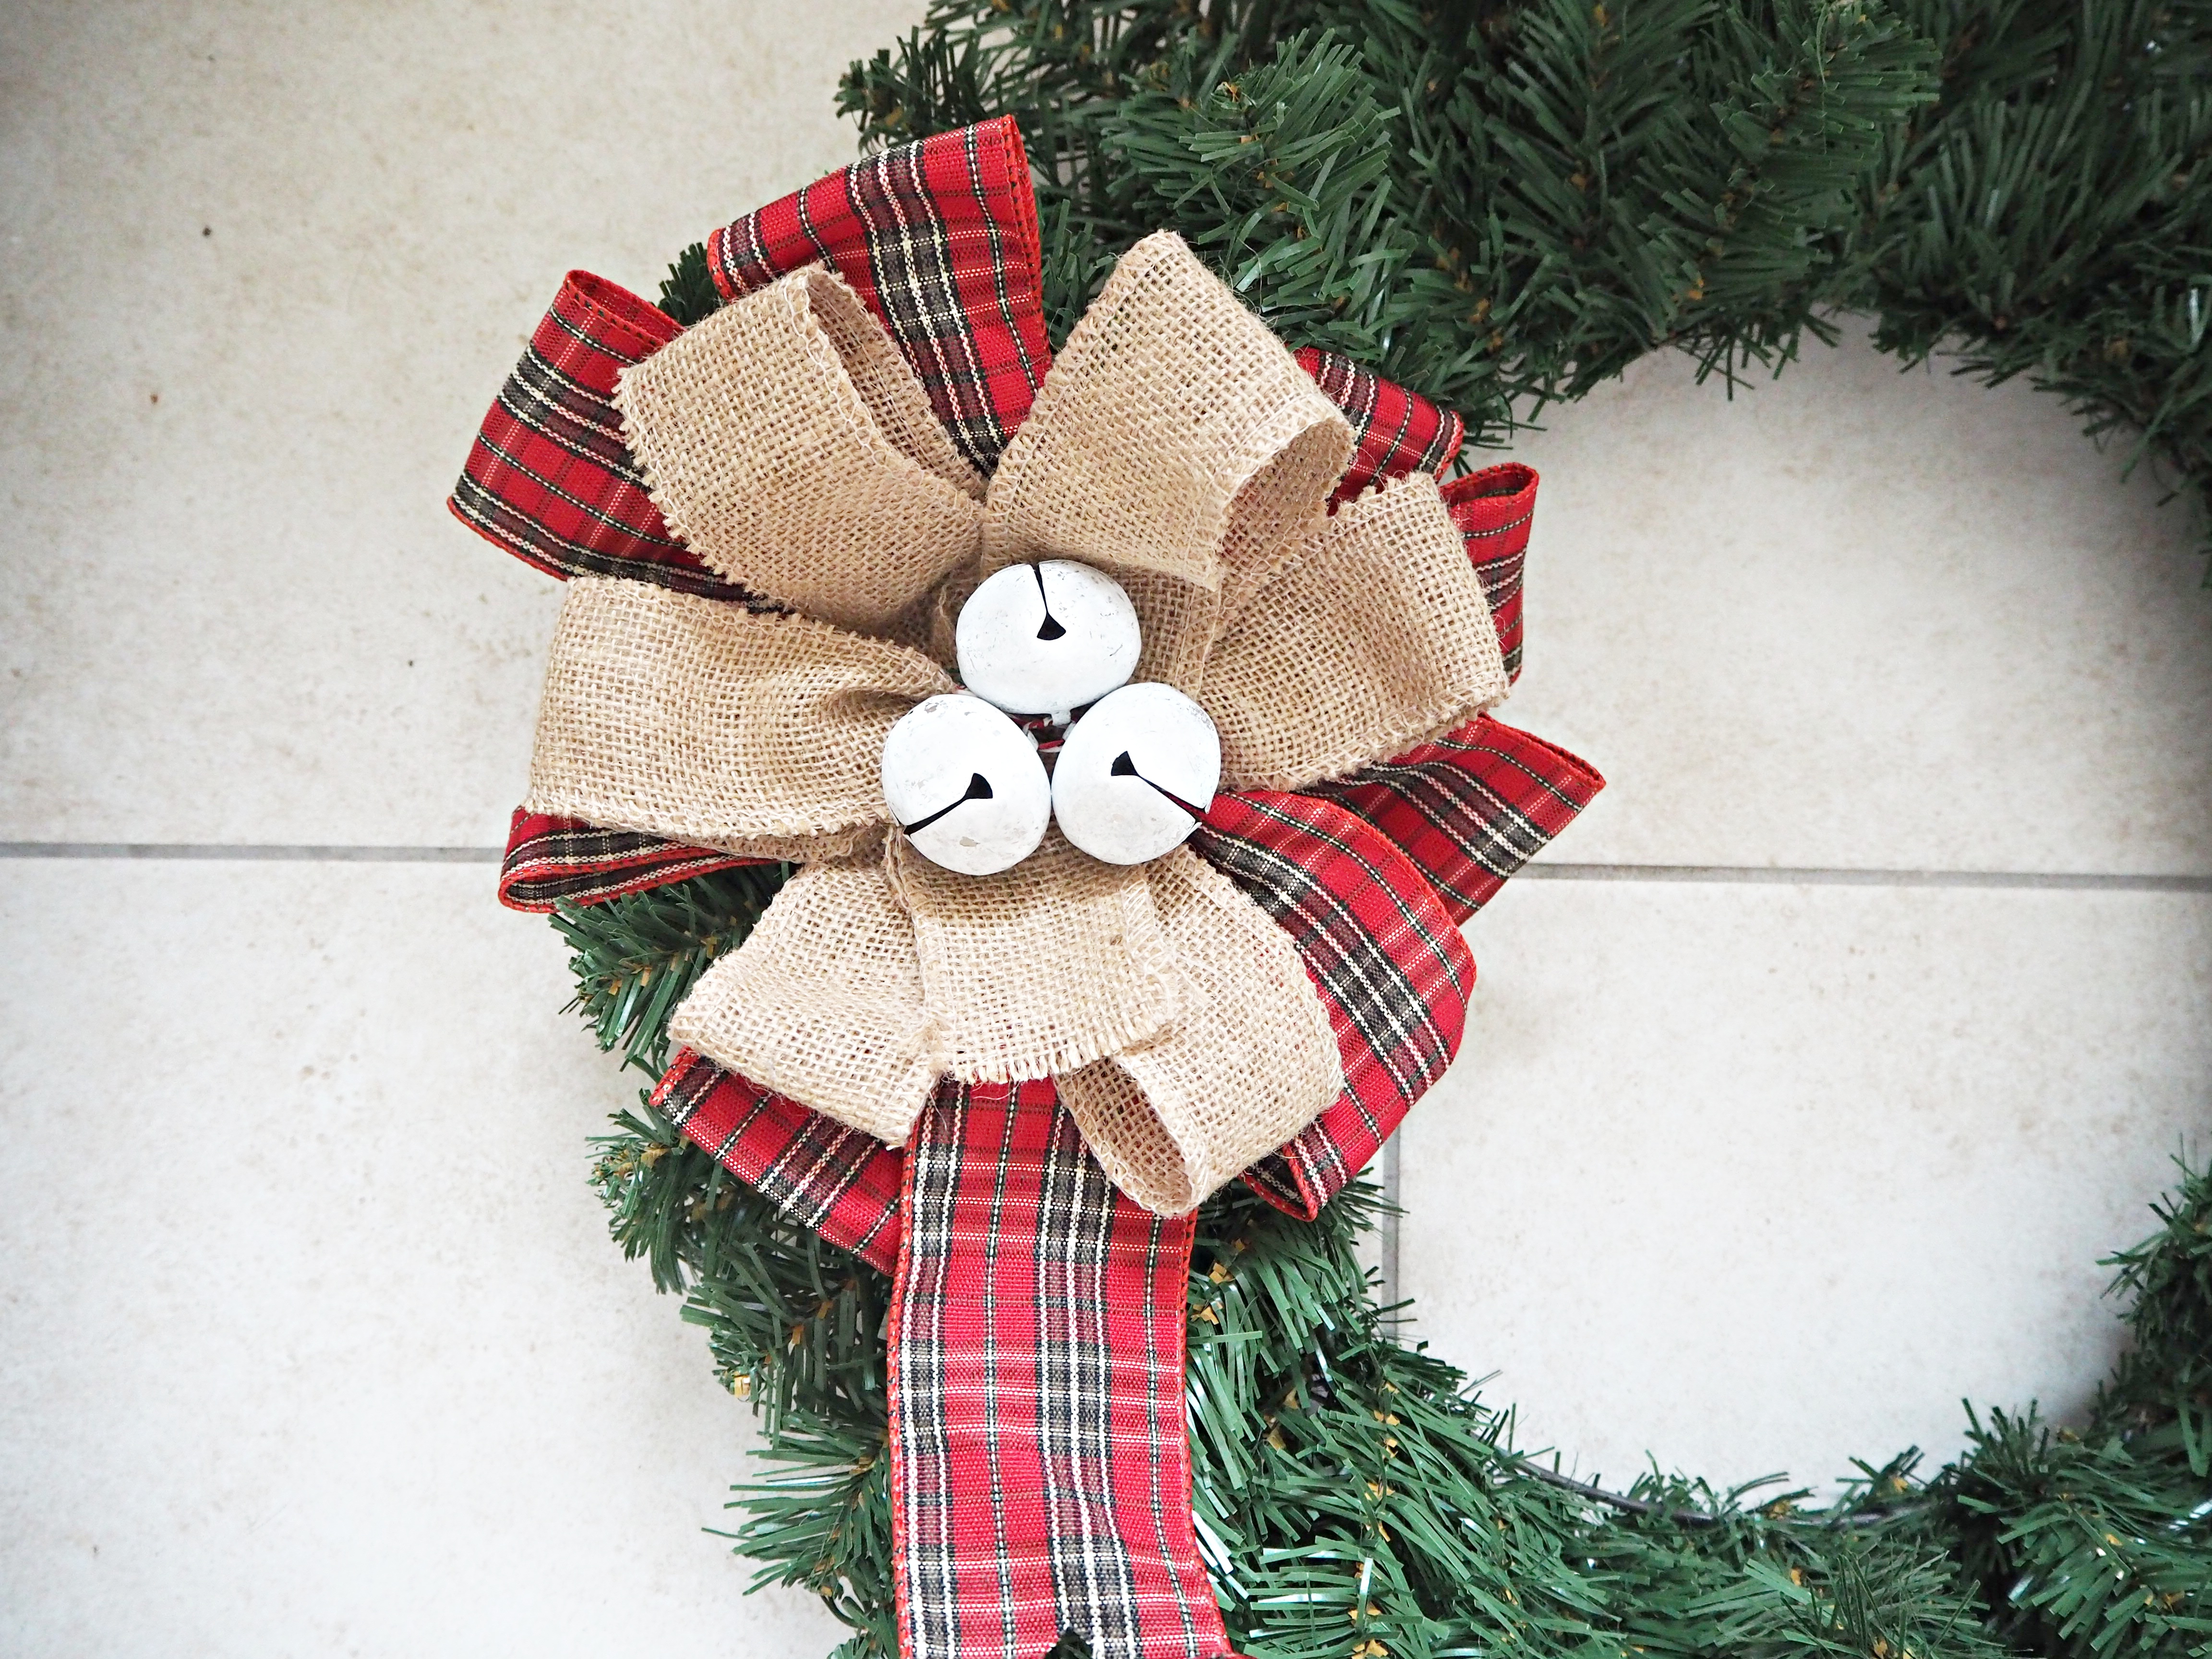
Next put on your ribbon. Wrap your ribbon, one roll at a time from the top of the tree to the bottom. We have used 2 different types – tartan and hessian, just like on the wreath, to tie in with our Christmas theme. Twist the ribbon as you go round, pushing some bits in and pulling others out at intervals. Wrap some hessian ribbon around the bottom of the tree to hide your wires.

Now for your decorations and baubles. Separate your baubles into small, medium and large. Put the larger ones at the bottom and smaller ones as you go up to the top. The more plain baubles are to be used as fillers and put in towards the centre on your tree. Baubles should not be touching the branches below, instead hanging mid air. At this stage you may need to rearrange some branches as you go along. Don’t put all your decorations on at once, put a few on a time, stand back to have a good look, then put some more on until happy. If your bauble string is a bit long, wrap it around the branch a few times to make shorter.

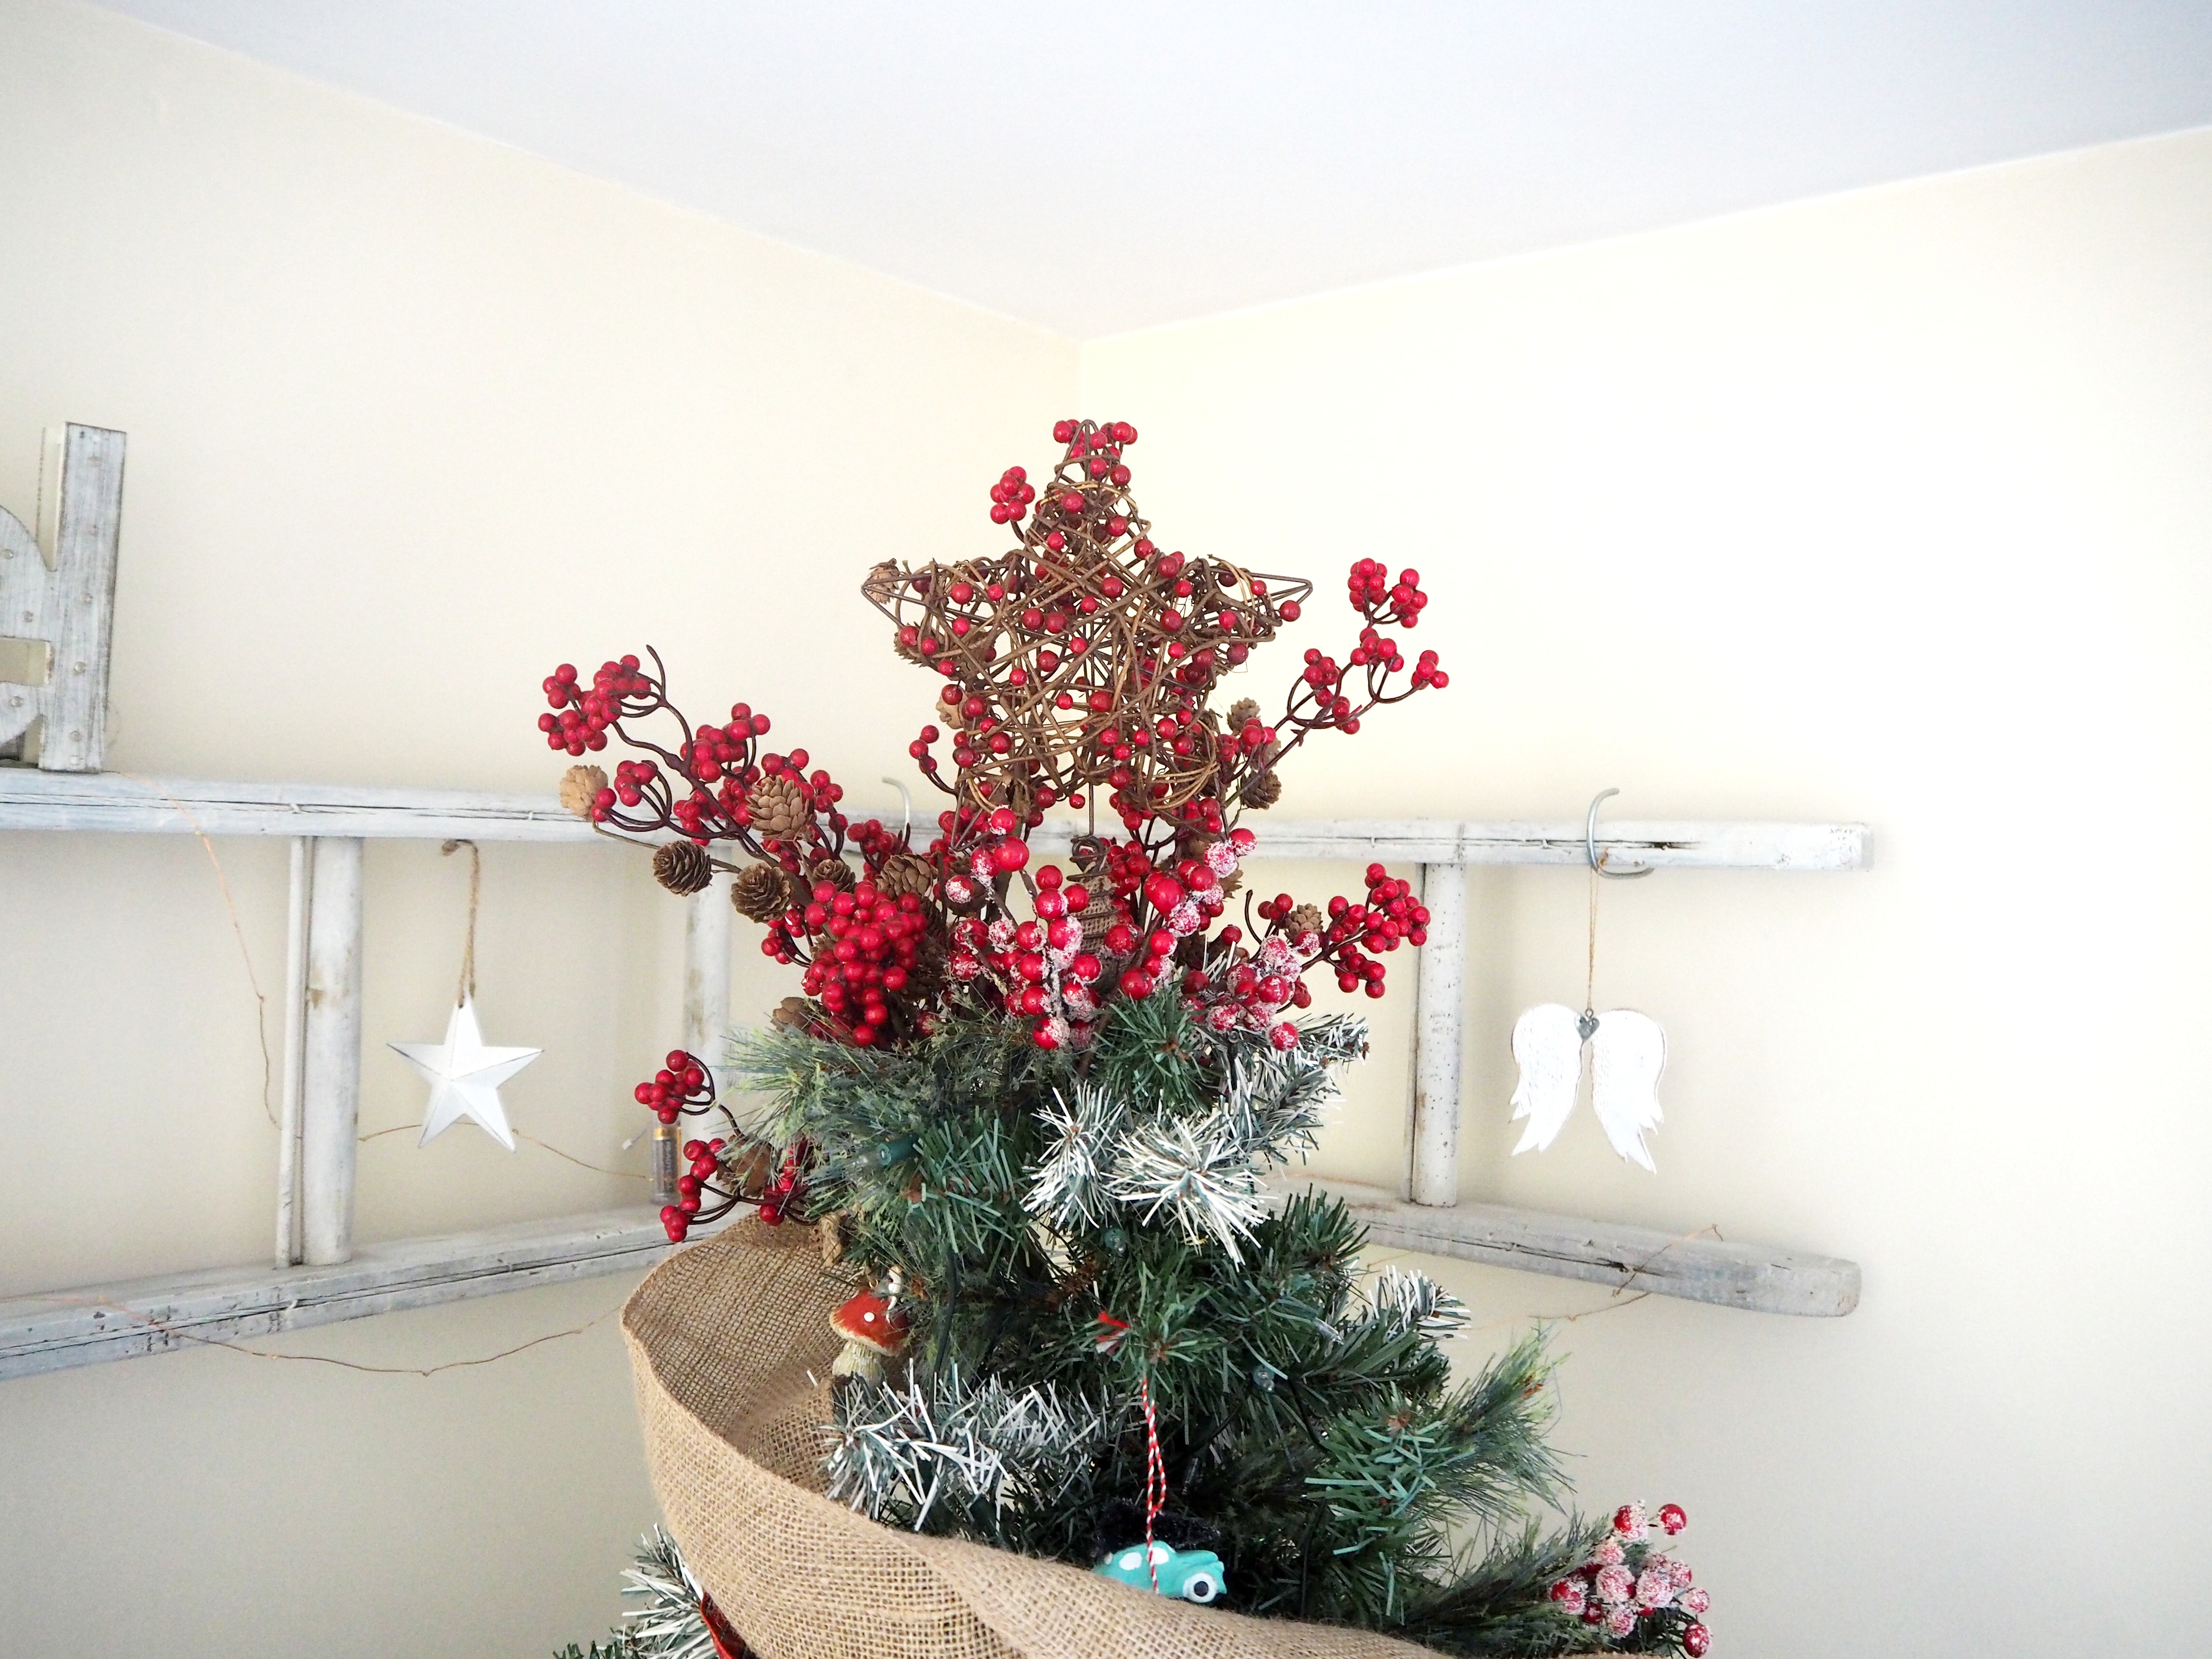
And lastly the focal point at the top of your tree.  We love the illusion of an explosion coming out of the top, so have used some berries and pinecones on sticks poking from the top and sides of the star.  We also added some of these berries on sticks peaking out from various branches around the tree.

OLYMPUS DIGITAL CAMERA

And here it is finished!

OLYMPUS DIGITAL CAMERA

We hope you find these tips helpful in perfecting your own tree and if you have any others we would love to hear them!

Hope you enjoy reading, as much as I enjoy writing!

Jill

LIFESTYLE

Create your own artificial Christmas wreath

Hello there!

We are beginning the ‘Christmas at Rose Cottage’ run up with a simple DIY wreath. I kicked it off over on instagram this week by creating a rustic, traditional style wreath on an insta live! But incase you missed it, I have written a step by step guide below.  This wreath would be perfect for your fireplace or hung on a front door! The majority of the materials can be found in most local high street stores at this time of year but I’ll let you know where I picked mine up.

So first, here is the list of things you will need and where to find it:

50cm artificial wreath – https://www.amazon.co.uk/Premier-Artificial-Christmas-Wreath-Decoration/dp/B017R4P196/ref=sr_1_4?ie=UTF8&qid=1511465989&sr=8-4&keywords=50cm+artificial+wreath

Ribbon – https://www.theworks.co.uk/p/christmas-ribbons/christmas-ribbon—assorted/5052089202399

Bells – http://www.dunelm.com/product/pack-of-12-silver-jingle-bell-baubles-1000103945?searchTerm=bells

Cherries on sticks – Poundland

Pinecones – Scavenged and sprayed with snow spray

Cinnamon sticks – http://www.wilko.com/garlands-and-wreaths/wilko-christmas-decoration-cinnamon-bundles-6pk/invt/0401987?nst=0&gclid=EAIaIQobChMI2fmQ8rzV1wIVT77tCh0pIwyPEAkYBCABEgJdDvD_BwE&gclsrc=aw.ds

Baubles on wire – https://www.gardenersdream.co.uk/uncategorised-c99/glass-baubles-on-shiny-wire-20mm-silver-p1827/s5911?utm_source=google&utm_medium=cpc&utm_term=kaemingk-glass-baubles-on-shiny-wire-20mm-silver-kae-710401-gd&utm_campaign=product%2Blisting%2Bads&gclid=EAIaIQobChMIrtCsir3V1wIVOCjTCh1Z8AV_EAkYCCABEgKbOvD_BwE

Florist Wire – http://www.hobbycraft.co.uk/oasis-silver-hobby-wire-18-cm/569661-1000?glCountry=GB&gclid=EAIaIQobChMIydXv3r3V1wIVSRDTCh3D9g41EAQYASABEgIy7vD_BwE

**Please shop about for these products and check out the pound shops and local garden centres to get the best value for money!**

So now for how to put all these together to create the wreath of dreams!

Firstly, and what I feel the most important step to creating this wreath is to ensure you pull out and separate the sections – poke the branches in all different directions as this will create a fuller , more 3D look.  This photo below is a before and after:

The second step is creating the focal point of the wreath.  You will need at least 2 different types of ribbon.  I chose tartan and hessian to tie in with the traditional style I hope to create in Rose Cottage this Christmas.  I would recommend using a wired ribbon as it will help the loops sit better.  You are going to make 2 rosettes – one large and one small.  Start by taking one roll of ribbon (around 2 metres in length) and creating a loop.  Bend a piece of florist wire around this loop and point the 2 wires in opposite directions. Continue to create more loops on top, slightly moving around with each loop in a clockwise direction. Once you have used all the ribbon – twist the wire together over all the loops and secure.


Then do the same with the other ribbon, ensuring one rosette is bigger than the other. (To do this, make the loops bigger on the rosette you would like at the back).

OLYMPUS DIGITAL CAMERA

Next secure both of these rosettes together and to the wreath using florist wire.

OLYMPUS DIGITAL CAMERA

Tie together 3 bells using some string and then attach to the rosette – pulling string around the back of the whole wreath.

OLYMPUS DIGITAL CAMERA

Insert 3 berries on sticks around your rosette – these can be attached using florist wire at the back of the wreath.

Then you can add the rest of the accessories evenly around the wreath. (I have wrapped some florist wire around the pinecones as shown in the photos).

And that is your completed wreath!  You can substitute any of the ribbons and accessories to suit your own theme – I also think this would be beautiful in silver and white.

OLYMPUS DIGITAL CAMERA

If you have any questions at all, please get in touch! When you create your wreath, I’d love to see it, so please use the hashtag christmasatrosecottage2017 over on Instagram.

Hope you enjoy reading, as much as I enjoy writing!

Jill