INTERIORS

Creating a Plate Wall

Hello there!

If you’ve been following along with my blog for a while, you’ll know that I’m a massive Emma Bridgewater fan! As my collection grows, I’ve been trying to think of ideas to have as much as I can on display (much to the hubby’s delight!!).

My latest idea was to create a wall full of plates with some of my favourite pieces. I wanted to get them out of the back of my cupboard and onto display.

I started by sticking together some blank pages the size of the space I wanted to fill.

I then painted the wooden letters with some tester pots of paint. I picked the letters up from Hobbycraft and used a different style for each letter to create more of a feature.

I placed the letters and plates onto the blank page to create the pattern I wanted.

I drew round them all with a pencil.

I then stuck the page up onto the wall.

I used a screwdriver to mark the wall where each plate would go.

I took down the page, and put a wall plug, (it was plaster board) and a screw with washers into the holes marked. The washer was to give the hook on the back of my plate a little more to hold on to (and to settle my nerves!!!).

After lots of research these plate hangers from Amazon came out on top for reliability. I picked up a pack with a variety of sizes.

I then matched the size of the hanger to the plate size and following the instructions on the back to secure them.

Now the nervous part (!!!) … I started to hang the plates onto the screws with washers.

I attached the letters using ‘no more nails’.

And here’s the finished result! It really was as simple as that!

Hope you enjoyed reading, as much as I enjoyed writing!

blog

Styling your kitchen worktops

Hi there!

Hope you are all enjoying the frosty cold weather?…it puts me into full on faffing mode and the latest place in Rose Cottage to get hit is the kitchen worktops! When I share my kitchen over on Instagram I always get lots of compliments on the styling of it so thought I would share a few tips over here on how I put it all together. The tips are nothing too complicated but they sure are effective…

1. Separate your kitchen into sections

Think about your worktops in smaller more manageable areas, rather than as a whole. Concentrate on one area at a time, make sure your really happy with how you’ve dressed it before moving onto the next.

Think about whether the area will be for practical use or simply decorative; or it could be a mix of both! It’s useful to have certain appliances close to particular cupboards eg mugs near the kettle (especially handy on busy mornings!!). Keep this in mind when choosing what appliances you will need in each worktop section. Also most appliances will need plug sockets so give this consideration too!

2. Start with a blank canvas

I always clear the space I am working on before deciding where anything will go. It helps see the full size of the space and will make it easier to experiment with different accessories.

3. Give the area a good clean

Use the opportunity to give the area a good scrub; clean the worktop itself, the wall/ tiles behind and any appliances or accessories you will be using.

4. Think about things you might want to hide

I am not a fan of seeing plug sockets in my kitchen so often use chopping boards, platter plates and framed prints to hide them where i can. I also hide the plugs and leads of appliances using the same techniques.

5. Add height, colour and texture

Setting appliances and accessories on top of chopping boards can help create a feature and add height.

Adding hooks from the cupboards above is a great way to incorporate accessories without taking up counter space.

6. Accessorise, accessorise and accessorise!

The majority of the accessories in my kitchen are Emma Bridgewater, I am a massive fan and enjoy the country kitchen feel they give. Think about mixing colours, textures and sizes when using accessories, adding plants and flowers too.

Have you any great tips on how you style your own kitchen? I’ll love to hear them!

Hope you enjoyed reading, as much as I enjoyed writing!

Collaborations, INTERIORS

How to create a cosy home for your family (In Collaboration with Pilkington Glass)

Hello there!

Happy New Year!

With the temperatures falling dramatically over the past couple of weeks, I’ve been peaking out of Rose Cottage each morning hoping for some snowy scenes! This time of year the oil bill seems to go through the roof with heating on pretty much 24/7, but I cannot help but love the colder weather!  For me, there is nothing better than being snuggled up inside, roasty toasty under a blanket, in front of the fire, and it being icy cold outside.

In the Winter, your home tends to become your sanctuary more than any other time.  Coming home from work to a cosy house, making dinner and then surrounding yourself with candle light and early nights.  Home is definitely where the heart is, but even more so at this time of year, so I thought I would share with you my favourite ways to beat the chill and make your home feel extra cosy:

Pick the Right Windows

Make sure the windows you have are working overtime to do everything they can to keep as much heat in as possible.  If you are thinking of replacing your windows, consider a glazing that will reduce heat loss – for example a glass from the Pilkington K Glass range or Pilkington Optitherm range is ideal glass for inner pane of a double glazing unit to keep the heat in.  Alternatively, Pilkington Energikare is a double glazing unit which not only reflects heat back into the room it also allows free heat from the sun to pass through the glass, known as passive solar gain.  As well as being more energy efficient, the correct windows can have a great impact on the aesthetics of your home.  Even upgrading just the glass in your windows to the latest low-e glass and retaining the existing frames can also help to give extra warmth to your home especially in the Winter. 

Stock up on the Home Comforts

Get the fancy candles out (the ones you keep for the visitors!!) and light them to create a soft ambient glow.  Pop on your silky PJs and the cashmere socks to lounge in front of the roaring fire.  We typically spend more time at home at this time of year so why not invest in some items to make coming home that extra bit special.

Go for the best bedding

I don’t know about you but I really struggle to get out of bed these mornings…especially when it’s so warm and cosy under the sheets!  This time of year calls for early nights and lazy mornings so make your bedroom a place you never want to leave with beautiful bedding and thick down duvets.

Bellies full of the Yummiest Food

Salads just don’t cut it when the temperature drops; instead chose healthy, hearty recipes such as cottage pies, stews or anything with a ton of carbs!! Hoke out your slow cooker, pop it on in the morning and come home from work to some yummy home cooked goodness.

Think about Thermal Insulation Glass

Replacing the heat loss through your windows can be expensive so why not install some energy efficient windows like these ones from Pilkington.  It’s so important to try and keep your carbon footprint small where we can and one step can be to improve the energy efficiency of your home.

If you have any other tips on how to keep your home cosy I’d love to hear them!

Hope you enjoyed reading, as much as I enjoyed writing!

Jill


Collaborations, INTERIORS

A Festive Project (In Collaboration with Ronseal)

Hi there!
There is nothing more I love than having a little project on the go…and thankfully my Dad is always on hand to help bring the crazy ideas to reality! Ronseal got in touch and challenged us to create something for Winter using some products from their range. I’ve had some wooden Christmas trees pinned on my Pinterest board for quite some time and now was the perfect opportunity to get them one out of my phone and into Rose Cottage! 
When planning the project I knew I would be using both wood and metal, so chose the Ronseal stays white 2 in 1 primer and paint in gloss pure brilliant white.  This paint is super easy to use as you don’t need a separate primer and only 1 coat is required. It’s also drip resistant so is quick to apply. 
Here’s what we used:
1 tin of Ronseal stays white 2 in 1 primer and paint in gloss pure brilliant white
4 lengths of wood 
Metal tree stand
Wooden log
Nails 
Baubles and fishing wire to decorate 
Firstly we cut the wood to size. The larger triangle is 5ft by 3ft and the smaller triangle is 4.5ft by 2.5ft. 
Then screwed them together into 2 separate triangle shapes.
I painted the metal base and wooden triangles with the Ronseal paint which glided onto both surfaces like a total dream! I used an old rag to rub a little bit of the paint off to give a more white washed look. 
We then assembled the trees, screwing them on the base log using a small wooden slice to separate the triangles; Then set it into the metal base.
I dressed the wooden tree using some glass baubles hung with fishing wire.
We couldn’t be happier with how it turned out and spending time with Dad to complete it was just lovely! 
What projects have you been up to over the festive period? I’d love to hear them and give Dad something else to add to the ever growing list of Rose Cottage jobs!!! 
Hope you enjoyed reading, as much as I enjoyed writing!

Collaborations, LIFESTYLE

Gift Different (In Collaboration with TKMaxx)

Hi there!
Can you believe how close we are to Christmas?!…Where on earth did 2019 go to?! This is my absolute favourite time of the year; getting the house all decorated, heading to parties and carefully choosing special gifts for friends and family!
When buying presents, I love nothing more than heading into TKMaxx and not knowing what range of goodies I will be able to pick up! It’s no surprise that it is Europe’s leading off-price apparel and homeware retailer as it sells such a huge assortment of big names and designers, top brands, up and coming labels and one of gems.  Everything in store is up to 60% less than the RRP and has significant savings compared to the prices you find in department stores or on the high street.  Because each store receives several deliveries every week containing thousands of items, stock is always fresh and changing, which means theres always something new in store to discover!  Whenever I find something I love in TKMaxx i’m always sure to grab it there and then, as nothing sticks around too long!!
Not only is it a fab store for picking up gifts at this time of year but it always has items for every occasion!  TKMaxx set me a challenge to head into my local store and pick up as many amazing gifts as I could for under £50.  I immediately though of my friend who has had a rough year and how I would like to pick up some nice items for her and make up a little gift hamper.  What better way for her to start of the new year, than with a selection of goodies to help her relax and look after herself!
Firstly, I got her some of the softest slippers I have ever felt!  I tried these on for size and honestly they are like walking on air!  I hope that when she gets home after a hard day and slips these on, they will instantly make her feel better.  In store they have the most amazing selection of slippers for men, women and children and this pair were a total steal at £12.99!

Next up, I bought her some PJs with little doggies on them.  She has a little dog who gives her much comfort, so I thought she could put these on and snuggle up on the sofa with him.  These PJs have such a luxury feel to them and will be so soft on the skin and at only £12.99 whats not to love?!

I also got her a glass water bottle.  Keeping hydrated is so important for staying healthy and doesn’t water always taste so much nicer from a glass bottle?? I picked this up from the clearance aisle in the home department, when an item has a red sticker in store I always grab it extra fast!!  £12 – Such great value!

And lastly a beautiful relaxing candle and room spray.  These will be great for her unwinding in the bath and before bed time – £12 for both. I could spend hours in the candle aisle in TKMaxx, and if I go missing in store you’ll always find me here!! 

Not only is it fab to get into your local TKMaxx store for a good nosy about but they also have an online store – www.tkmaxx.com which is full of amazing product categories at great value and with amazing savings.  Let me know what treasure you are able to pick up in your local store?

Hope you enjoyed reading, as much as I enjoyed writing!

INTERIORS

5 tips to Capture the Perfect Interior Shot

Hello there!

Over 3 years ago I started my Instagram journey when we were renovating Rose Cottage.  Interior design was never really my thing until I started to make decisions about the inside of our home…Queue me spending hours upon hours scrolling through Pinterest for ideas and to try and find my style!  I began to share photos of our redecoration and found a real love for staging interior images.  I didn’t attend any fancy photography courses instead just picked things up and improved (slightly!!!) along the way!  There has been a lot of trial and error to get where I am and even still I feel theres loads more room to grow.

I have to say, there are no rules, only loose guidelines that you can follow to take a good photo.  It really all comes down to finding your OWN style.  Personally I love light and bright shots, others may prefer dark and moody – its entirely up to you!
1. Use natural light (whenever possible!)
Get the lights turned off to avoid bad shadows.  I also don’t use a flash – I feel natural light always gives the best outcome.

2. Edit every single photo
Software to edit your images will enhance them and retrieve the best results.  I like Snapseed as its quick and easy to use.

3. Keep your lines straight
Watch your lines when your taking interior shots and keep them as straight as you can.  Using a tripod with a bubble level can really help with this.  Keeping your camera at chest height, between the ceiling and floor is a good way to capture over the table and countertops.


4. Overcast days are your best friend!

The minute you see some clouds get your house tidied and the camera out!  The clouds function as a large softbox creating lovely soft shadows.

5. Stage carefully
The best shots are always carefully staged.  Hide all those plugs and ugly cables, basically anything that is not intended for decorative purposes.  Photoshop is also great for editing out those unwanted light switches etc.

There’s definitely a lot more hints and tips I’m sure I’ve missed here so if you’ve any questions please come over to @homeatrosecottage on Instagram – I’d love to hear from you over there! 

Hope you enjoyed reading, as much as I enjoyed writing!

Collaborations, LIFESTYLE

Transforming my skin (In collaboration with Revilo)

Hello there!

The lovely team at Revilo got in touch to see if I would like to try out some of their products.  I jumped at the opportunity as my skin has been in bad need of some love and attention of recent.  The company was founded by a Husband and Wife duo who are from Ireland;  with Lucy having over 20 years experience in the luxury spa industry, I felt in very safe hands when explaining my main skin concerns.  They recommended I try the Skin Refiner Nano with a box of ampoules for purifying and clearing.

img_6089

The Skin Refiner Nano is an award winning, non-invasive skin care enhancement device. It is now available in Ireland and the UK for the first time exclusively through Revilo Products. It has been sold in Germany, Austria and Switzerland already.  It is similar to micro-needling, however unlike micro-needling there is no downtime and no needles; just a gentle disposable Silicone tip and is completely pain free with instant results.

The Skin Refiner Nano creates invisible Nano channels in your skin increasing the absorption rate of your skincare products into your skin from approximately 30% up to 70% that’s why it works so brilliantly.  As you get older collagen begins to break down in your skin resulting in lines and wrinkles, however the Skin Refiner Nano is fantastic for anti-ageing as it naturally stimulates your collagen giving you plumper, firmer, radiant skin. (What’s not to love eh??)  The Skin Refiner Nano uses disposable ampoules filled with hyaluronic acid and powerful natural ingredients that work at a deeper level because of the nano channels created making your skin visibly plumper and glowing with hydration.  Hyaluronic acid is known for replumping and hydrating skin.  The hyaluronic acid contains 4 different molecular sizes to hydrate your skin at different depths. The smaller ones go deeper and the large ones stay near the surface.

img_6090

There are three ampoules to choose from depending on your skin’s needs. One for Anti-aging one for Pigmentation and Redness Reducing (sensitive skin) and one for Purifying and Clearing (oily acne prone skin).  As I previously mentioned, I went for the Purifying and clearing one, as acne is my main skin concern.

And here are the results!…

e1463e34-5655-47a5-83f7-57699f50c768

To say I am pleased is a massive understatement!!!  I could not be happier with these results and they were achieved in just over 2 weeks!  It has massively reduced redness, prevented further breakouts, and left my skin feeling plumper and more hydrated. 

As an added bonus, all of the products are vegan, gluten free, not tested on animals, free from mineral oils, free from chemical fragrances, microplastics, harmful emulsifiers, dyes and artificial preservatives, with just the minimum of packaging.

Want to have amazing skin in only a couple of weeks too?! The lovely team at Revilo have very generously offered me a 10% off discount code along with free P&P – Use the code JILLBF at checkout via the website here.

If you have any questions at all please get in touch!

Hope you enjoyed reading, as much as I enjoyed writing!

Jill

blog, Collaborations

Autumn photo Shoot (in Collaboration with Cathy Dwyer Our Wildest Days Photography)

Hi there!

I thought I would pop some of the images from our photoshoot with Cathy Dwyer up here for you all to have a little nosy…They are just too gorgeous not to share!

Cathy was a joy to work with; she put us all at ease and her photography style is so different which really makes her stand out from the crowd!

We could not be happier with how the photos turned out and they will be proudly displayed here in Rose Cottage!

You’ll find Cathy on:

Instagram: Here

Facebook: Here

Email: ourwildestdays@gmail.com

Hope you enjoyed reading, as much as I enjoyed writing!

Collaborations, INTERIORS

Back Door Transformation (In Collaboration with Quarry Store and Stephen Gibson Paving)

Hello there!

Anyone who loves a good transformation…you are in for such a treat with this blog post! I have been bursting with excitement to share this with you all as I know you will love it as much as I do….

First I want to introduce you to the 2 amazing local, family run businesses who brought the magic to life!

Quarry Store

With over 50 years in business, excellent customer service and high quality products, the Quarrystore is hard to beat! They are based just outside Ballymena, but deliver all over Northern Ireland and the UK.  Their amazing online store is so easy to navigate and purchase from, and they have recently opened a picture perfect display area, where you can view all of the products available.  This area is great for giving you ideas and to see what is possible in your own home!  It really is a ‘one stop shop’ for all home improvements, DIY, landscaping and gardening projects.

Stephen Gibson Paving

Covering a 40 mile radius of Ballymena, Stephen Gibson Paving has over 30 years experience.  They provide free quotes and are porcelain and granite specialists.  They have a display area which can be visited via appointment, where their work can be viewed.


For anyone who has been following our Rose Cottage renovation journey, you will know transforming outside has been on the agenda for this year.  Feeling totally overwhelmed by the size of the area and the job in hand, Luke from Quarrystore was able to give me clarity and a vision for the space.  He chatted through the options available and showed me various samples of the materials which would suit Rose Cottage.  The display area at Quarrystore was a fab way to see all the different styles and helped both Ash and I to really visualise what it would look like outside our own home.

Before: 

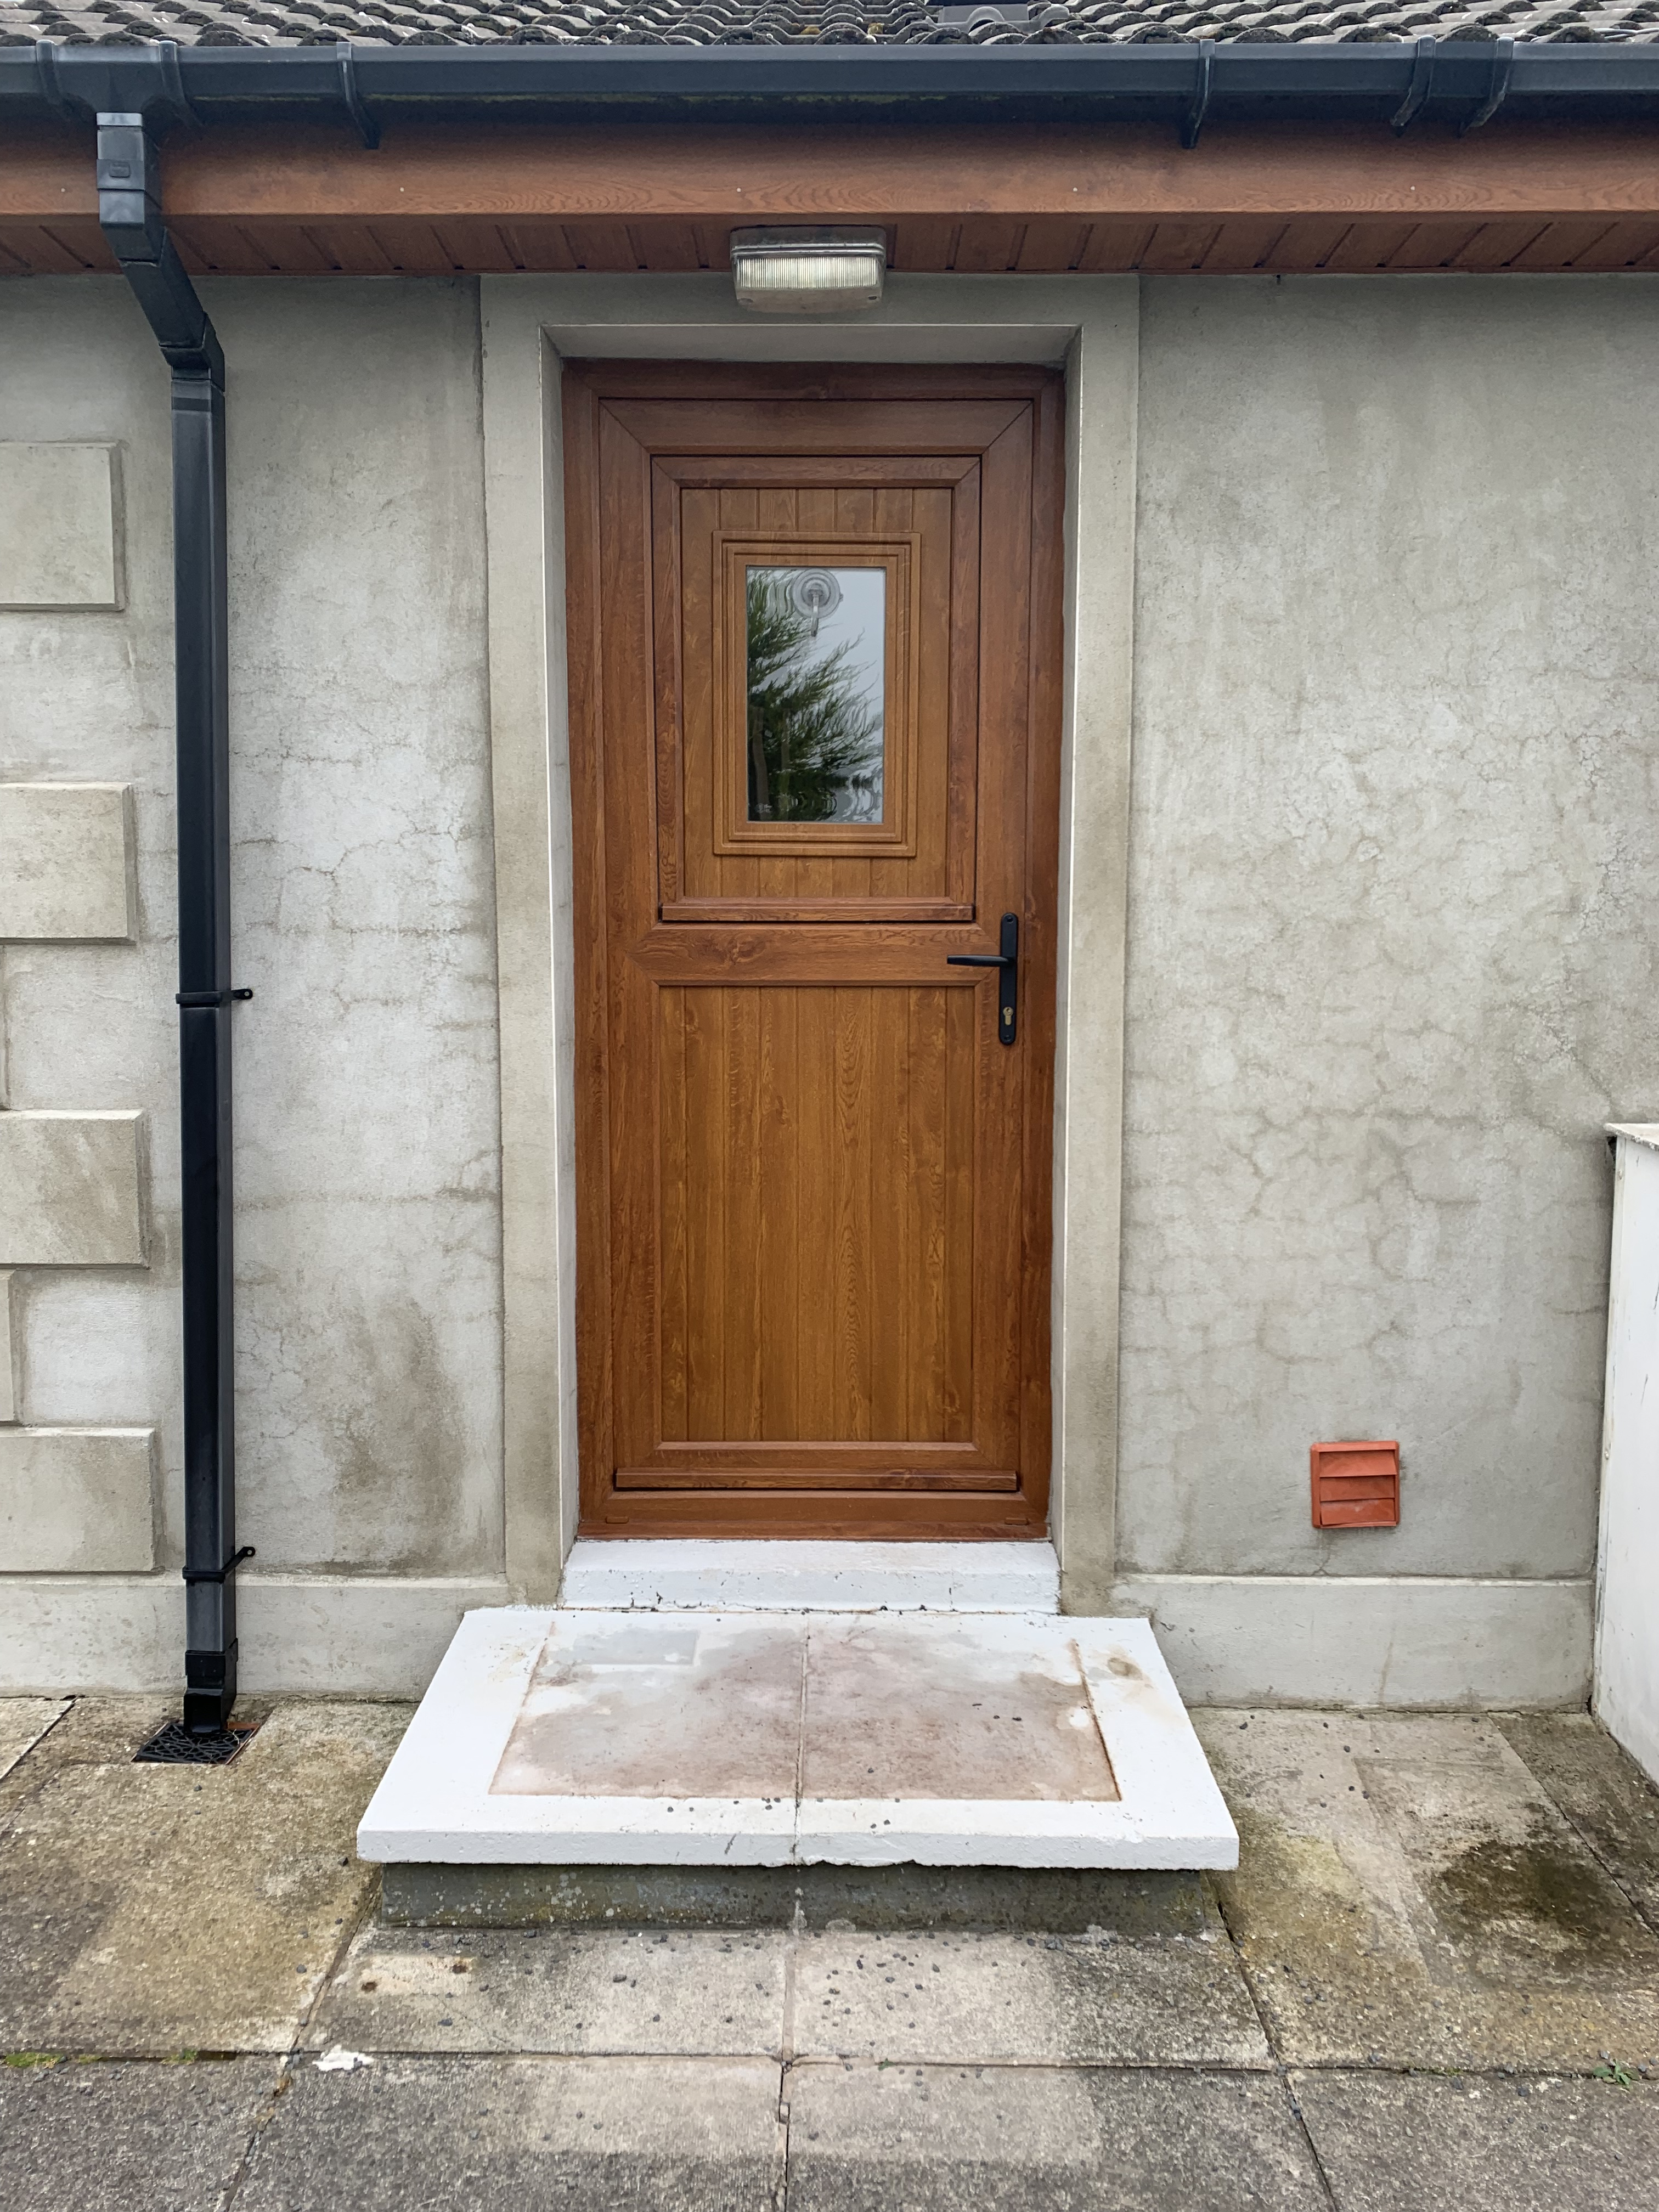
After a lengthy chat with Luke, we decided to go for the Walnut Porcelain tile for the top of the step.  (Available here)  This is a really hard wearing, durable and non-slip surface; perfect for a step, especially if you have little ones.  We framed the tile with a granite kerb. (Available here)  This is a sleek, beautifully coloured kerb which compliments the porcelain tile just perfectly.

OLYMPUS DIGITAL CAMERA

The beauty of shopping with Quarrystore is that you don’t even need to leave the comfort of your home if you don’t want to.  You can create a step just like this while sitting on your sofa watching The Bake Off! Visit the website here where you can see all the materials available, pop in your measurements and get it delivered right to your own doorstep!!


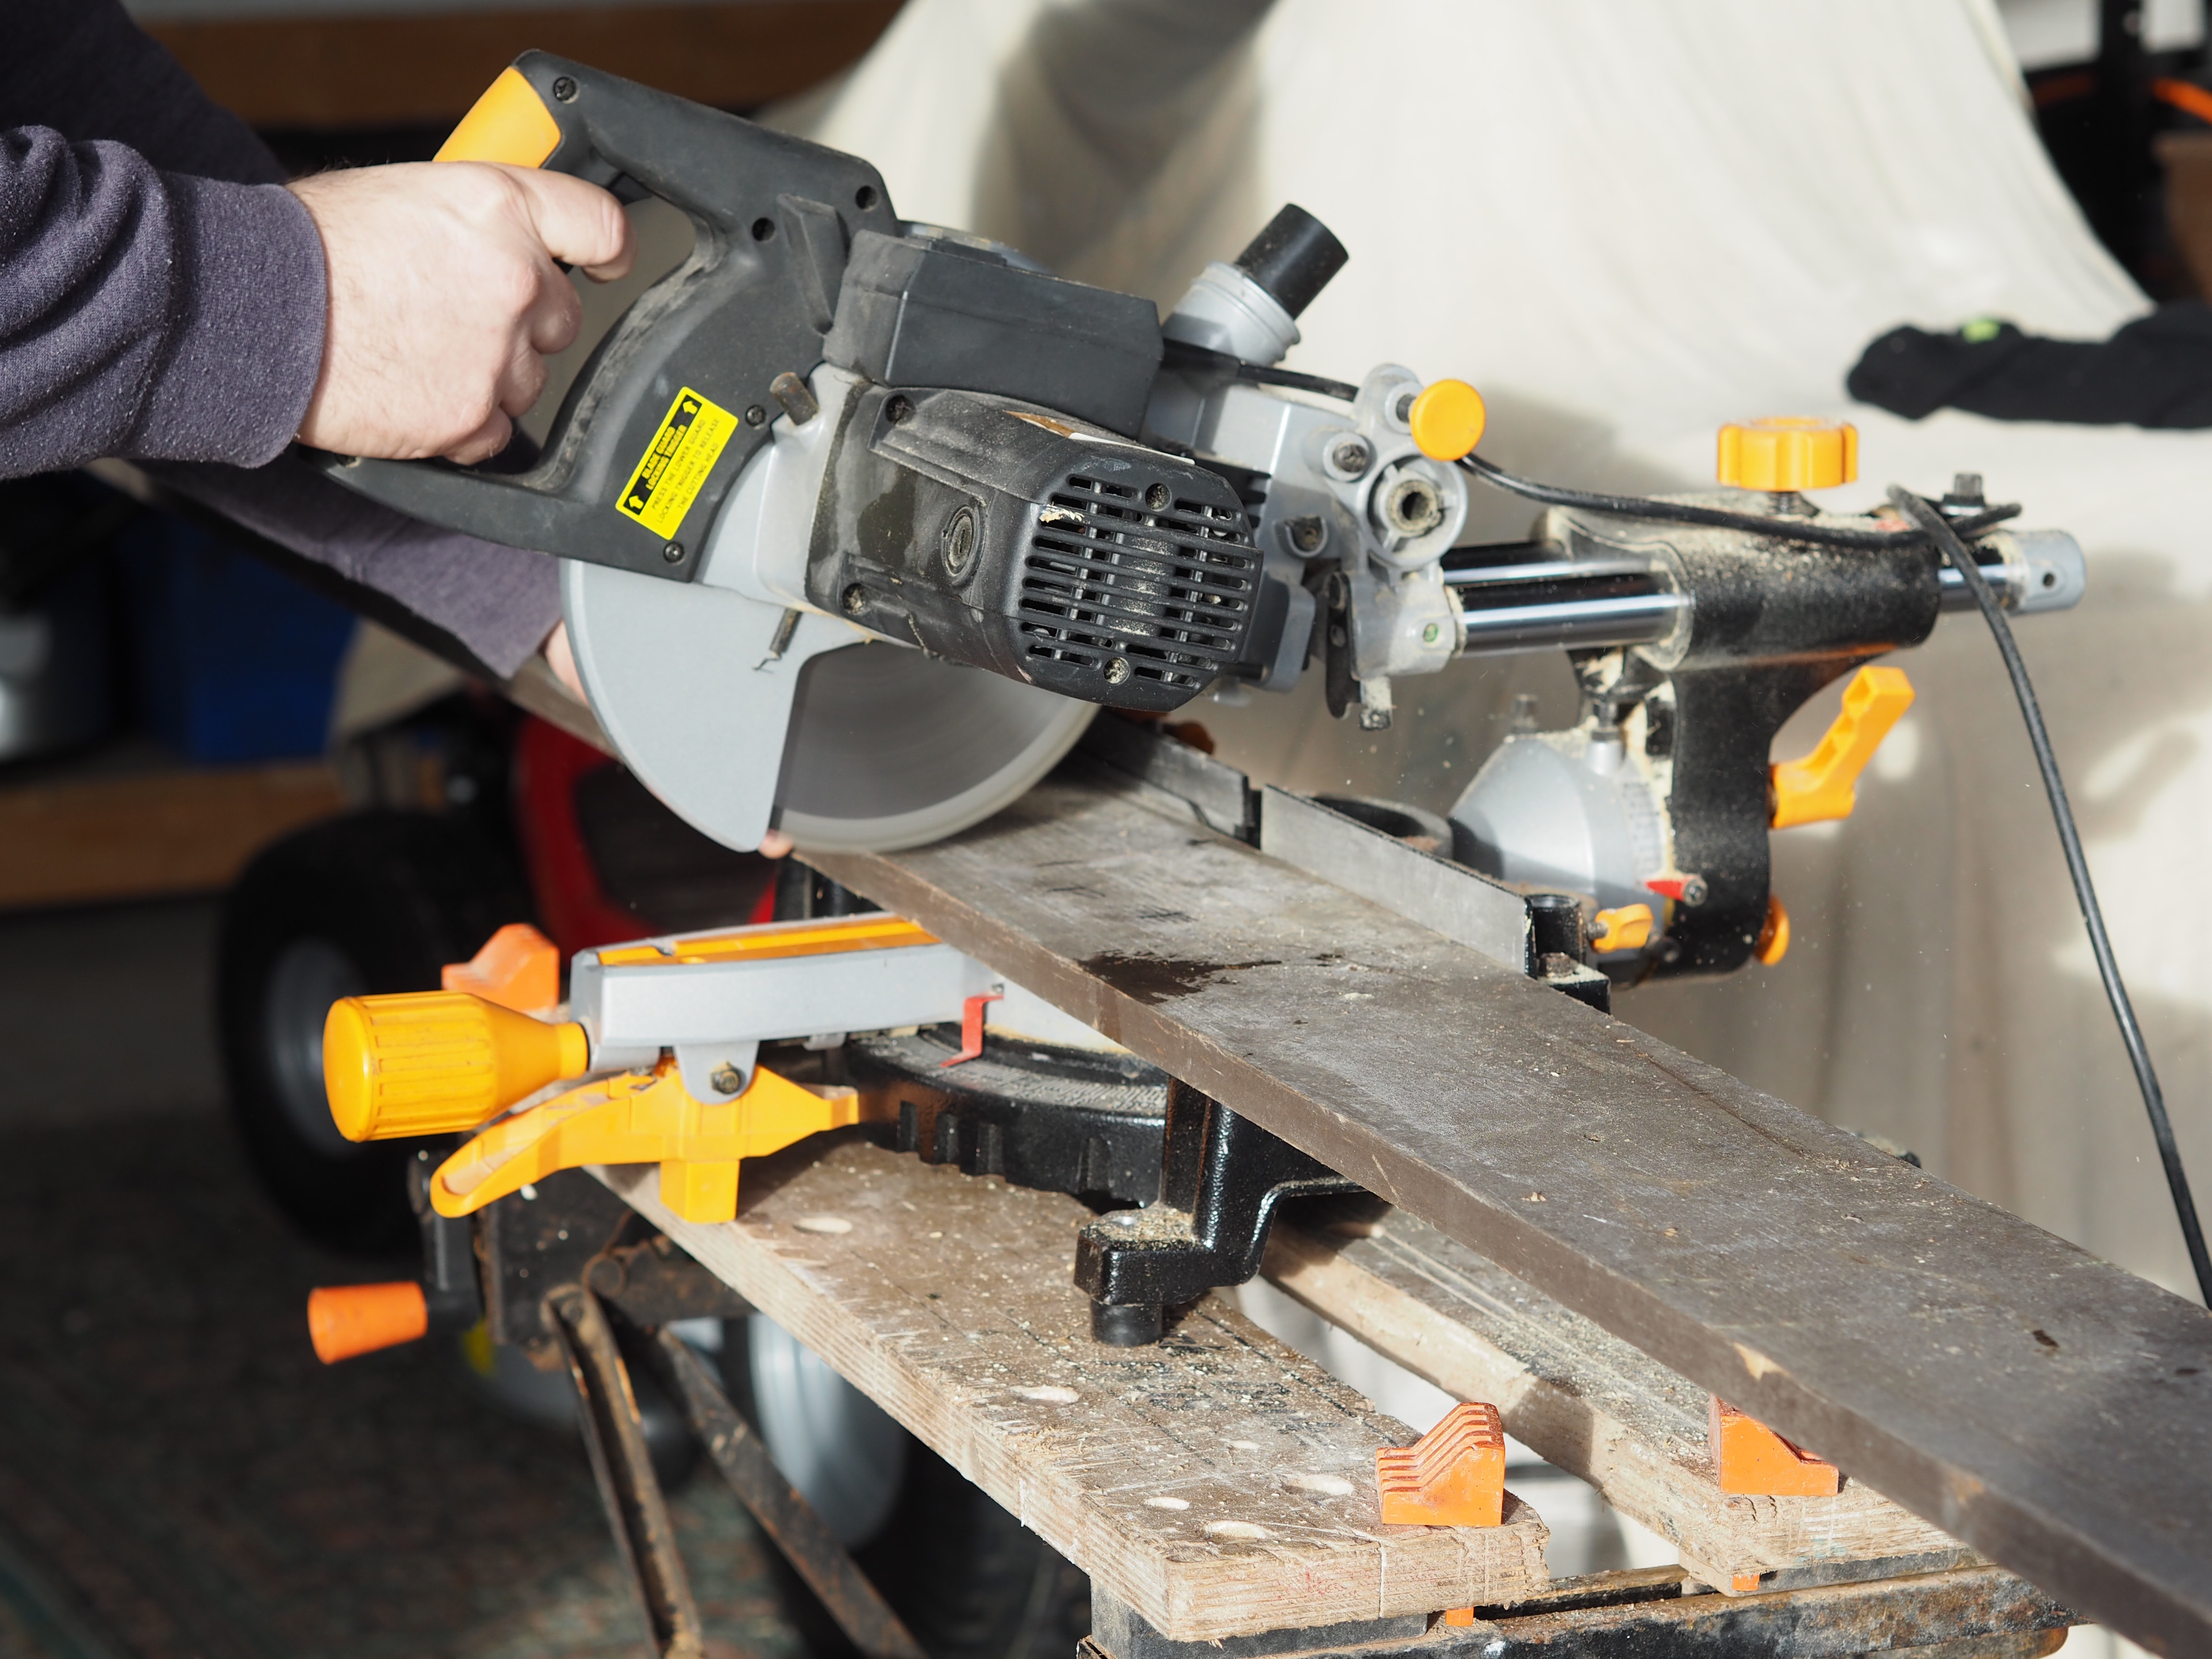
Luke recommended Richard from Stephen Gibson Paving to complete the work.  Richard was a total joy to have at Rose Cottage.  He was so friendly, listened to my requests, and was such a clean and tidy worker; I could not speak highly enough of his work!

OLYMPUS DIGITAL CAMERA

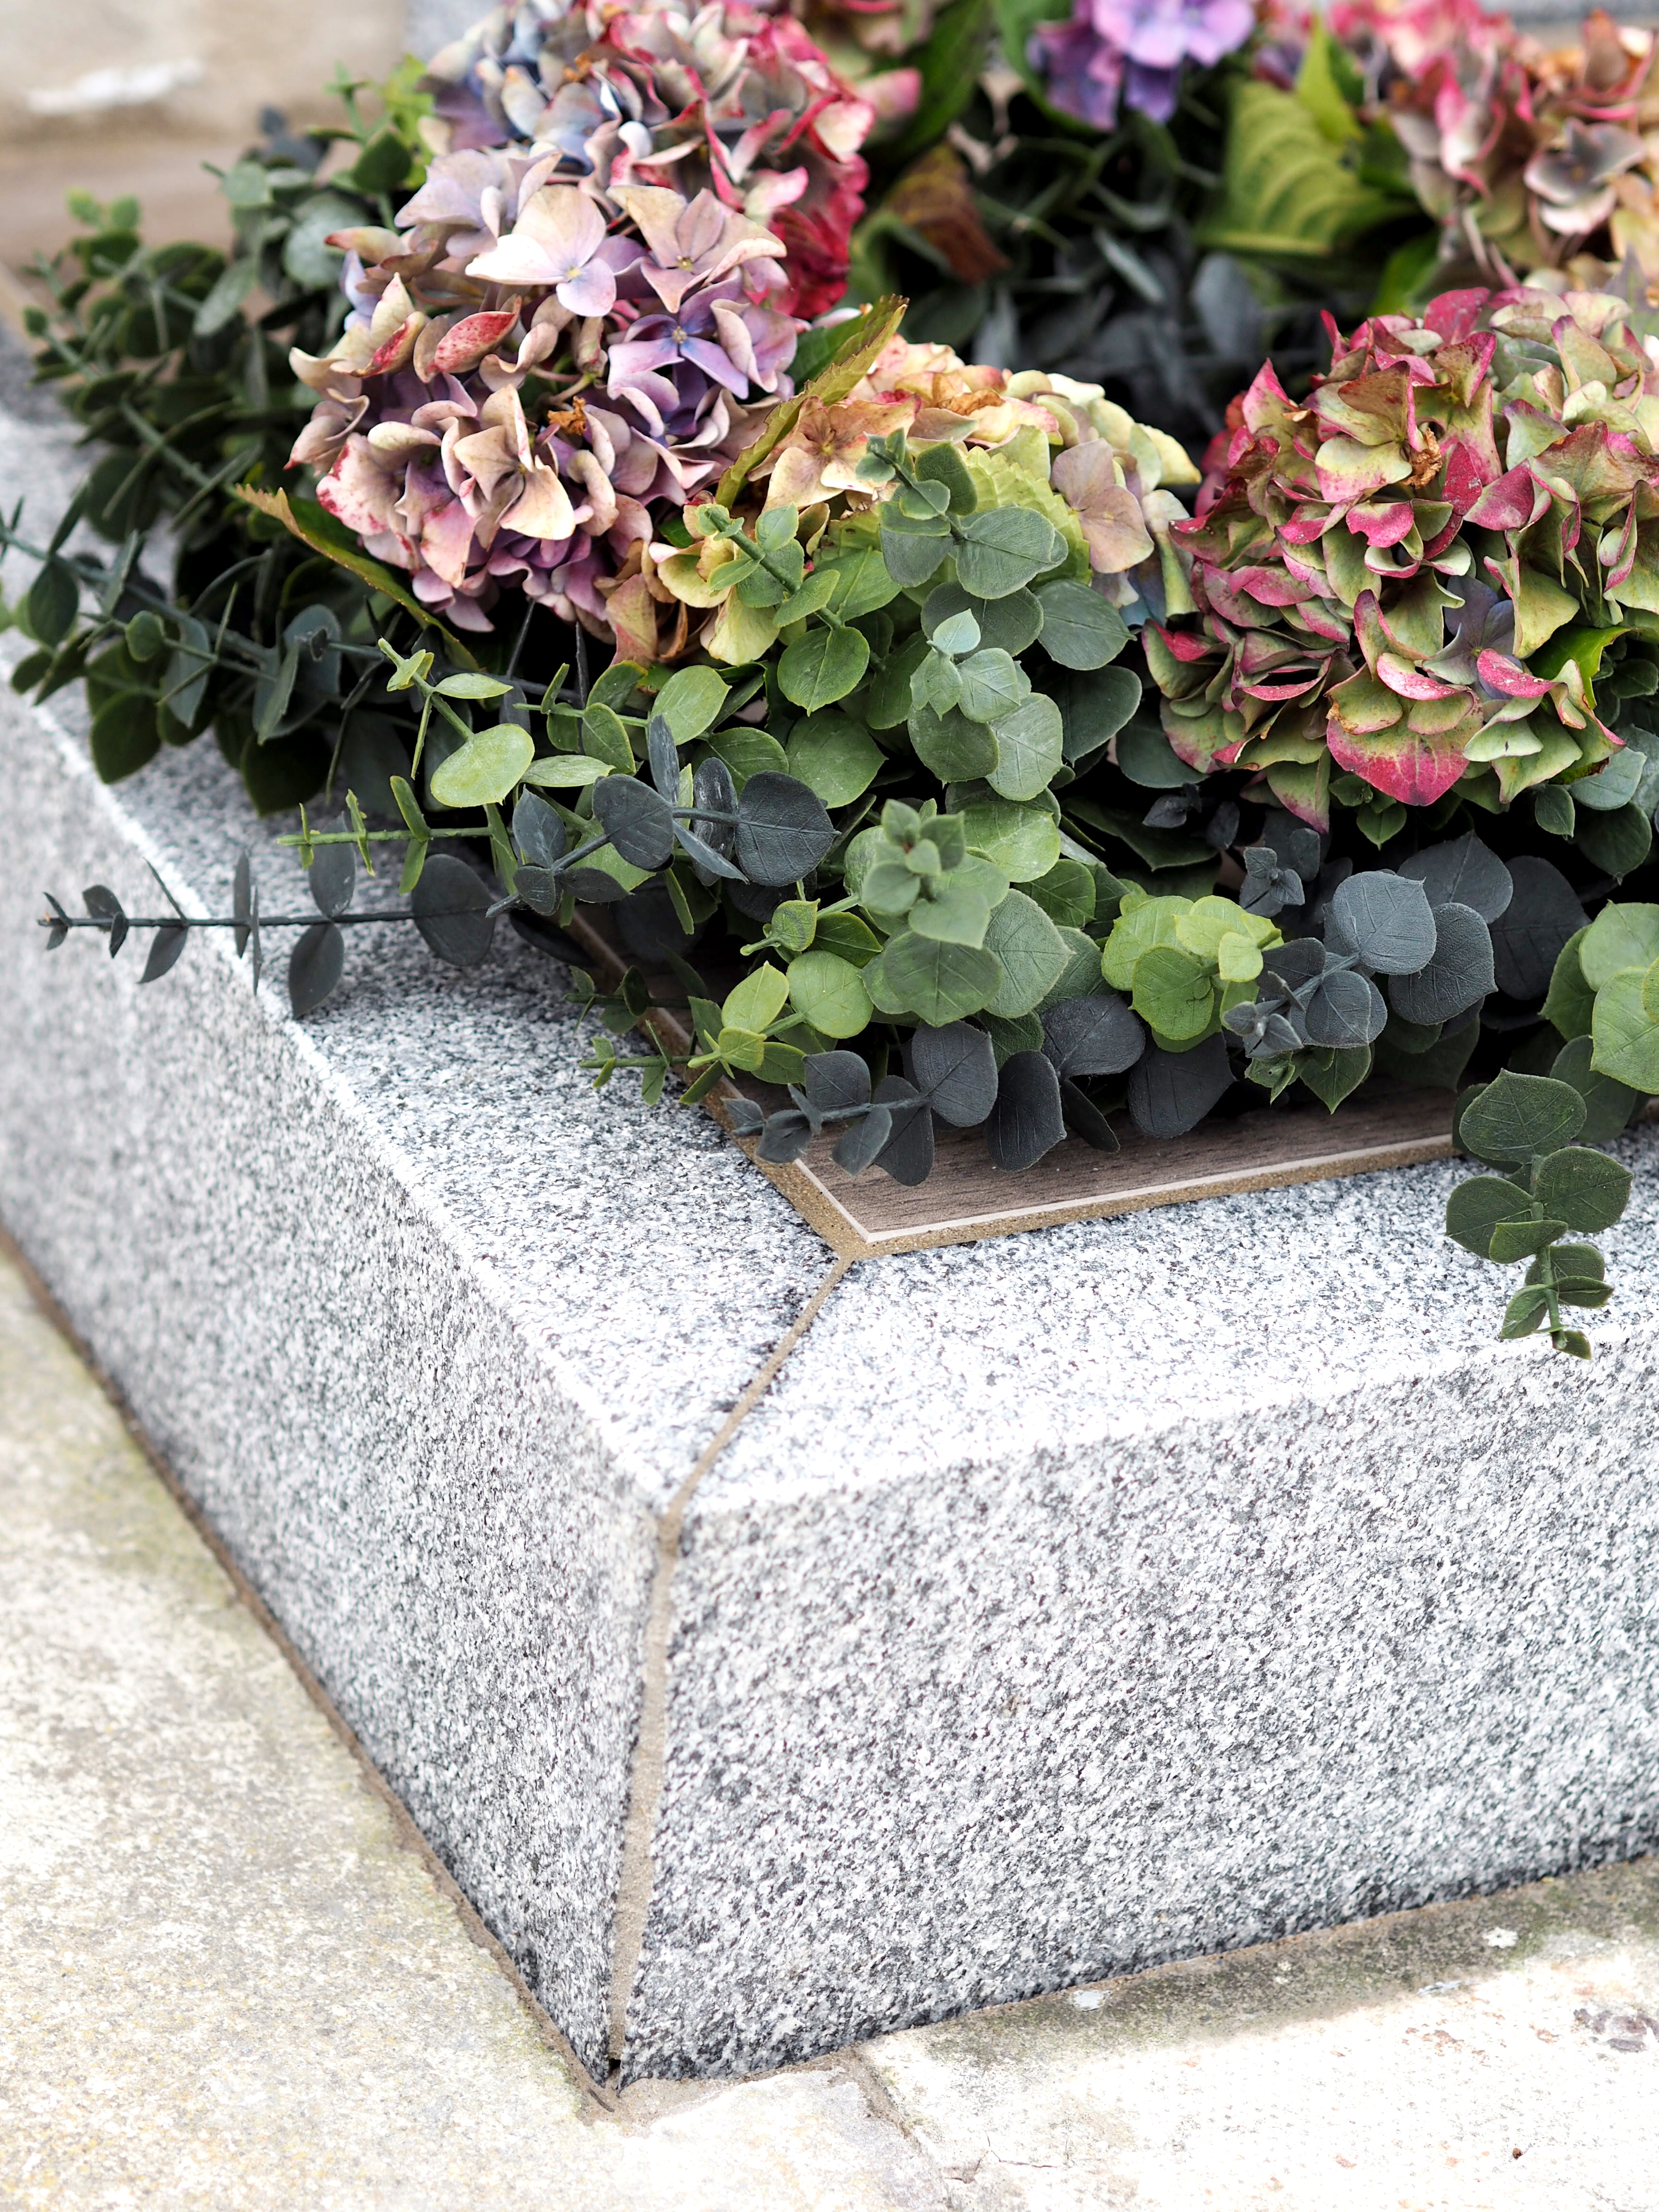
I hope you agree that even this small change to the exterior of Rose Cottage really has made such a difference!  I’ve been opening and closing the back door non stop since it was done, just for another nosy…And I can’t quite believe its my step!

Here is the Contact details for both of the businesses involved in created the most perfect step for Rose Cottage:

Quarrystore

Website https://www.quarrystore.co.uk/

Phone 028 2589 2488

Mobile 07866692071

Email luke@quarrystore.com

Email info@quarrystore.com


Stephen Gibson Paving

Website https://stephengibsonpaving.com/

Phone 028 2588 0140

Mobile 077 1123 1541

Email info@stephengibsonpaving.com


As always if you have any questions, please get in touch!

Hope you enjoyed reading, as much as I enjoyed writing!

Jill


INTERIORS

Style it New – Guest Post

Style It New – Shop your Home to Entertain your Guests
I recently wrote a Guest Post and thought I would share it over here too –
I couldn’t have been more excited when I heard the gorgeous Helen was starting this fab series and then to be asked to guest blog for it was the absolute cherry on top!  My name is Jill and you will find me hanging out over on @homeatrosecottage.  I am forever faffing about my home, moving furniture and swopping accessories around – My Hubby never knows what he’s coming home to!!
A couple of weeks ago we were hosing a bbq for some of our closest friends. I decided to look around Rose Cottage for items I could repurpose, rather than going to buy more things for entertaining which would sit in the back of a cupboard until next year!  With the help of Pinterest I pulled together a few ideas…
Garden tray to Drinks Table
(I also use this tray throughout the year, sitting on a footstool. Cheap alternative to a side table!)
Laundry basket to ice bucket

I mean, I don’t think i’ve seen any better sight in my Laundry basket!!

Floor tiles to grazing platter
I had these floor tiles left over from trying to pick the flooring in Rose Cottage, but you can pick tile samples up in B&Q for around £3 each.
I then added a faux eucalyptus garland along the back and a few candles.
And then loaded them with yummy goodies!
We had such a lovely evening and already looking for another excuse to get the drinks and nibbles out again! Remember when entertaining, before buying anything new, have a little nosy around your home and see if there’s anything you could repurpose – and don’t forget to tag us so we can share your ideas too!!
Hope you enjoyed reading, as much as I enjoyed writing!